
This guide covers the process for deploying new Sight rooms within the Innomesh Room Manager system. A Sight room is created from a Sight template: the room inherits the template’s device set, and you provide the room-specific details such as the room name and each device’s IP address or hostname.
Initial Setup
Navigate to the Room Manager Rooms page and select Add New Room in the top left corner.
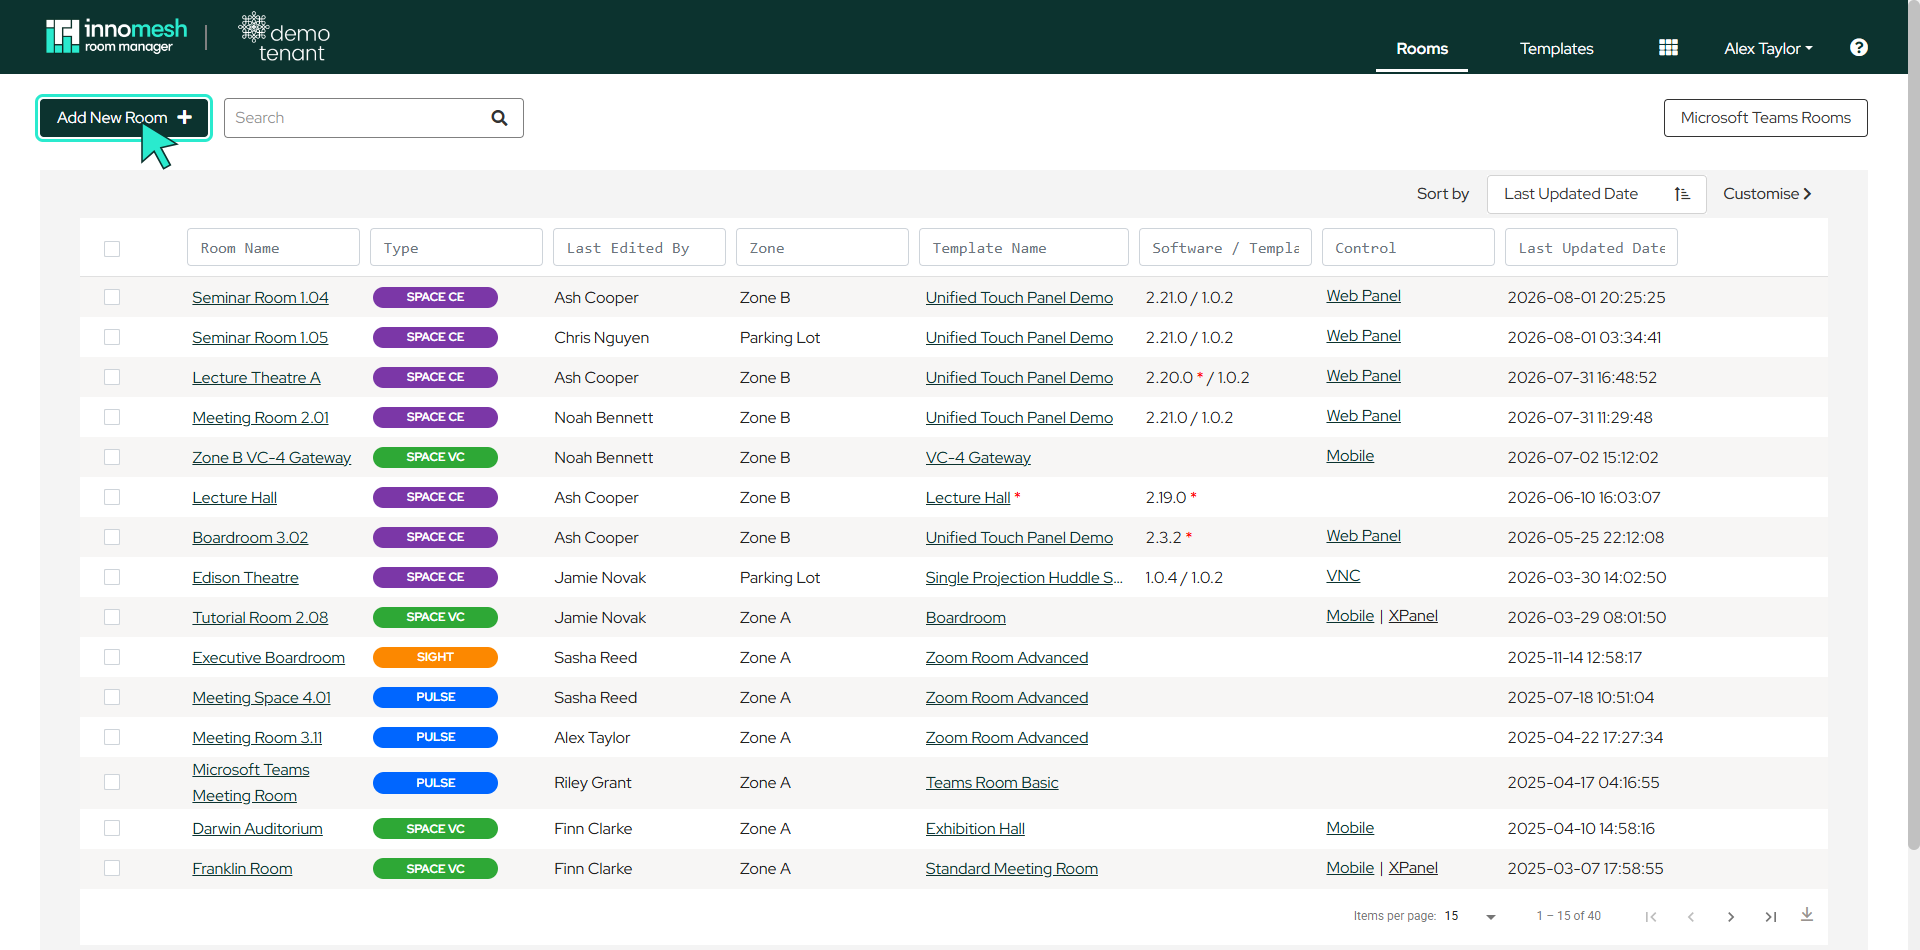
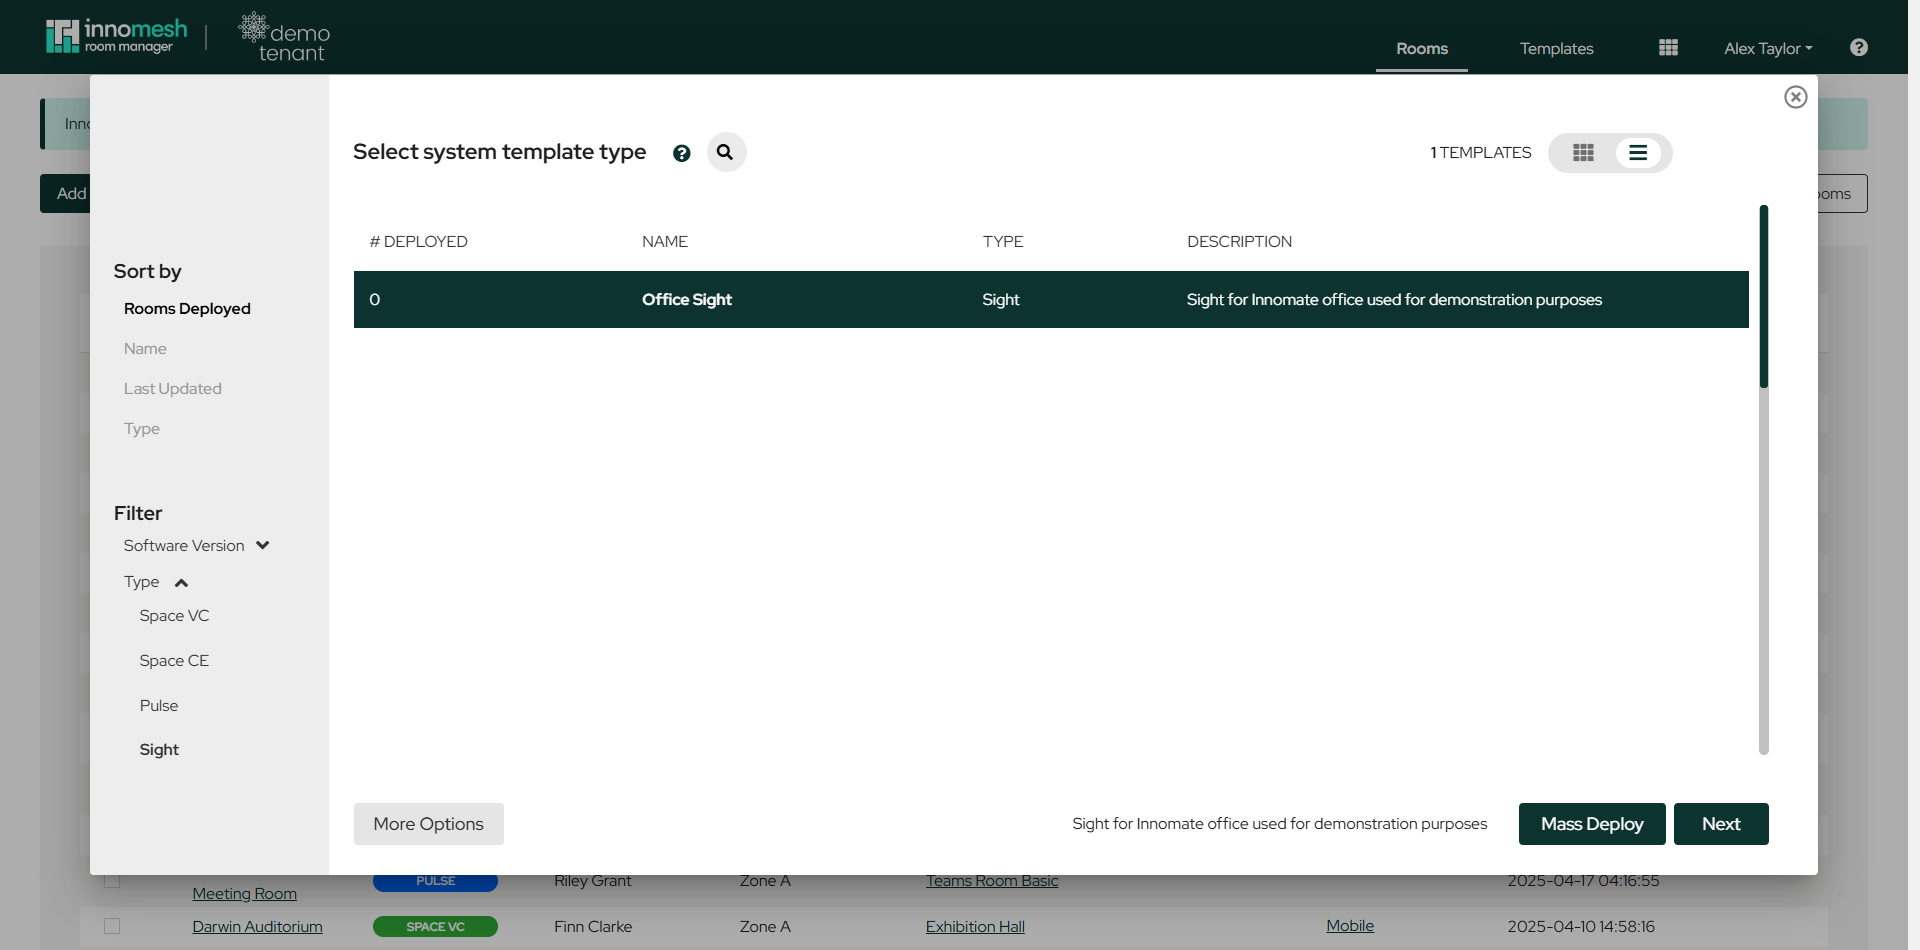
A popup lists the available templates with the number of rooms deployed from each, the template type, and its description. Use the Type filter in the sidebar to narrow the list to Sight templates, select your desired template, and click Next.
Zone Selection
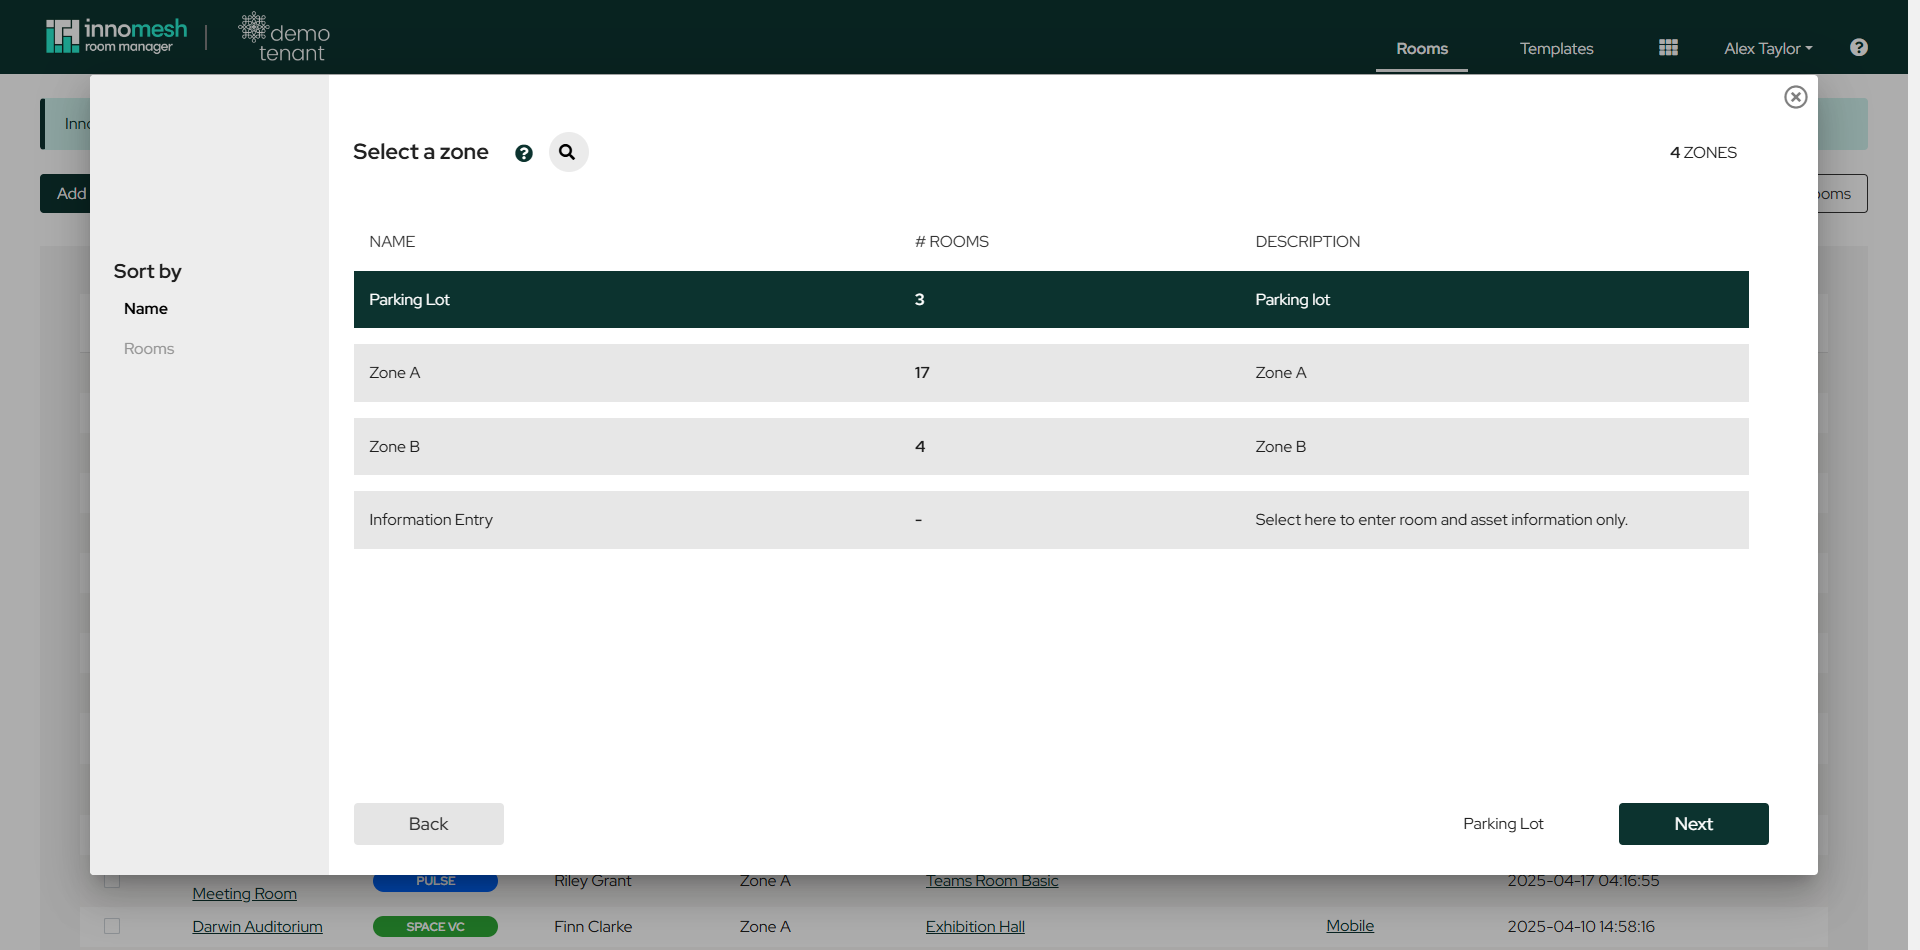
Select the zone for deployment. The Parking Lot zone stores inactive rooms with disabled functionality, which is useful for staging. Choosing Information Entry instead creates the room for entering room and asset information only. Click Next to proceed.
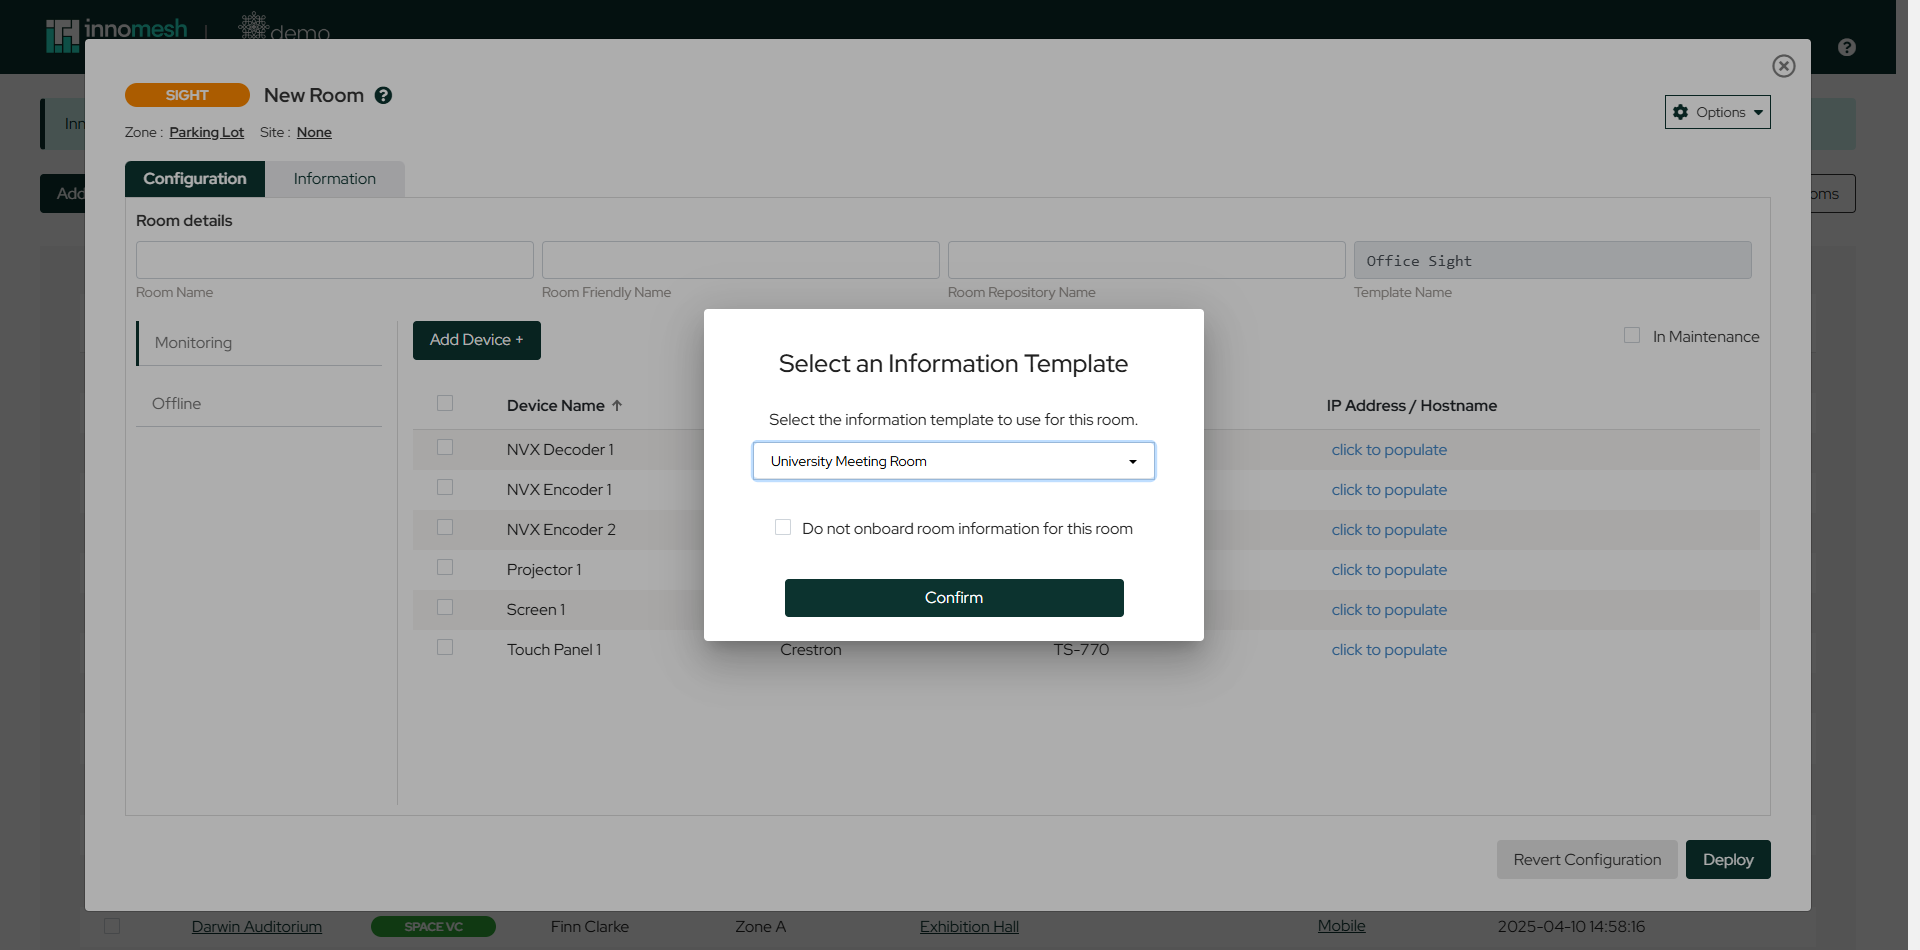
Information Template
You are then prompted to choose the information template used to onboard the room’s information fields. Select a template and click Confirm, or tick Do not onboard room information for this room to skip this step. See Room Information Onboarding for how information templates work.
Main Configuration View
The configuration page includes several key elements.
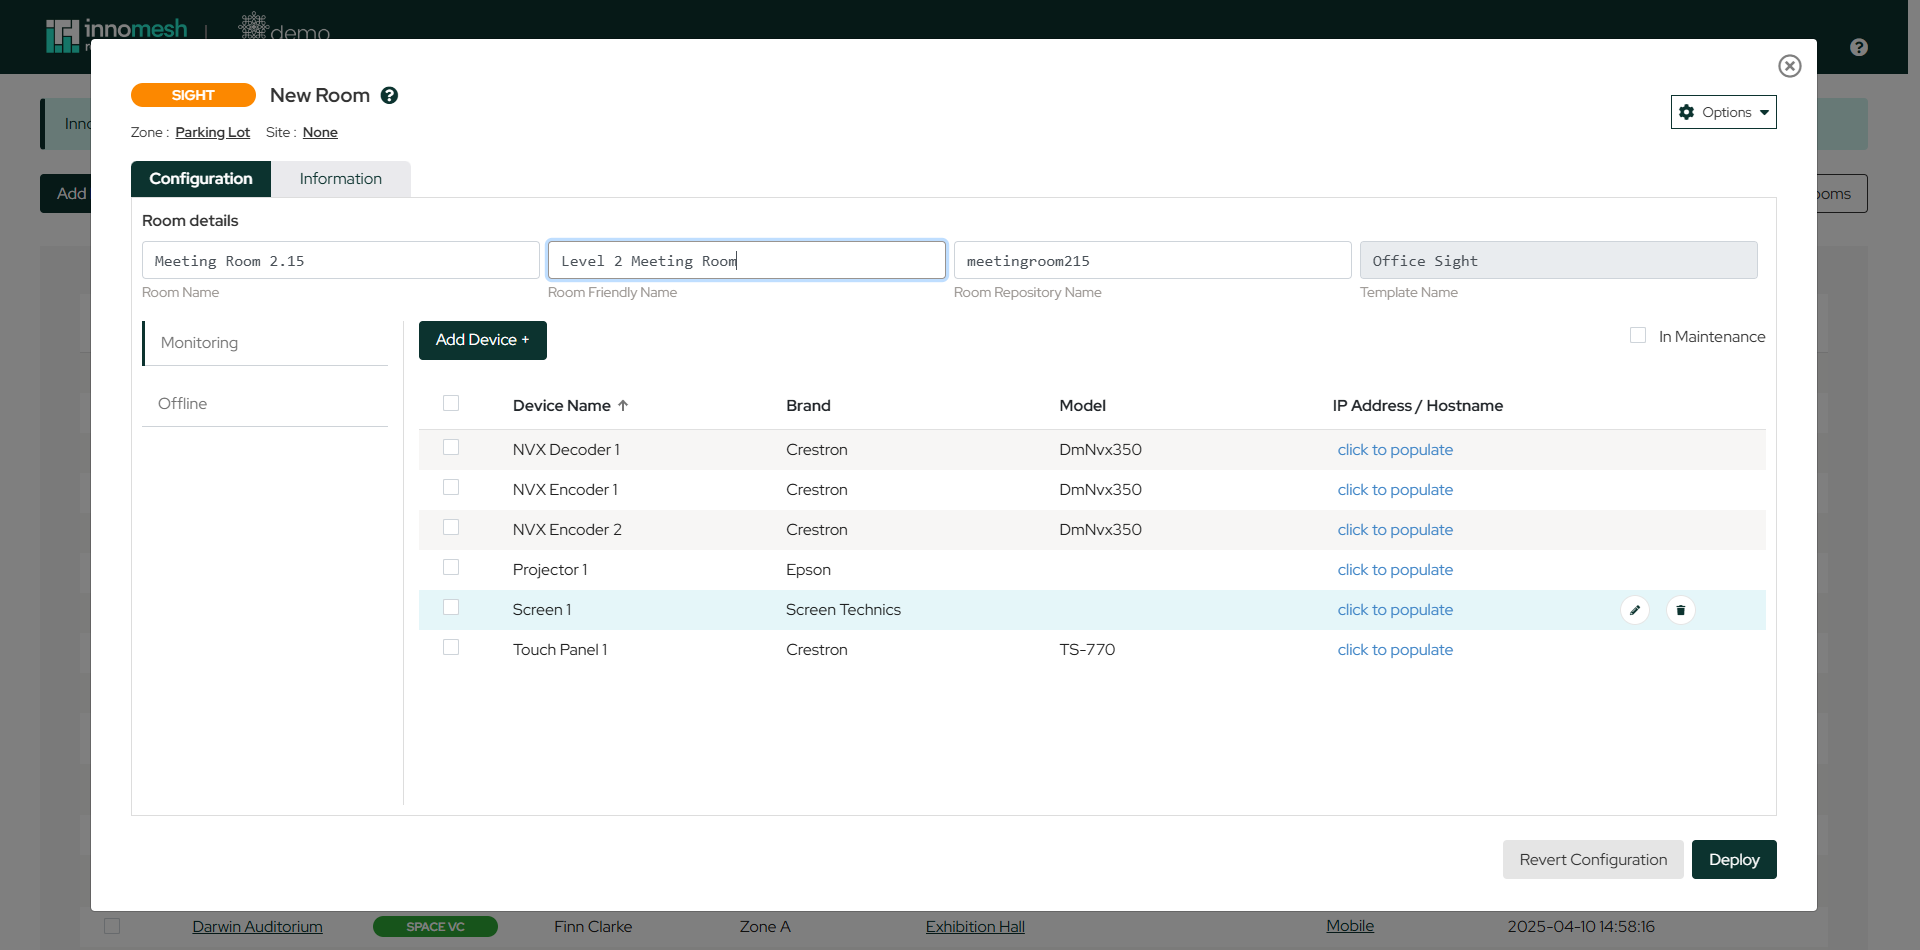
- Room Name, Room Friendly Name, and Room Repository Name: The room’s identifiers. The repository name auto-generates from the room name but can be customised before creation. Note that the repository name cannot be changed after the room is created.
- Template Name: The template the room is based on. This field is fixed.
- Zone and Site: Shown at the top of the view. Click either to change the deployment zone or assign the room to a site.
- Configuration and Information tabs: Configuration holds the monitoring setup; Information holds the room information fields from the information template selected earlier.
- Monitoring and Offline tabs: Devices Sight actively monitors, and devices recorded on the room but not currently monitored.
- Add Device: Button to begin adding new devices to the room.
- In Maintenance: Checkbox to divert alerts to the Suppressed list when the room is non-functional or under construction.
- IP Address/Hostname: Network identification for each device. Click a device’s entry to populate it.
- Edit/Delete: Manage individual devices using the inline controls on each row.
- Deploy and Revert Configuration: Deploy the room or undo recent changes.
Options Dropdown
The Options dropdown provides Sight-specific utilities alongside the standard room functions.
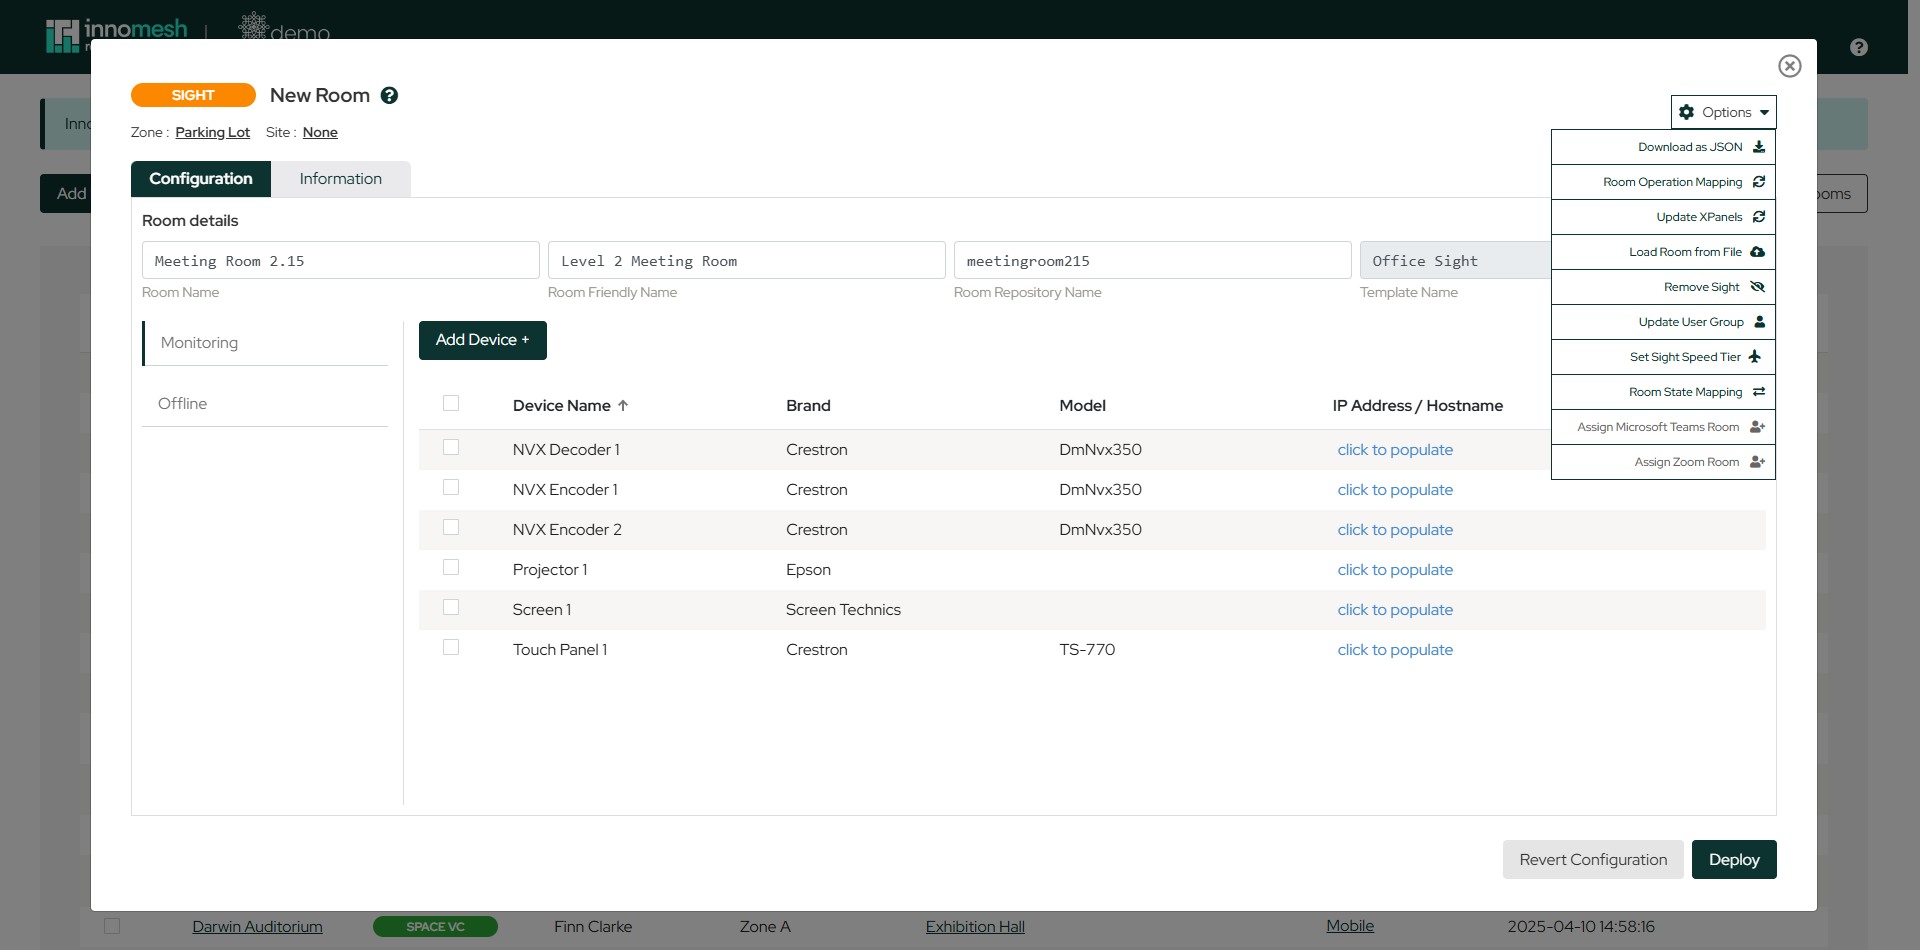
- Download as JSON and Load Room from File: Export the room configuration or import one from a previously exported file.
- Room Operation Mapping and Room State Mapping: Map room-level operations and room states. See Room Operation Mapping and Room State Mapping.
- Update XPanels: See XPanel Management.
- Remove Sight: Downgrades the room’s Sight subscription. See Subscription Tier Downgrade.
- Set Sight Speed Tier, Update User Group, Assign Microsoft Teams Room, and Assign Zoom Room round out the menu.
Device Configuration
When adding or editing a device, search the list on the left and select the asset profile that matches the physical device. The profile pre-populates the device’s ID, name, brand, model, and type, and determines which drivers are available.
Where the device supports native Sight monitoring, choose its native driver from the Driver dropdown, for example Epson Projector (TCP) for an Epson projector, so Sight pulls live data from the device. Pulse (ICMP) remains available as a reachability-only fallback.
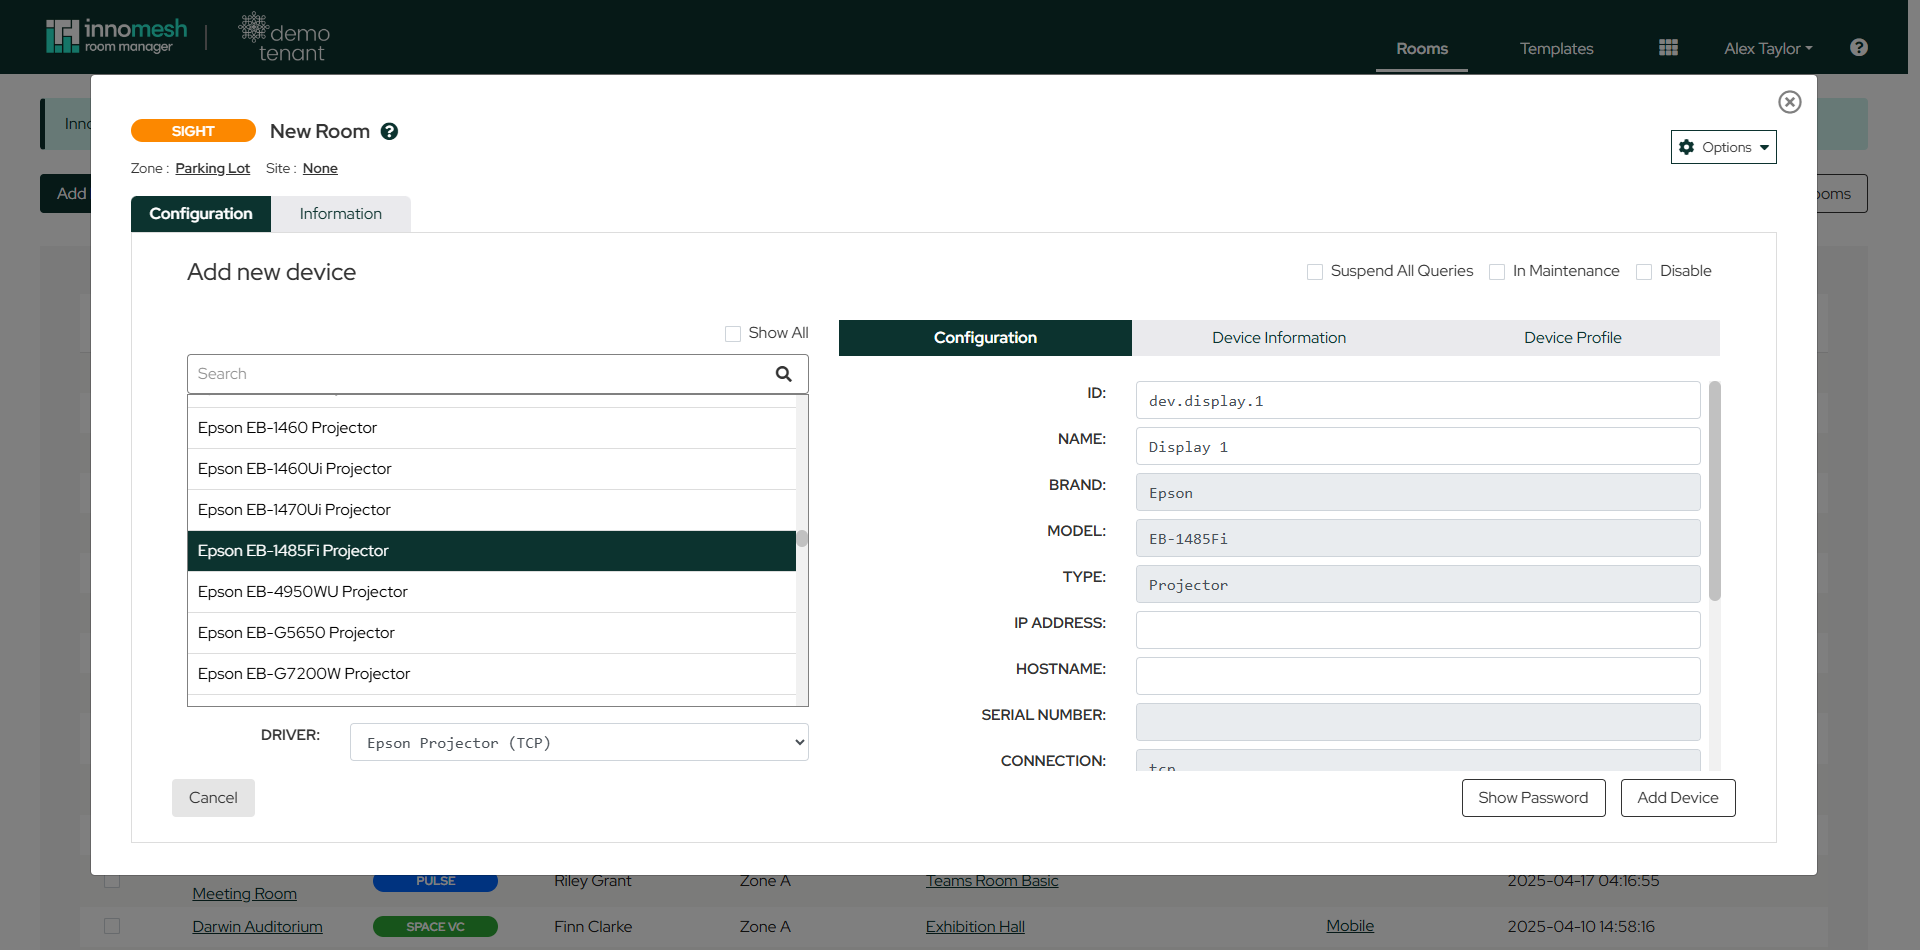
The right-hand side of the panel has three tabs:
- Configuration: The device’s ID, name, brand, model, and type, plus its network details (IP address, hostname, serial number) and connection settings.
- Device Information: Network and hardware details such as IP, hostname, firmware version, and MAC address.
- Device Profile: Full specifications from the asset profile, such as aspect ratio and brightness.
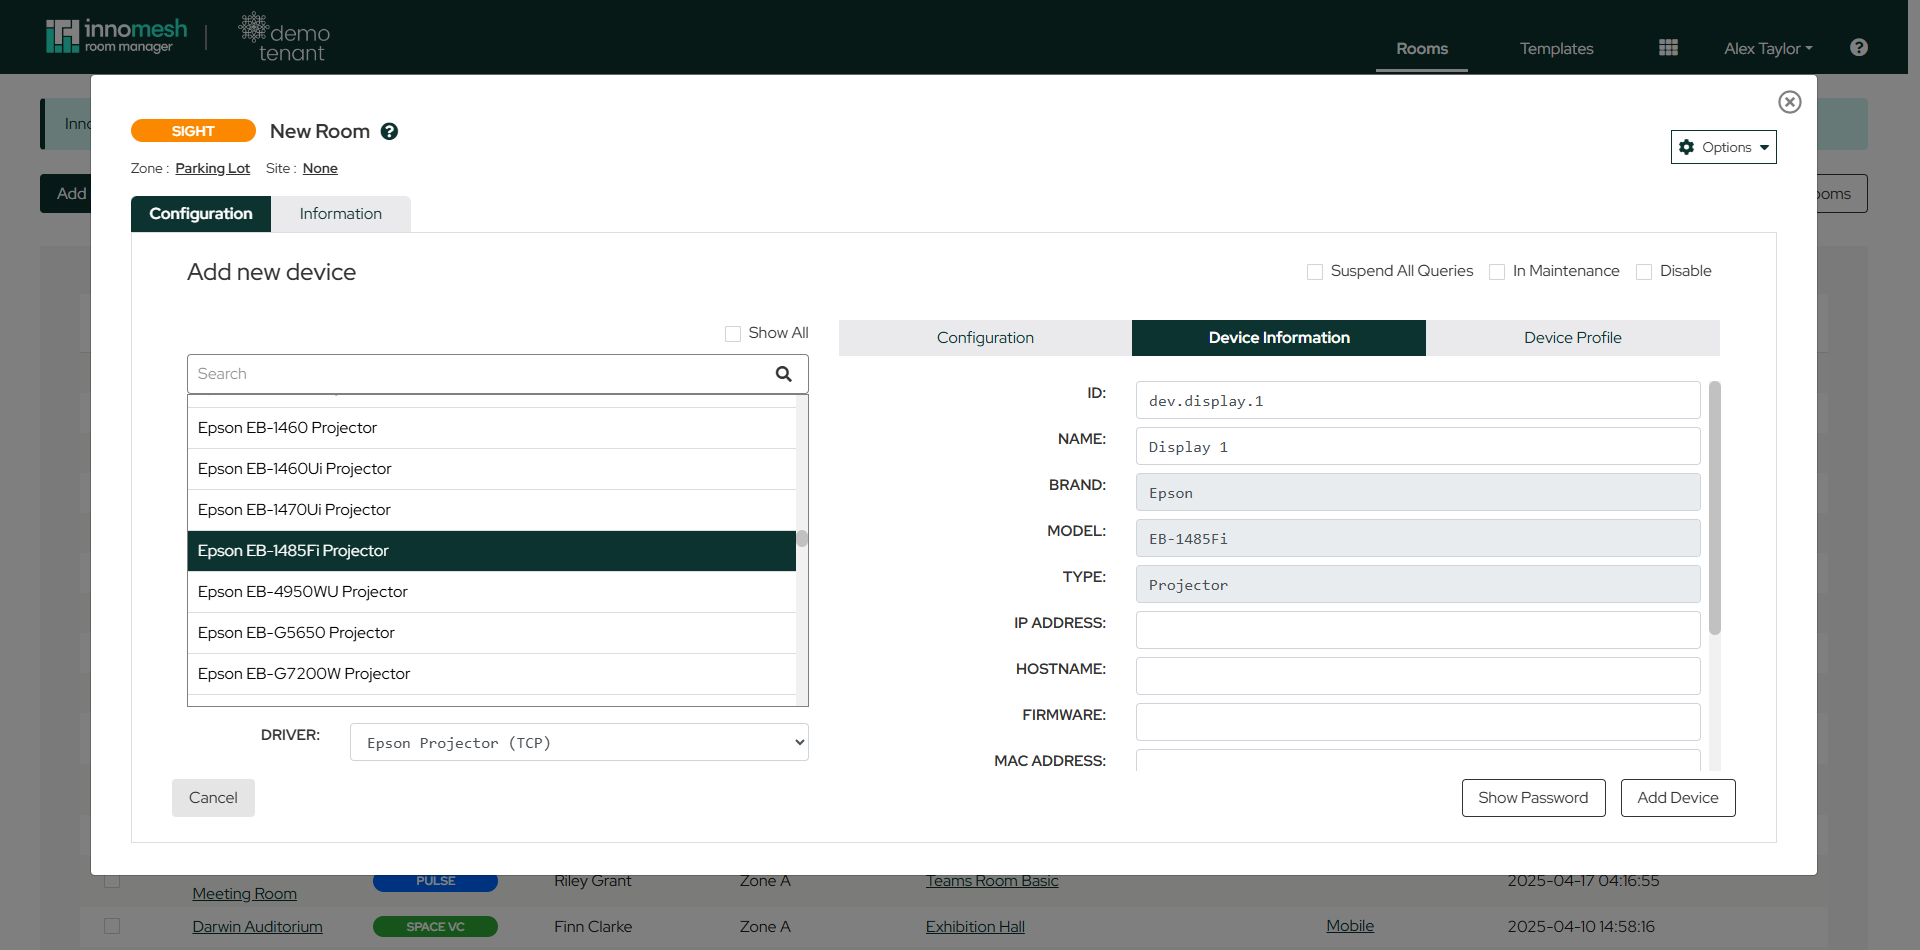
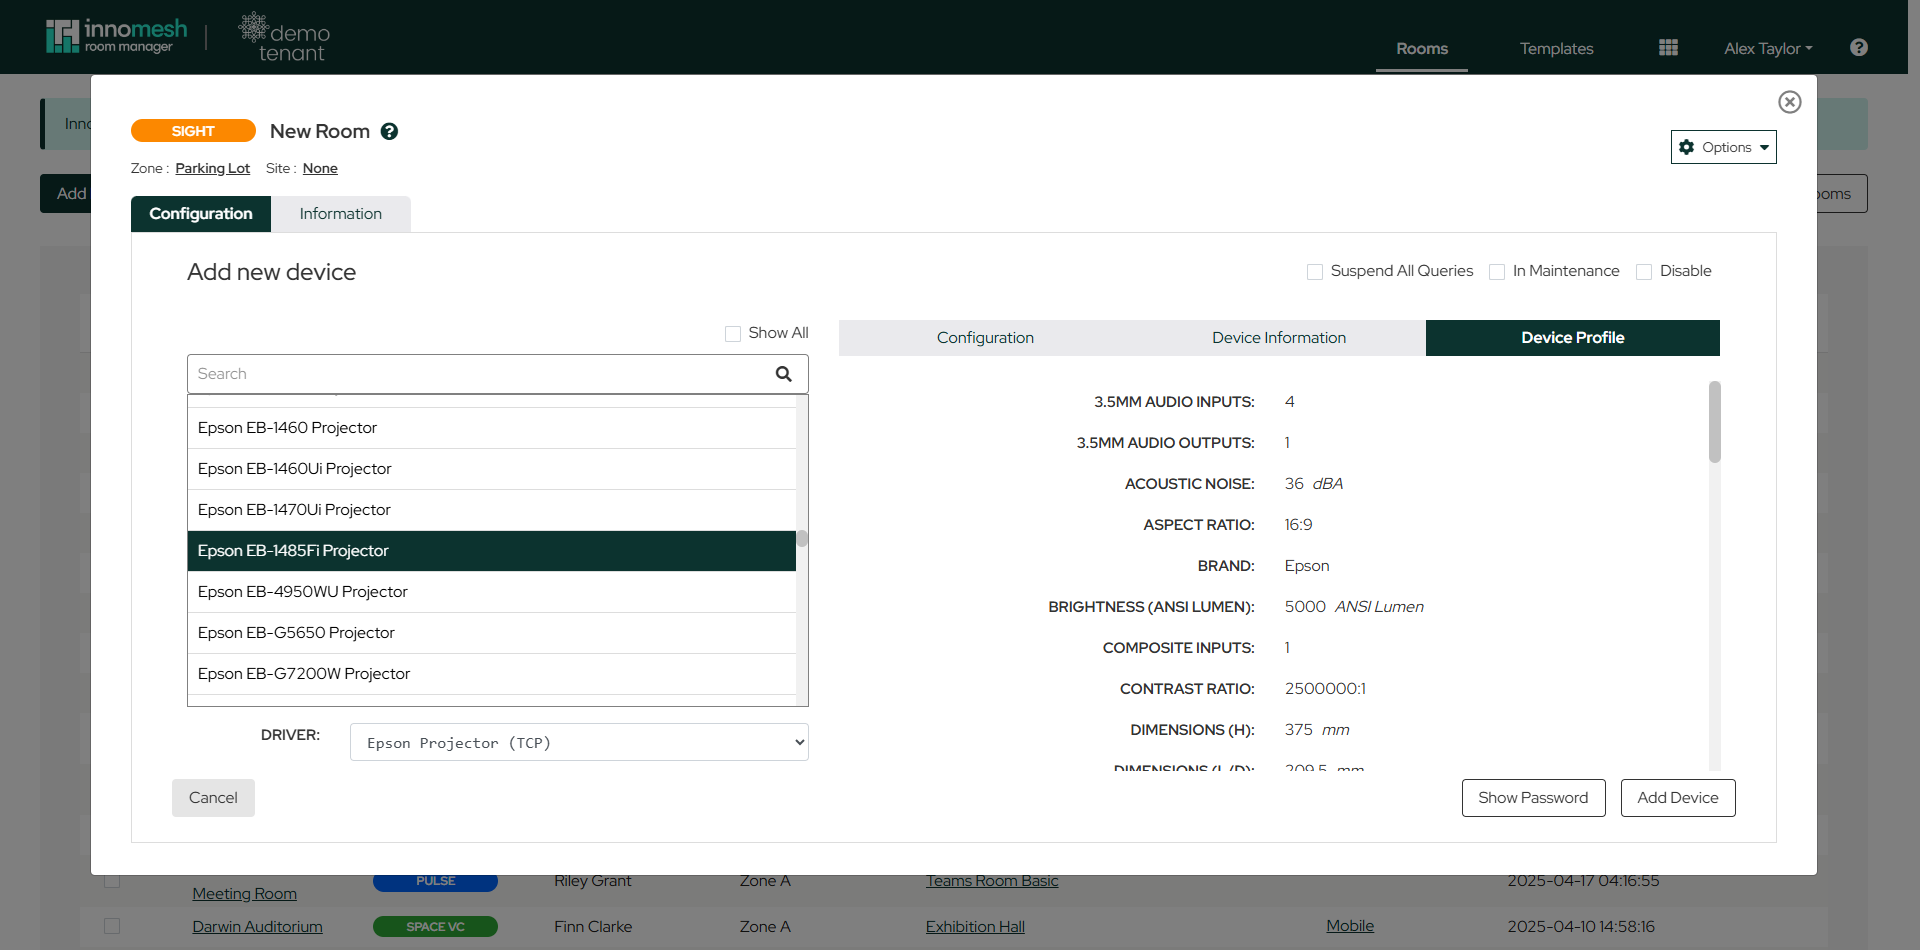
Use the Suspend All Queries, In Maintenance, and Disable checkboxes to suppress monitoring or alerts for the device as needed, then click Add Device (or Update Device when editing) to confirm.
Deploying the Room
Once the room details and device network addresses are in place, click Deploy. The room begins monitoring, and you can view its status in the Portal Rooms page, the Room Support View, and the Hotlist.
Mass Deployment
To mass deploy Sight rooms, click Add New Room, select the Sight template, then click the Mass Deploy button that appears in the bottom right of the template picker.
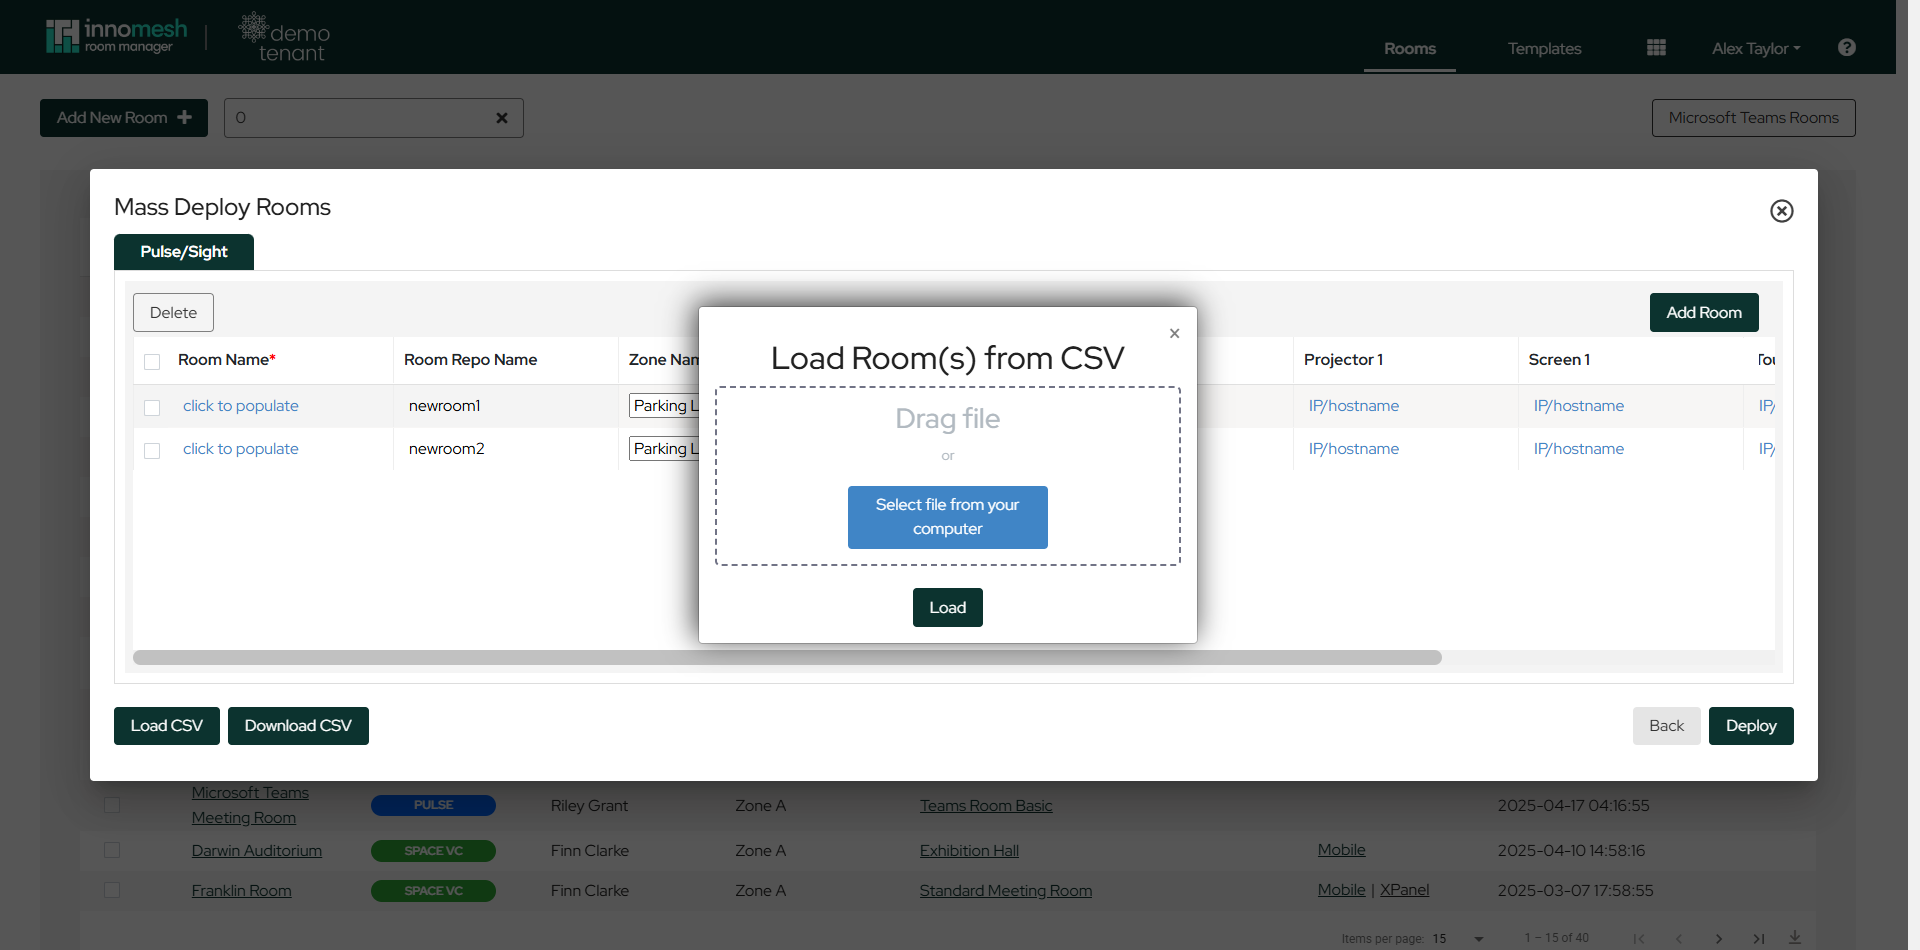
The mass-deployment view lists one row per room, with the room name, repository name, zone, and one column per device for its IP address or hostname:
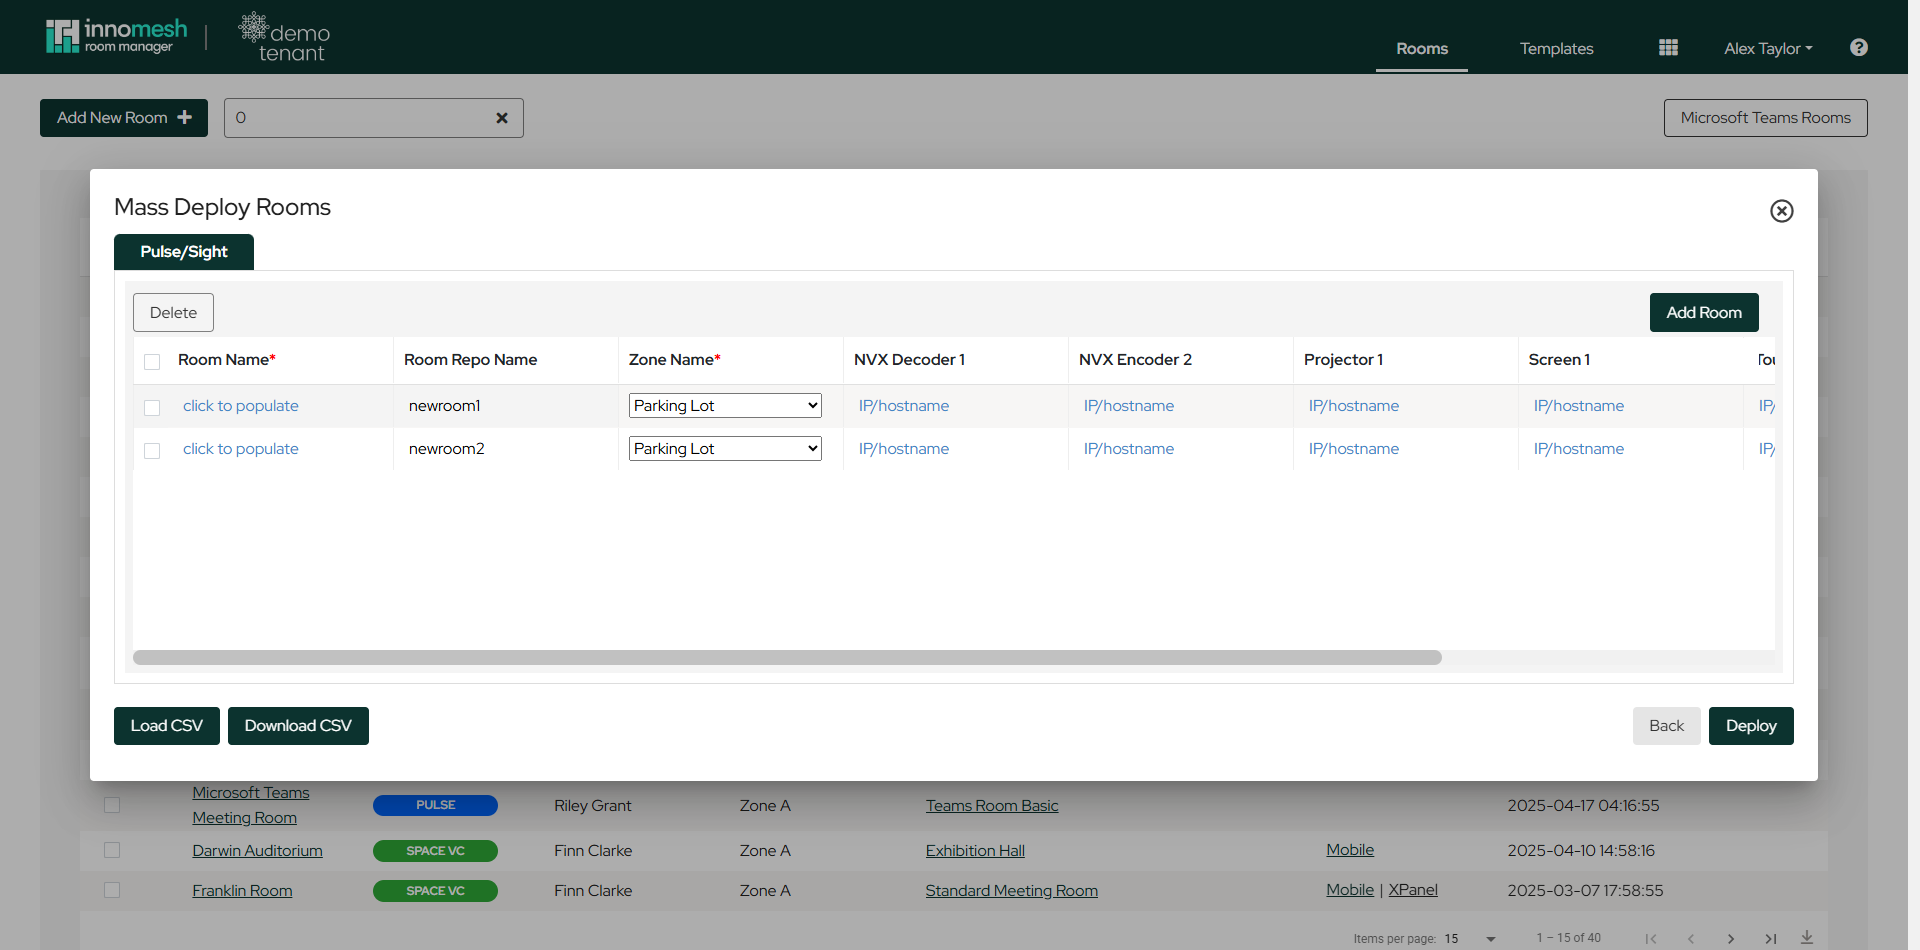
- Add rooms: Use the Add Room button in the top right corner of the window.
- CSV operations: Load a CSV or download the current configuration to CSV from the bottom left.
- Bulk deployment: Deploy all configured rooms using the Deploy button in the bottom right corner.
CSV Requirements
CSV files must contain three columns (Room Name, Room Repo Name, Zone) plus one column per device. It is recommended to download an existing CSV first to see the correct format.
Deploy rooms to the Parking Lot zone initially to prevent offline device alerts from reaching the Portal Hotlist.