

Incident Rules automatically raise incidents when alert conditions you define are met, so your team does not have to open them by hand. Each rule is built in a three-step wizard covering general properties, the trigger criteria, and the output that shapes the resulting incident.
The Incident Rules List
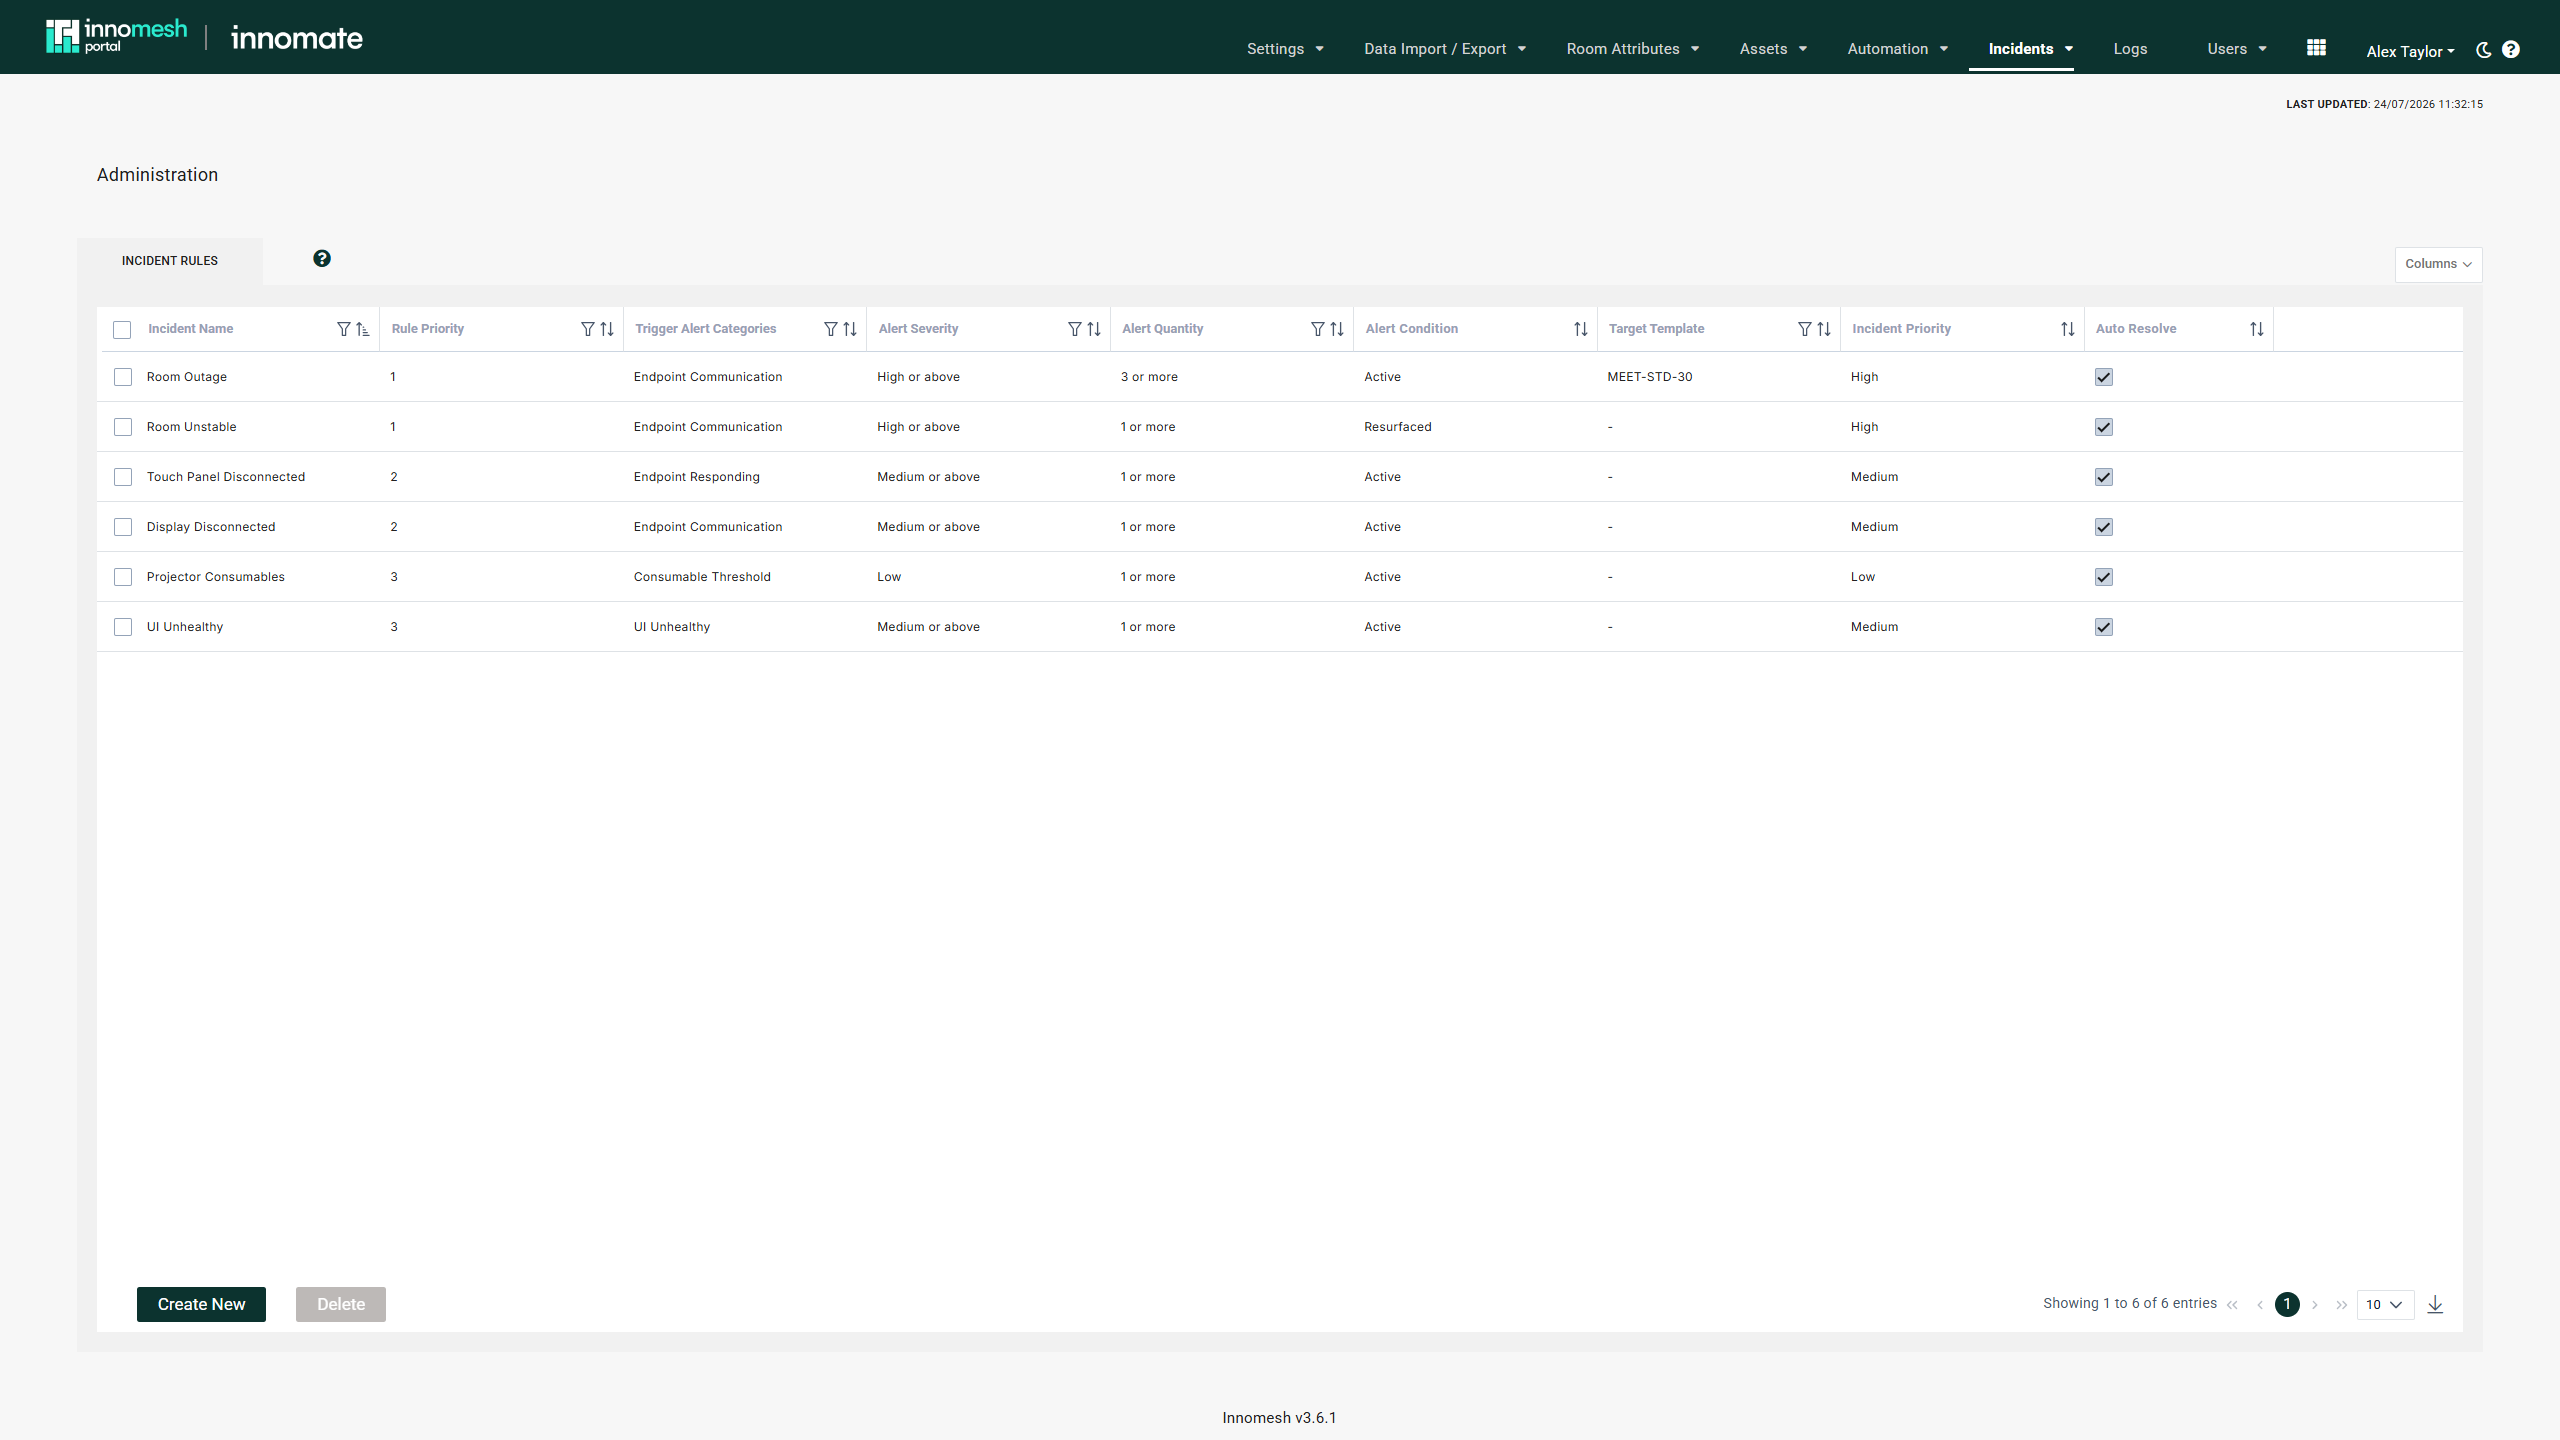
In Innomesh Portal, open Administration and go to Incidents > Incident Rules.
 Incident Rules | Innomesh Portal
The list shows each rule’s name, rule priority, trigger alert categories, alert severity, alert quantity, alert condition, target asset type, target template, incident priority, and whether it auto-resolves. Click a rule to edit it, or tick one or more checkboxes to enable Delete.
Creating an Incident Rule
Click Create New to open the three-step wizard.
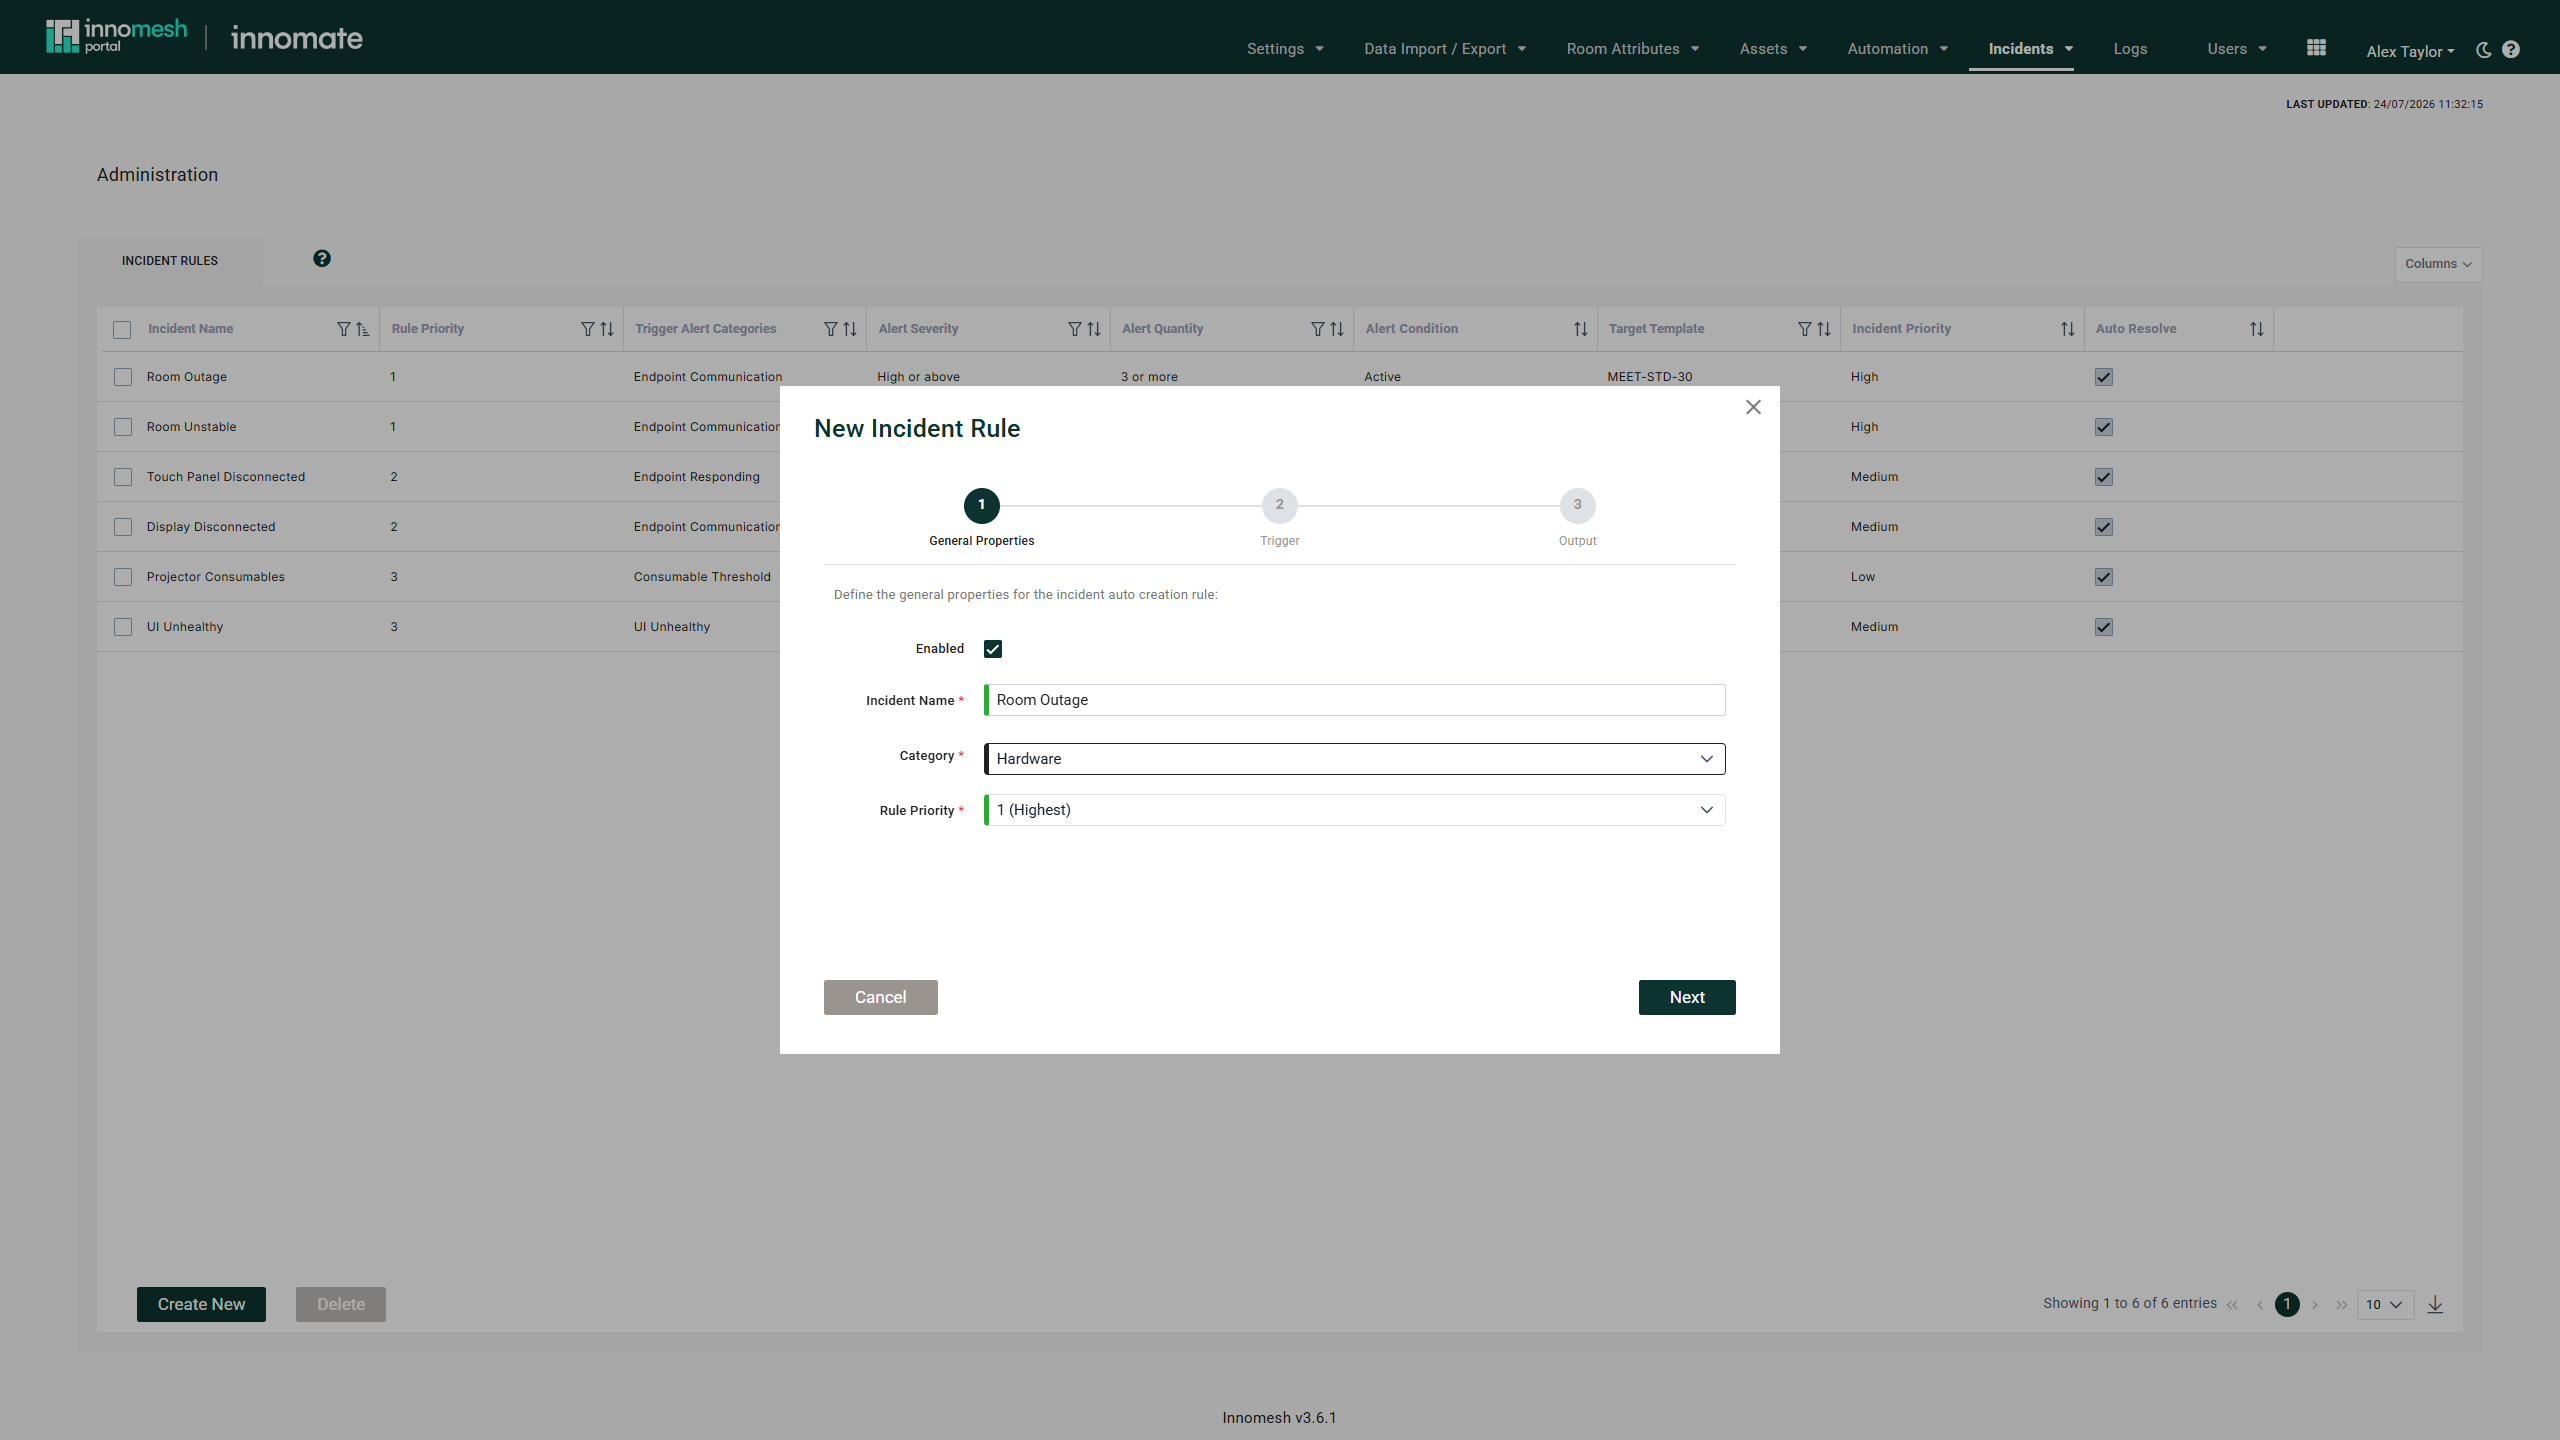
Step 1: General Properties
Enter a unique Incident Name (incidents created from the rule inherit it), choose a Category, set a Rule Priority from 1 (Highest) to 10 (Lowest), and leave Enabled ticked.
Step 2: Trigger
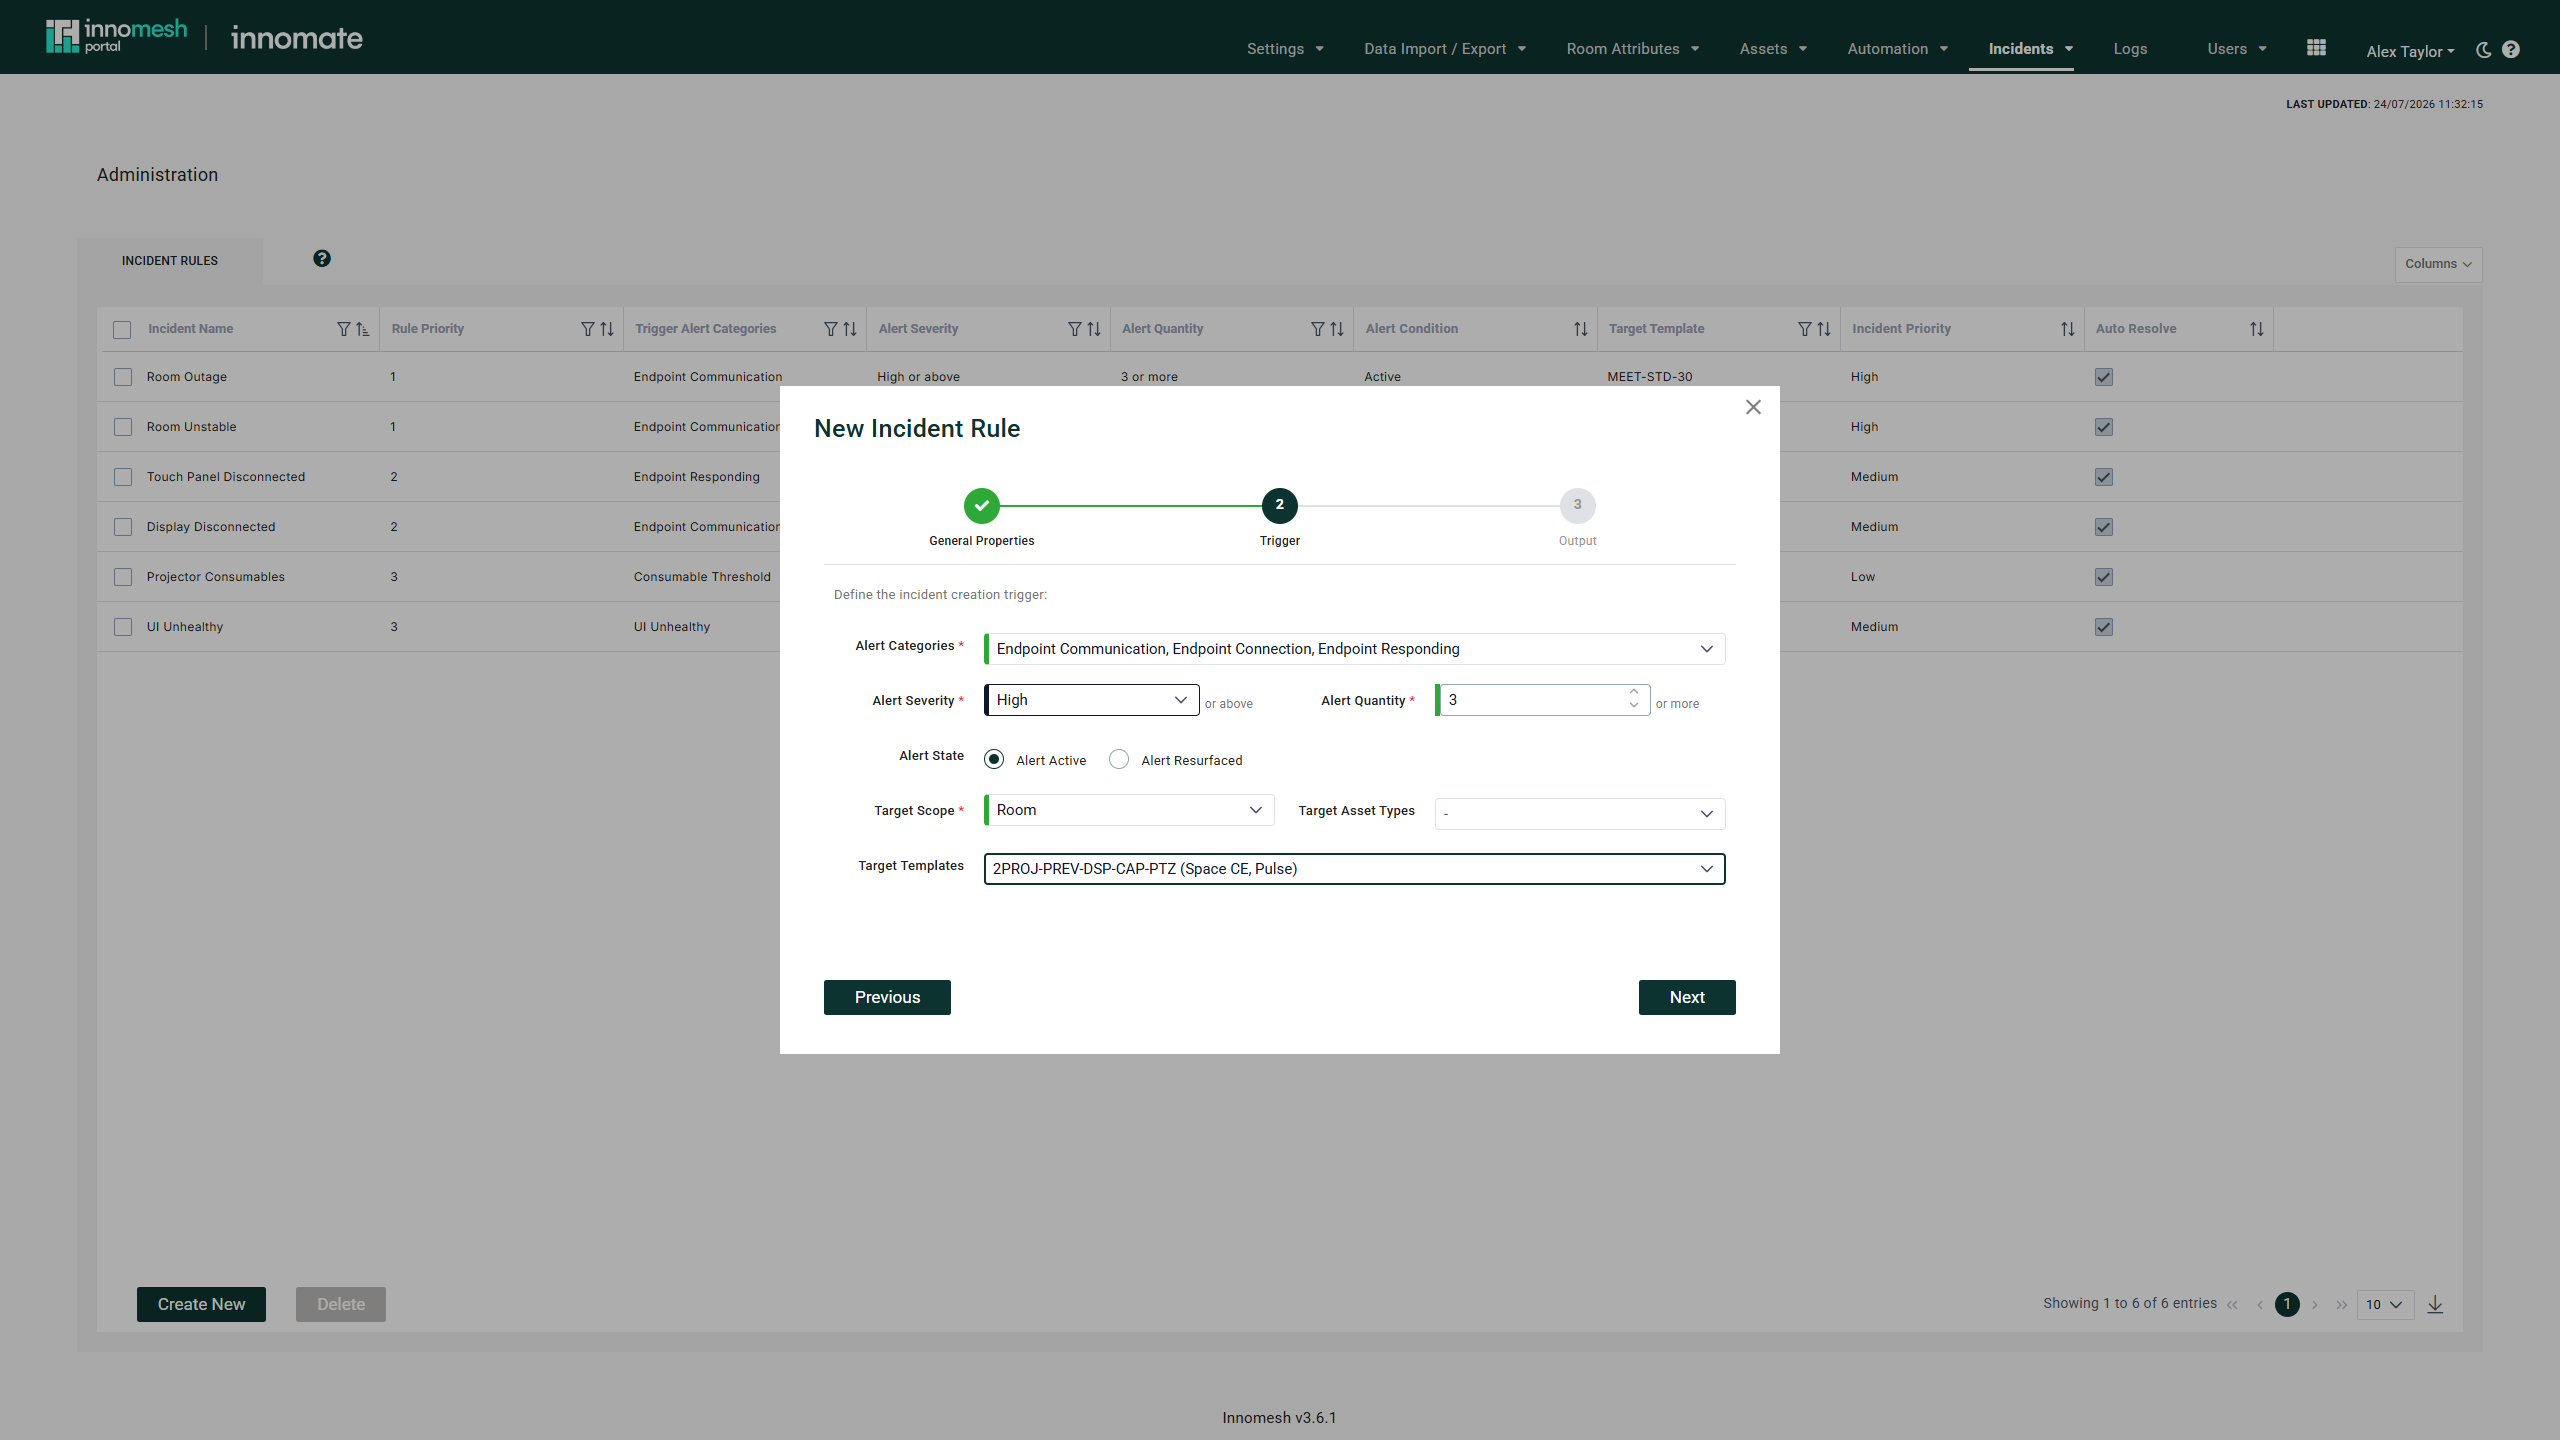
Define the alert conditions that raise the incident:
- Pick one or more Alert Categories.
- Choose the minimum Alert Severity (Low, Medium, High, or Critical, treated as that severity or above).
- Set the Alert Quantity (1 or more matching alerts).
- Choose the Alert Condition (Active or Resurfaced).
- Select a Target Scope of Global, Site, Zone, or Room, then optionally narrow by Target Asset Types. Target Templates are only available when the scope is Room.
Step 3: Output
Shape the incident the rule creates:
- Pick the Incident Impact and Incident Urgency (High, Medium, or Low; these may be fixed for your tenancy).
- Write an optional Description template.
- Leave Automatically Resolve Incident ticked if you want the incident to close once the triggering alerts clear.
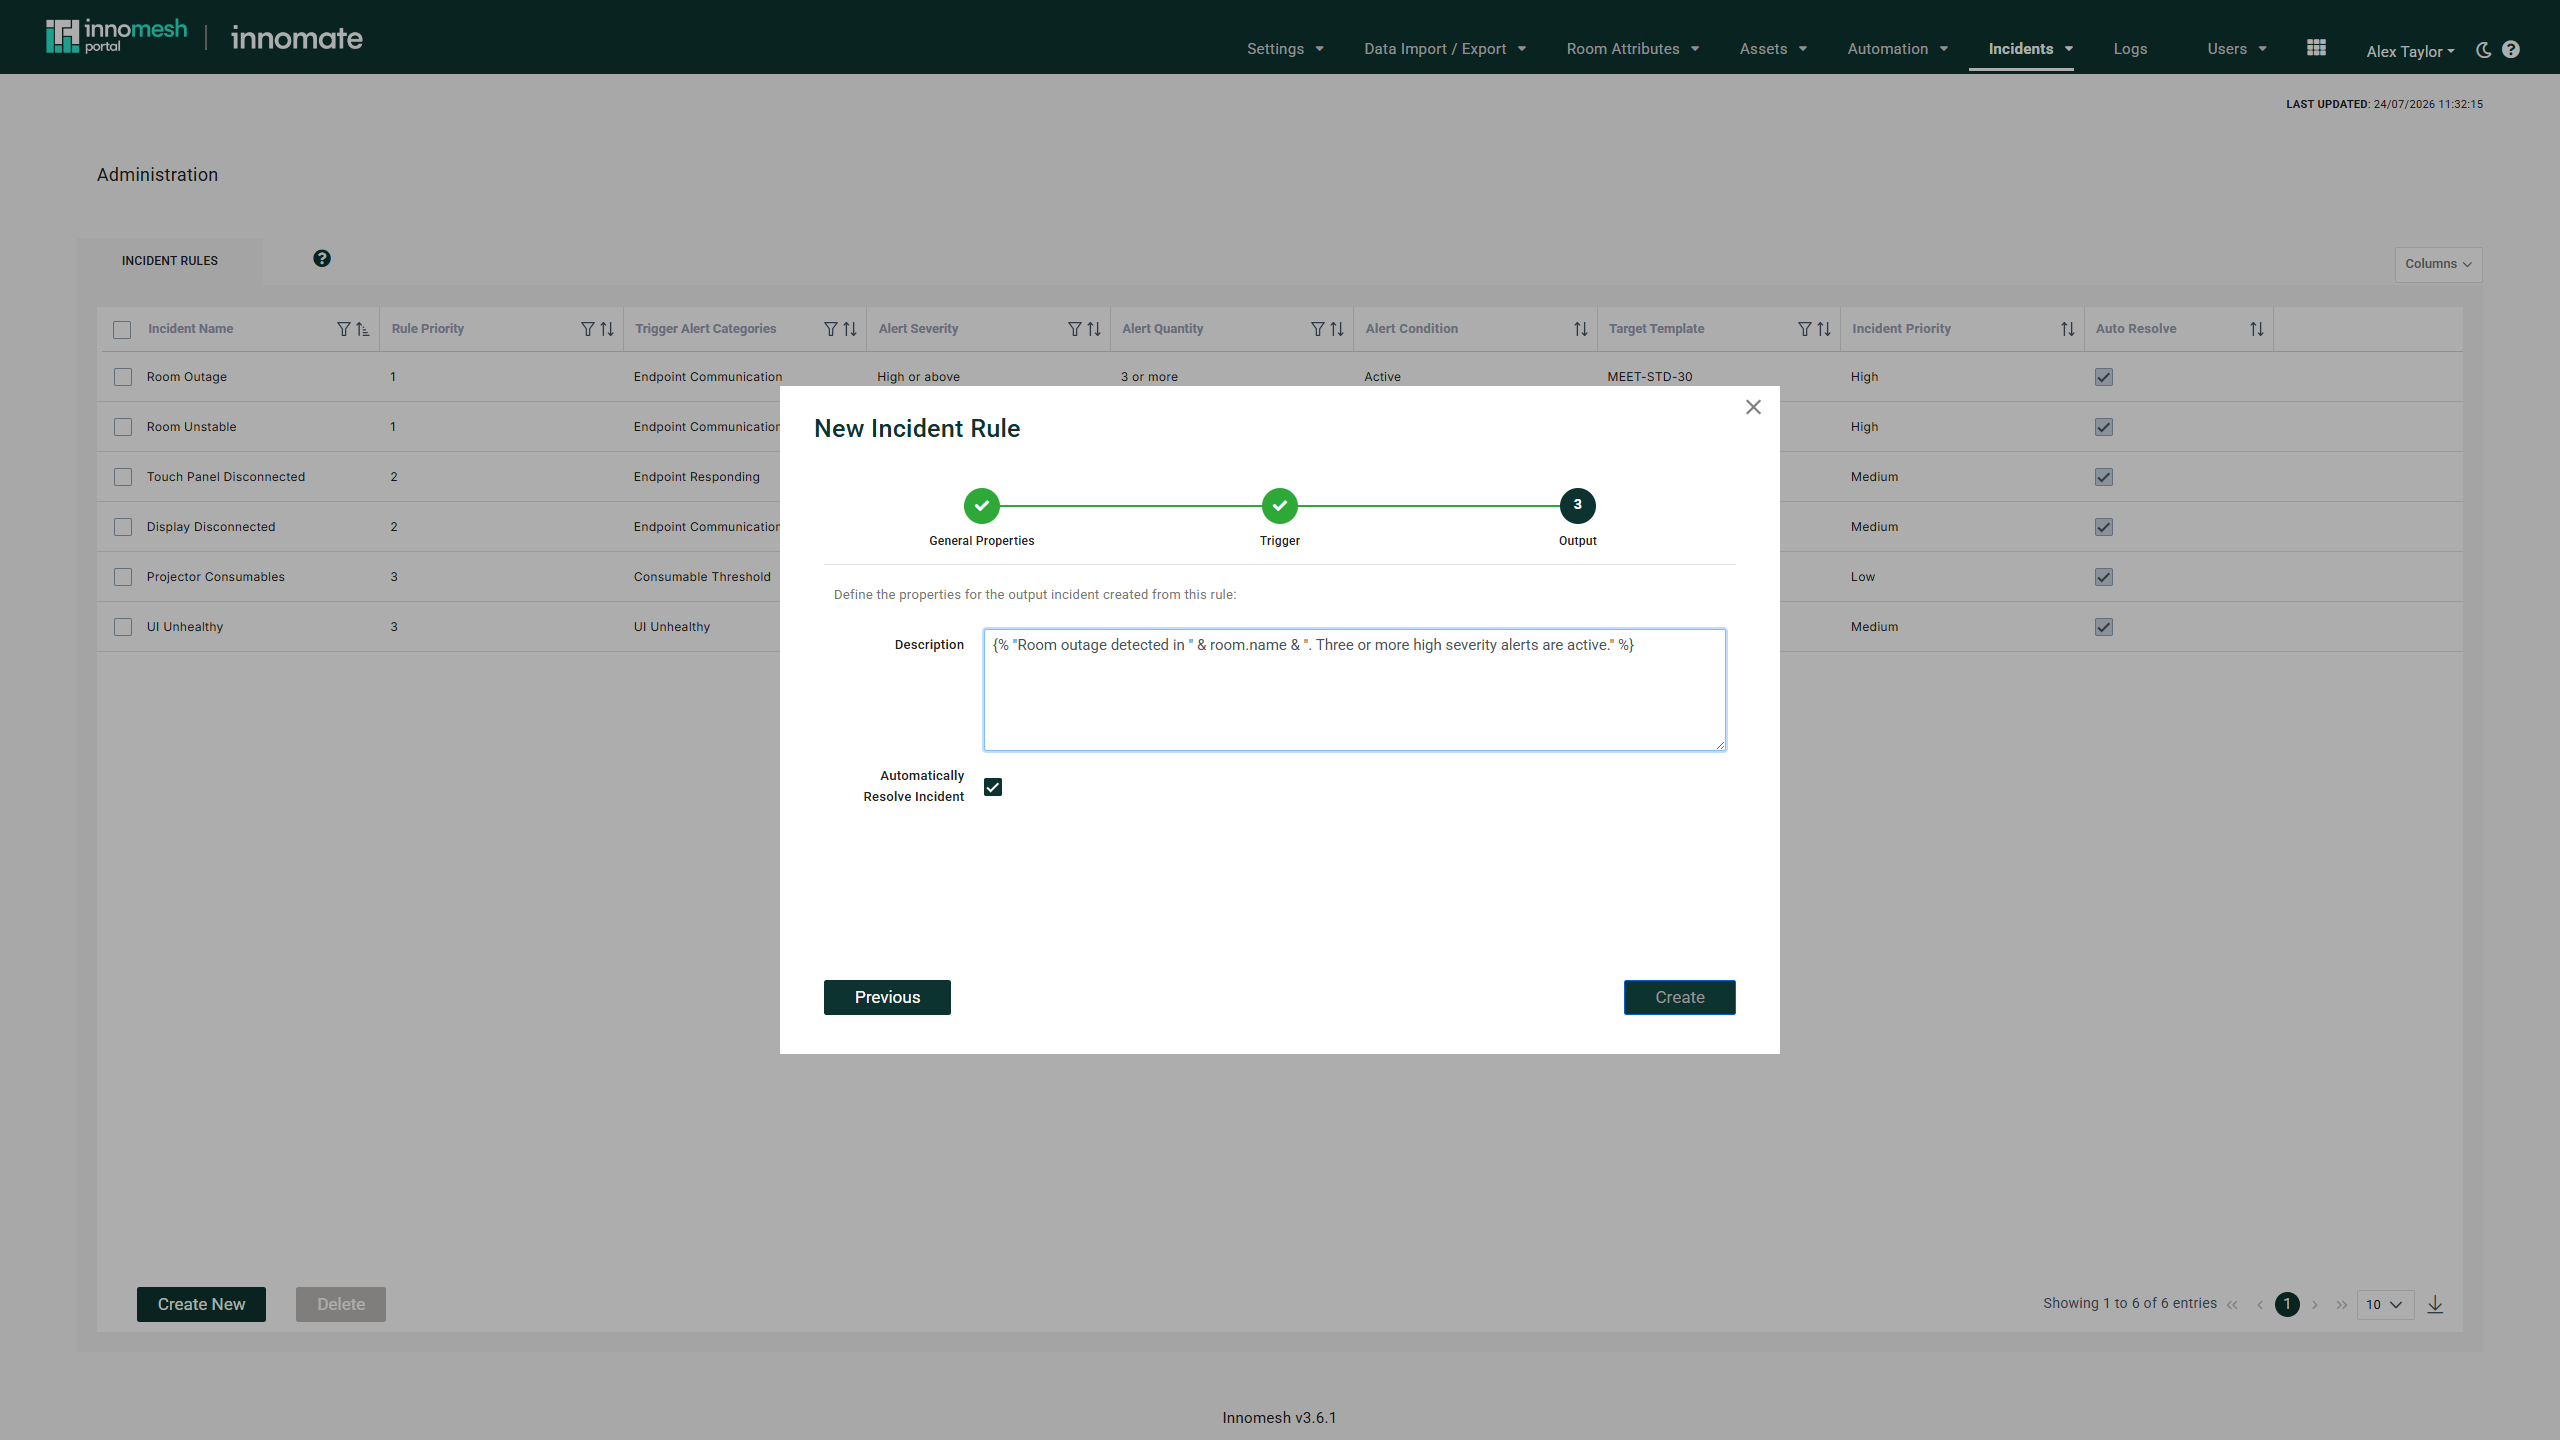
Click Save to finish.
Description Templating
The description field accepts plain text and JSONata-style expressions inside {% %} delimiters, for example {% "Room: " & room.name %}. Use this to pull alert, room, or asset fields into the incident summary.
Deleting a Rule
Tick the rule’s checkbox, click Delete, and confirm with Yes, Delete. Deleting a rule stops future evaluations against it; incidents the rule has already raised are unaffected.