Open an incident from the Incidents list, or from an Incident ID link on the Alerts page, to reach the Incident Detail View. It has three sections accessed from the left-hand nav: Information, Associated Alerts, and Comments.
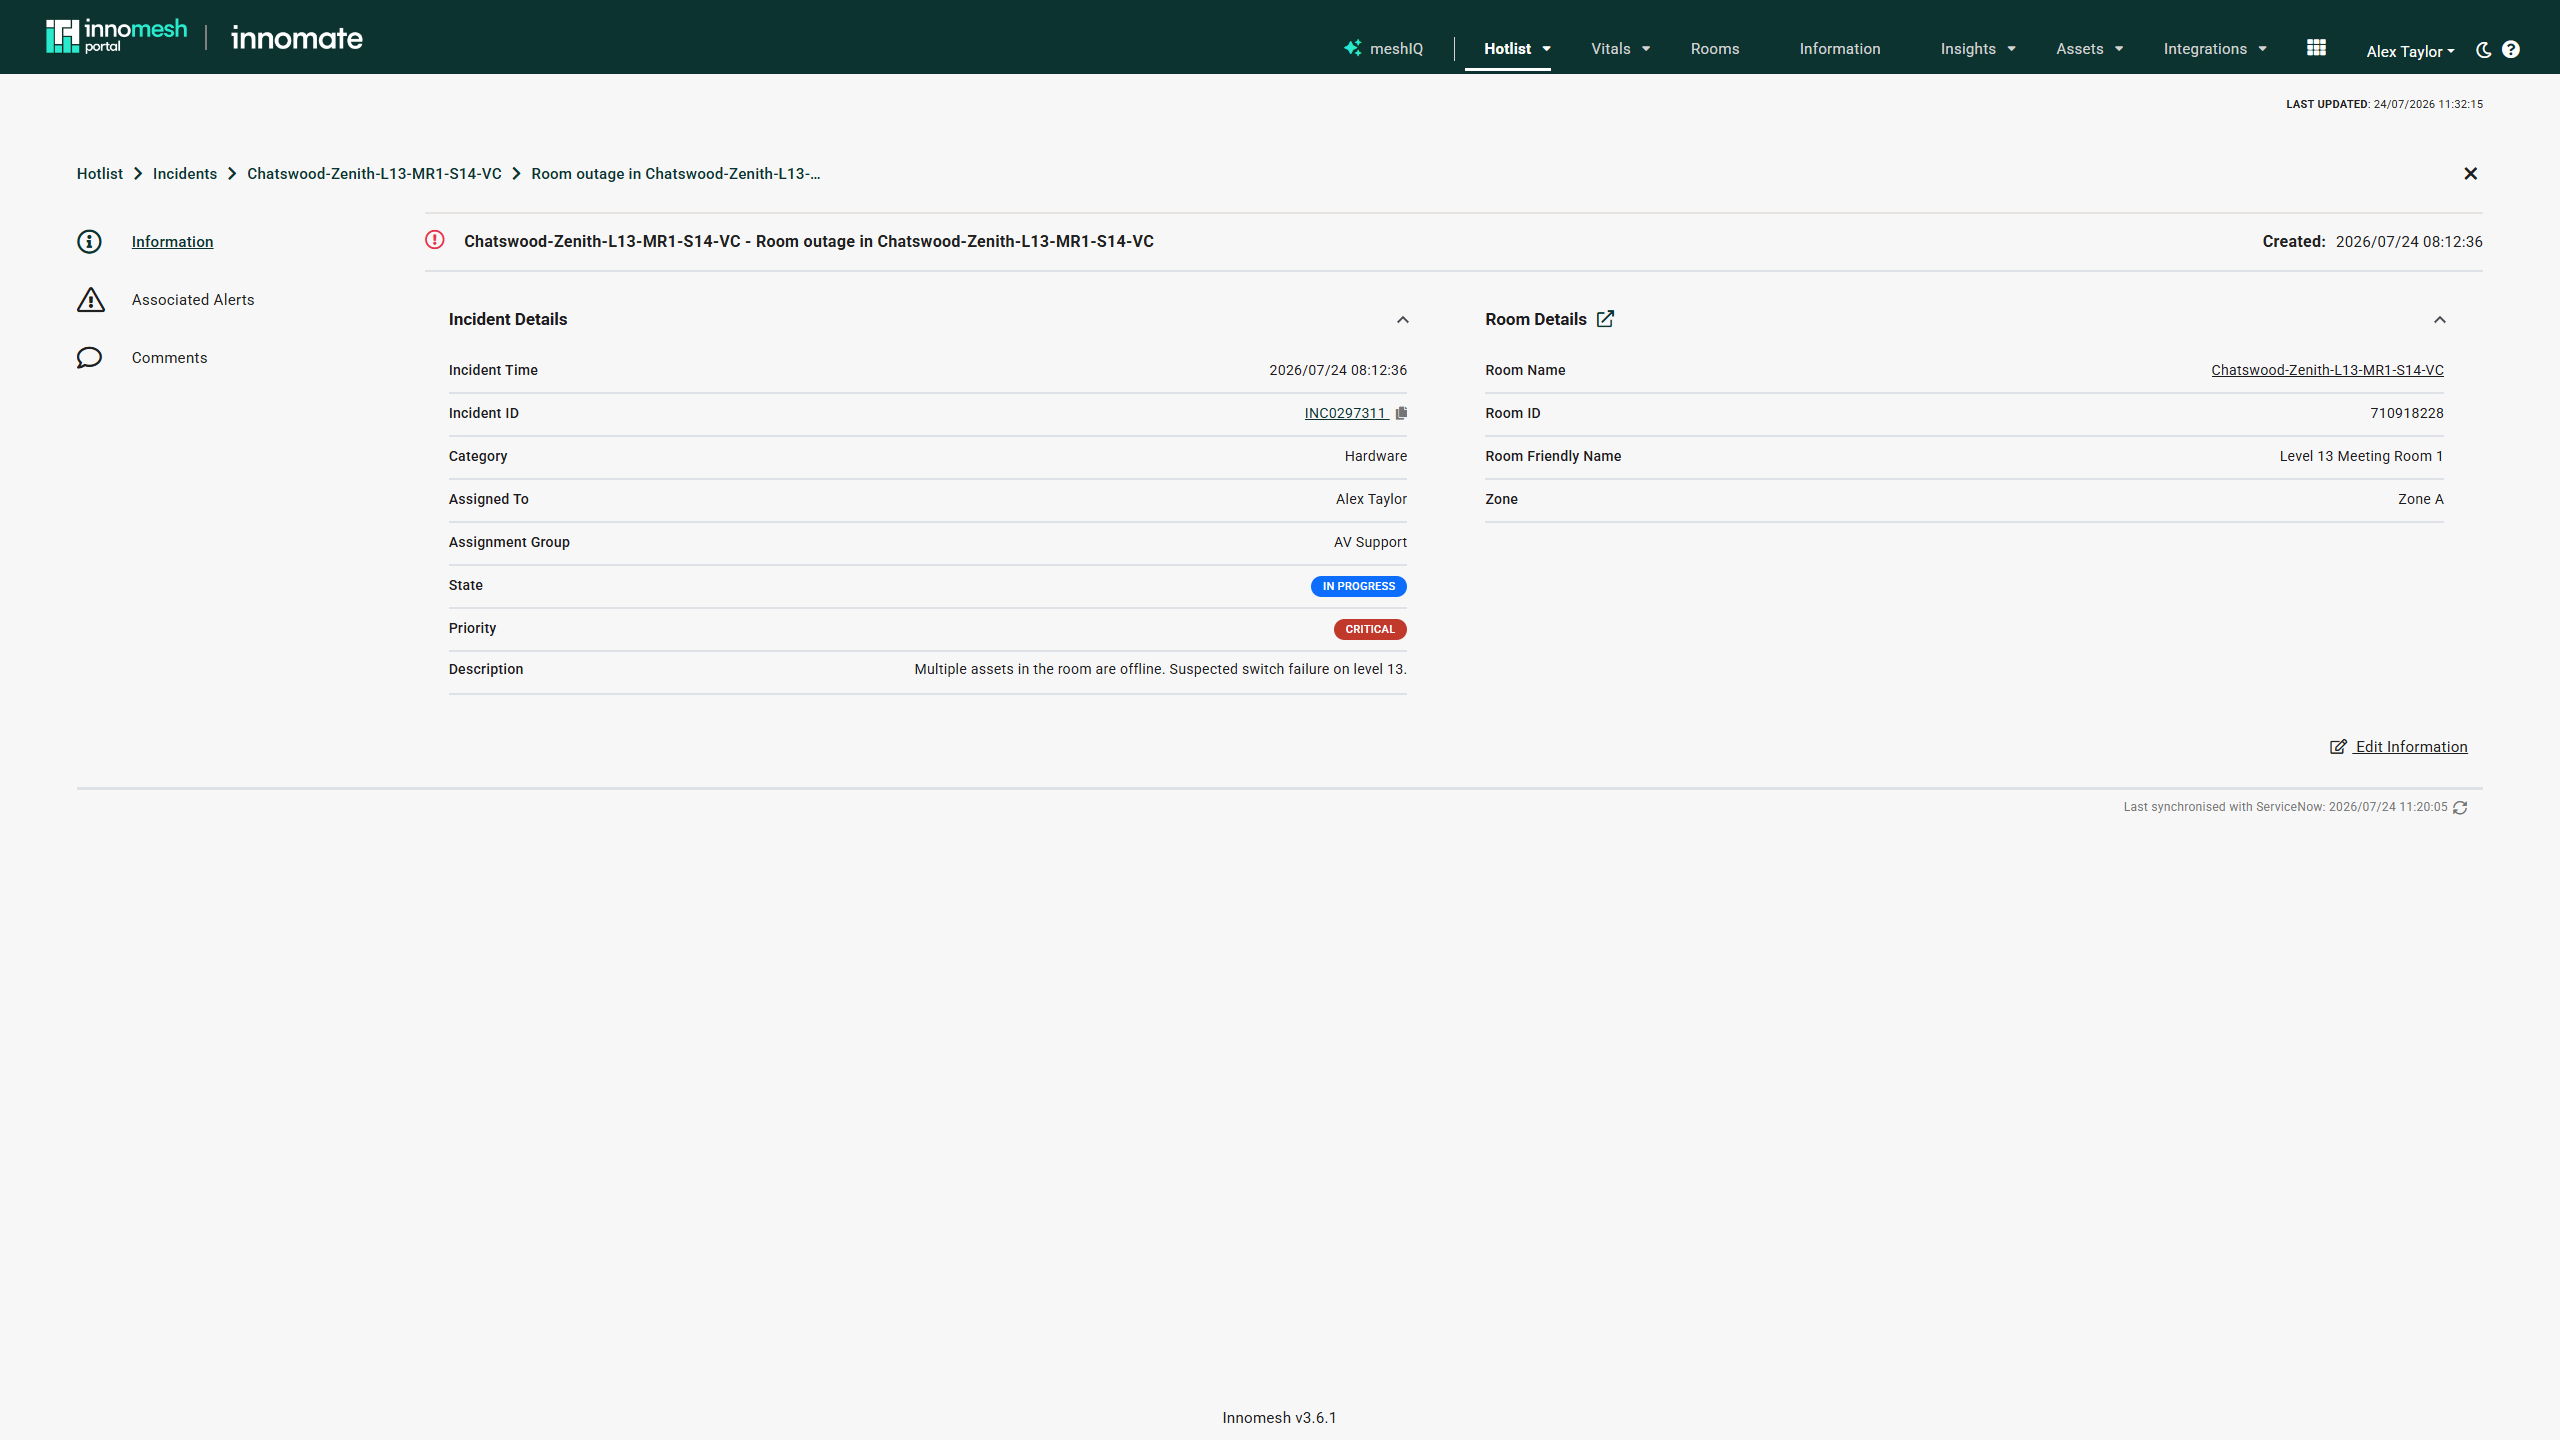 Incident detail view | Innomesh Portal
Information
The Information section has two columns: Incident Details on the left, and a scope-specific panel on the right.
Incident Details
| Field | Description |
|---|---|
| Incident Time | Creation timestamp (read-only) |
| Incident ID | Unique identifier; the copy icon beside the value copies it |
| Category | Incident category, from your tenancy’s configured list |
| Assigned To | Current owner |
| Assignment Group | The ITSM assignment group; shown only for ServiceNow-integrated tenancies |
| State | Lifecycle state, shown as a coloured badge |
| Impact | How widely the issue is felt |
| Urgency | How quickly the issue needs attention |
| Priority | Derived from Impact and Urgency (read-only) |
| Description | Free-form summary of the incident |
| Resolution Code | Shown once the incident is resolved |
| Resolution Notes | Shown once the incident is resolved |
Priority is calculated from Impact and Urgency using the following matrix:
| High Impact | Medium Impact | Low Impact | |
|---|---|---|---|
| High Urgency | Critical (1) | High (2) | Moderate (3) |
| Medium Urgency | High (2) | Moderate (3) | Low (4) |
| Low Urgency | Moderate (3) | Low (4) | Planning (5) |
Scope Panel (right column)
- Room: shows the Room Name (linking to the room’s Information detail view), Room ID, Room Friendly Name, and Zone. Site is shown if the room is assigned to a site.
- Zone: shows the Zone Name.
- Site: shows the Site Name.
- Global: no right-hand panel is shown.
Editing
Users with incident management permission see Edit Information on the panel. The editable fields are Category, Assigned To, State, Impact, Urgency, and Description, where available for your tenancy. For example, Assigned To is read-only under an ITSM integration, and Impact and Urgency are read-only when they are fixed for your tenancy. Click Save Changes to apply, or Discard Changes to revert.
Changing State to Resolved prompts the Resolve dialog before saving; see Resolving an Incident below.
Associated Alerts
The Associated Alerts section lists every alert linked to the incident.
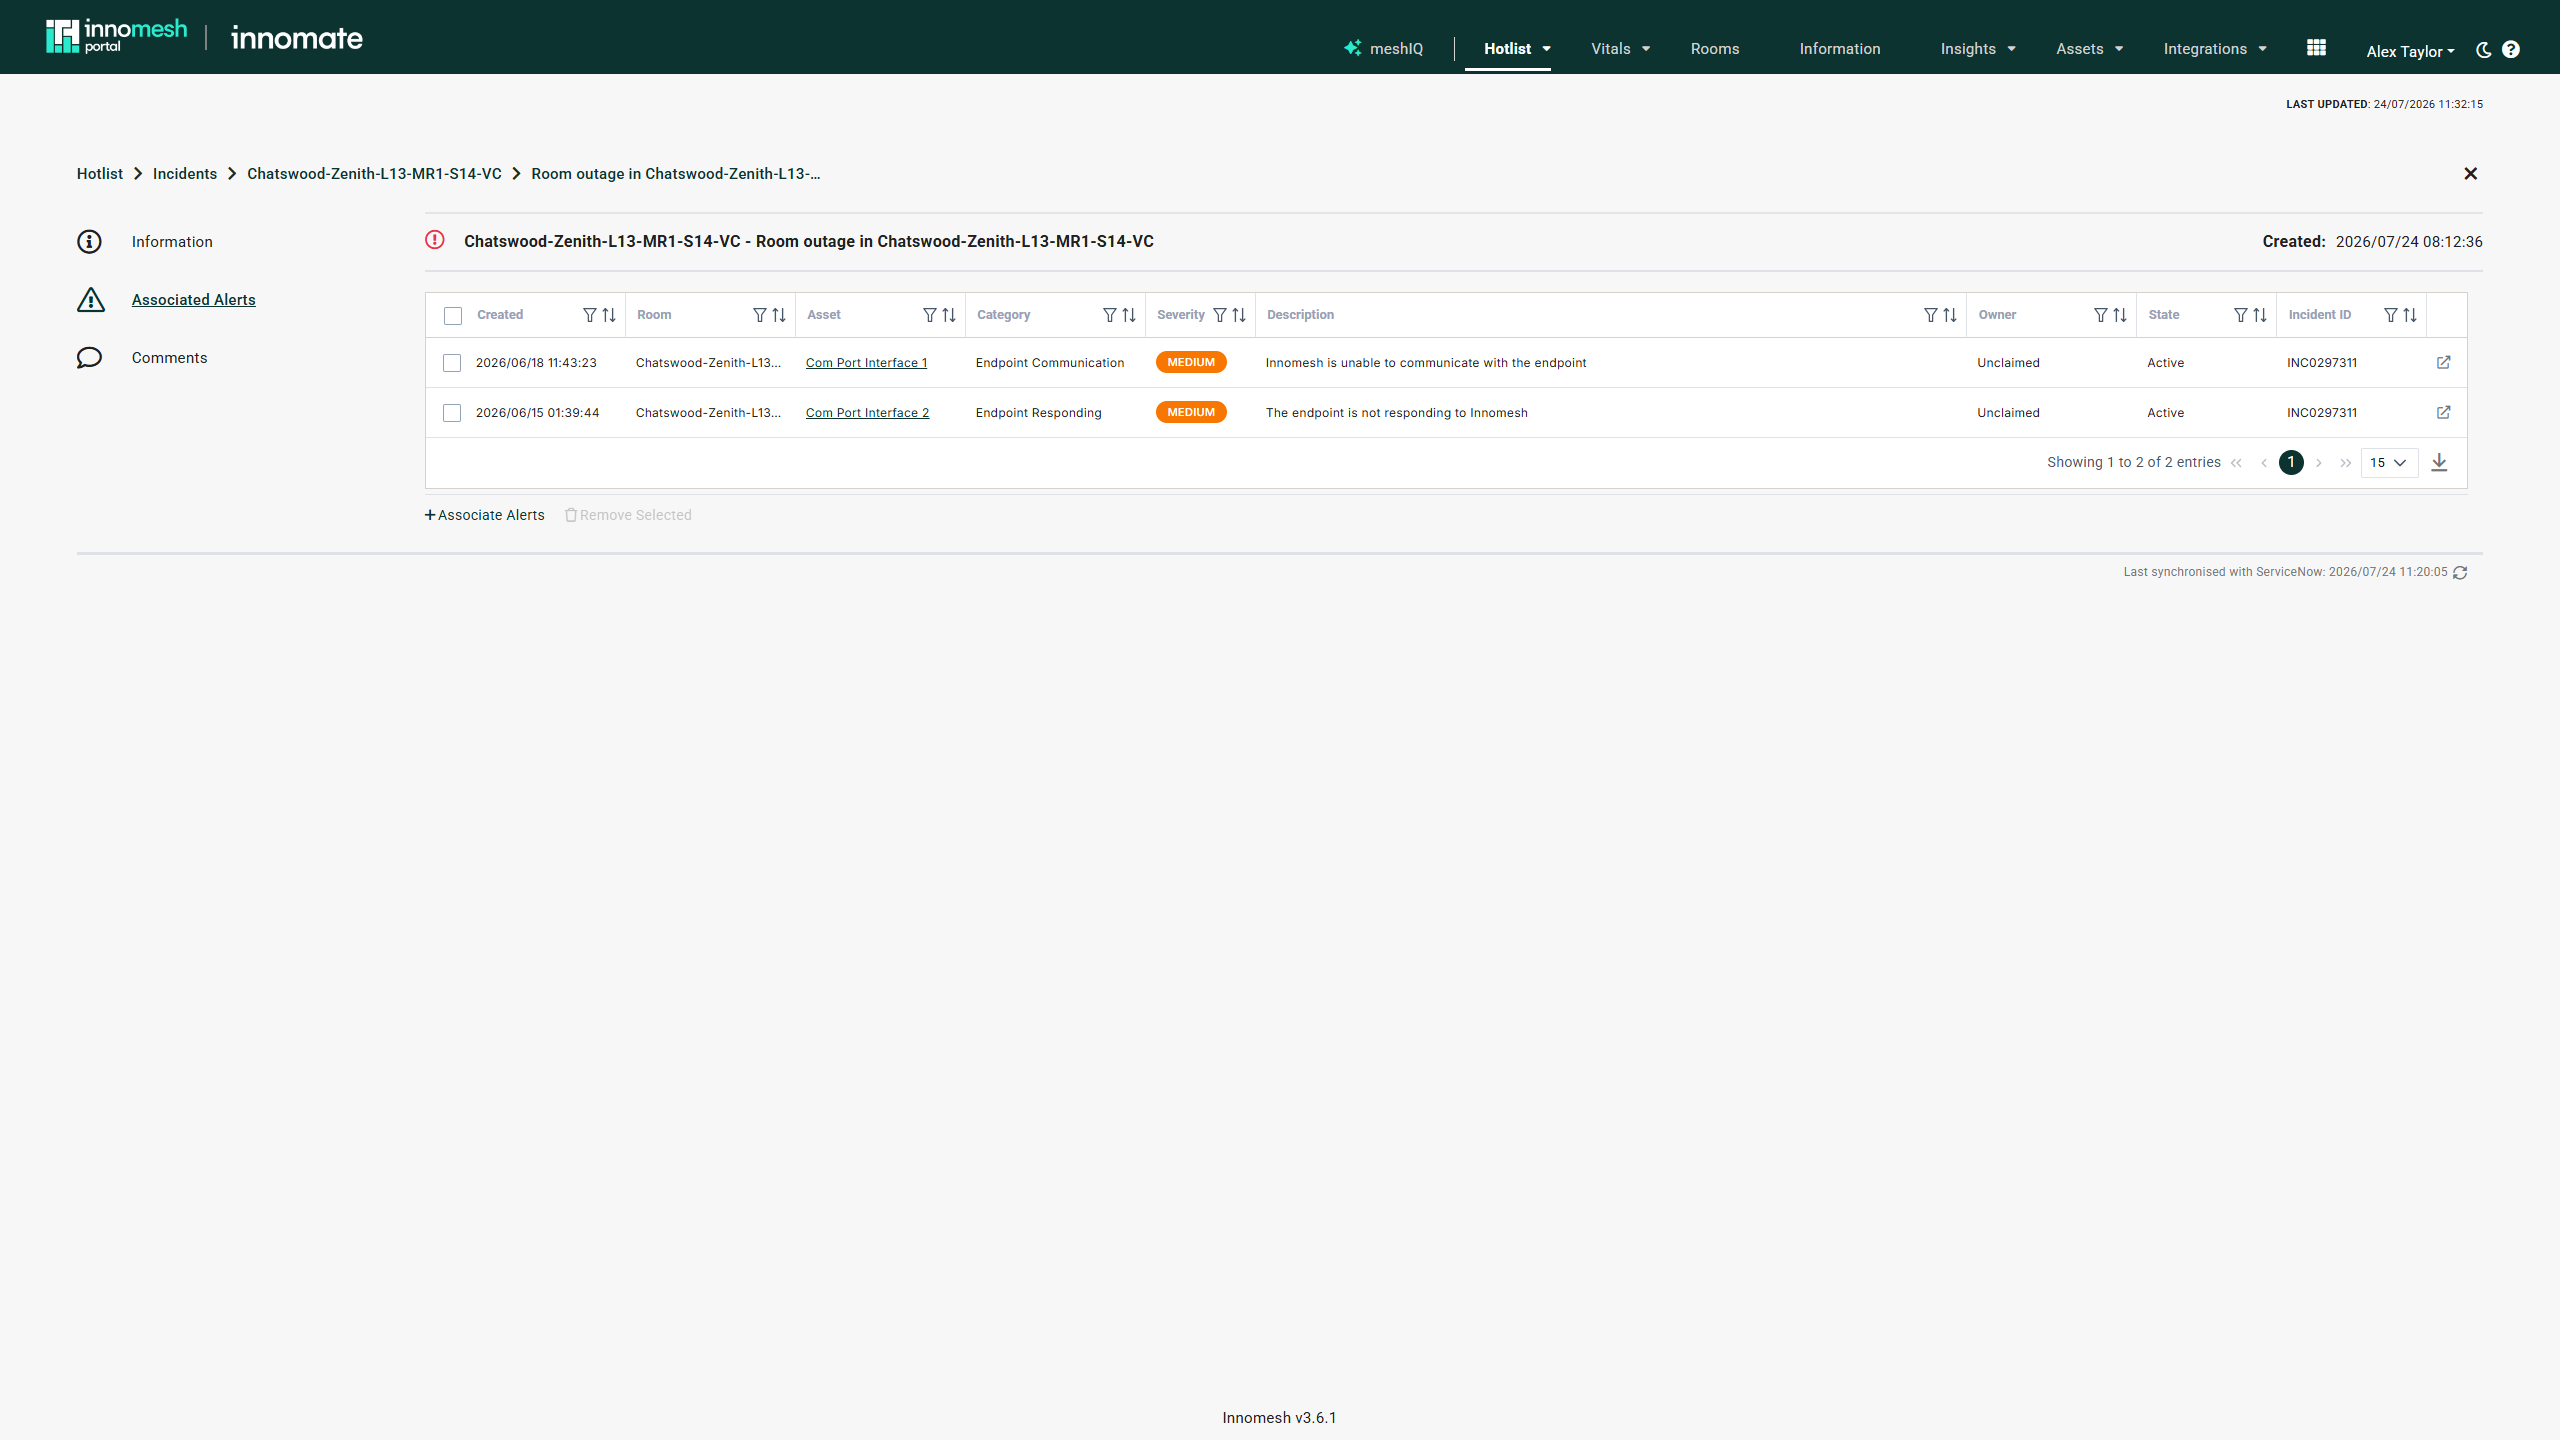 Associated Alerts | Innomesh Portal
| Column | Description |
|---|---|
| Created | When the alert was raised |
| Room | Room the alert belongs to |
| Asset | Asset the alert was raised against |
| Category | Alert category |
| Severity | Coloured severity badge |
| Description | Alert description |
| Owner | Alert owner |
| State | Alert state (active, resolved, or resurfaced) |
The trailing column carries a View Alert icon that opens the alert.
Users with incident management permission see a checkbox column and two footer actions:
-
Associate Alerts opens a dialog listing the alerts within the incident’s scope (global, room, zone, or site). Existing associations are pre-selected; tick or untick to change the set.
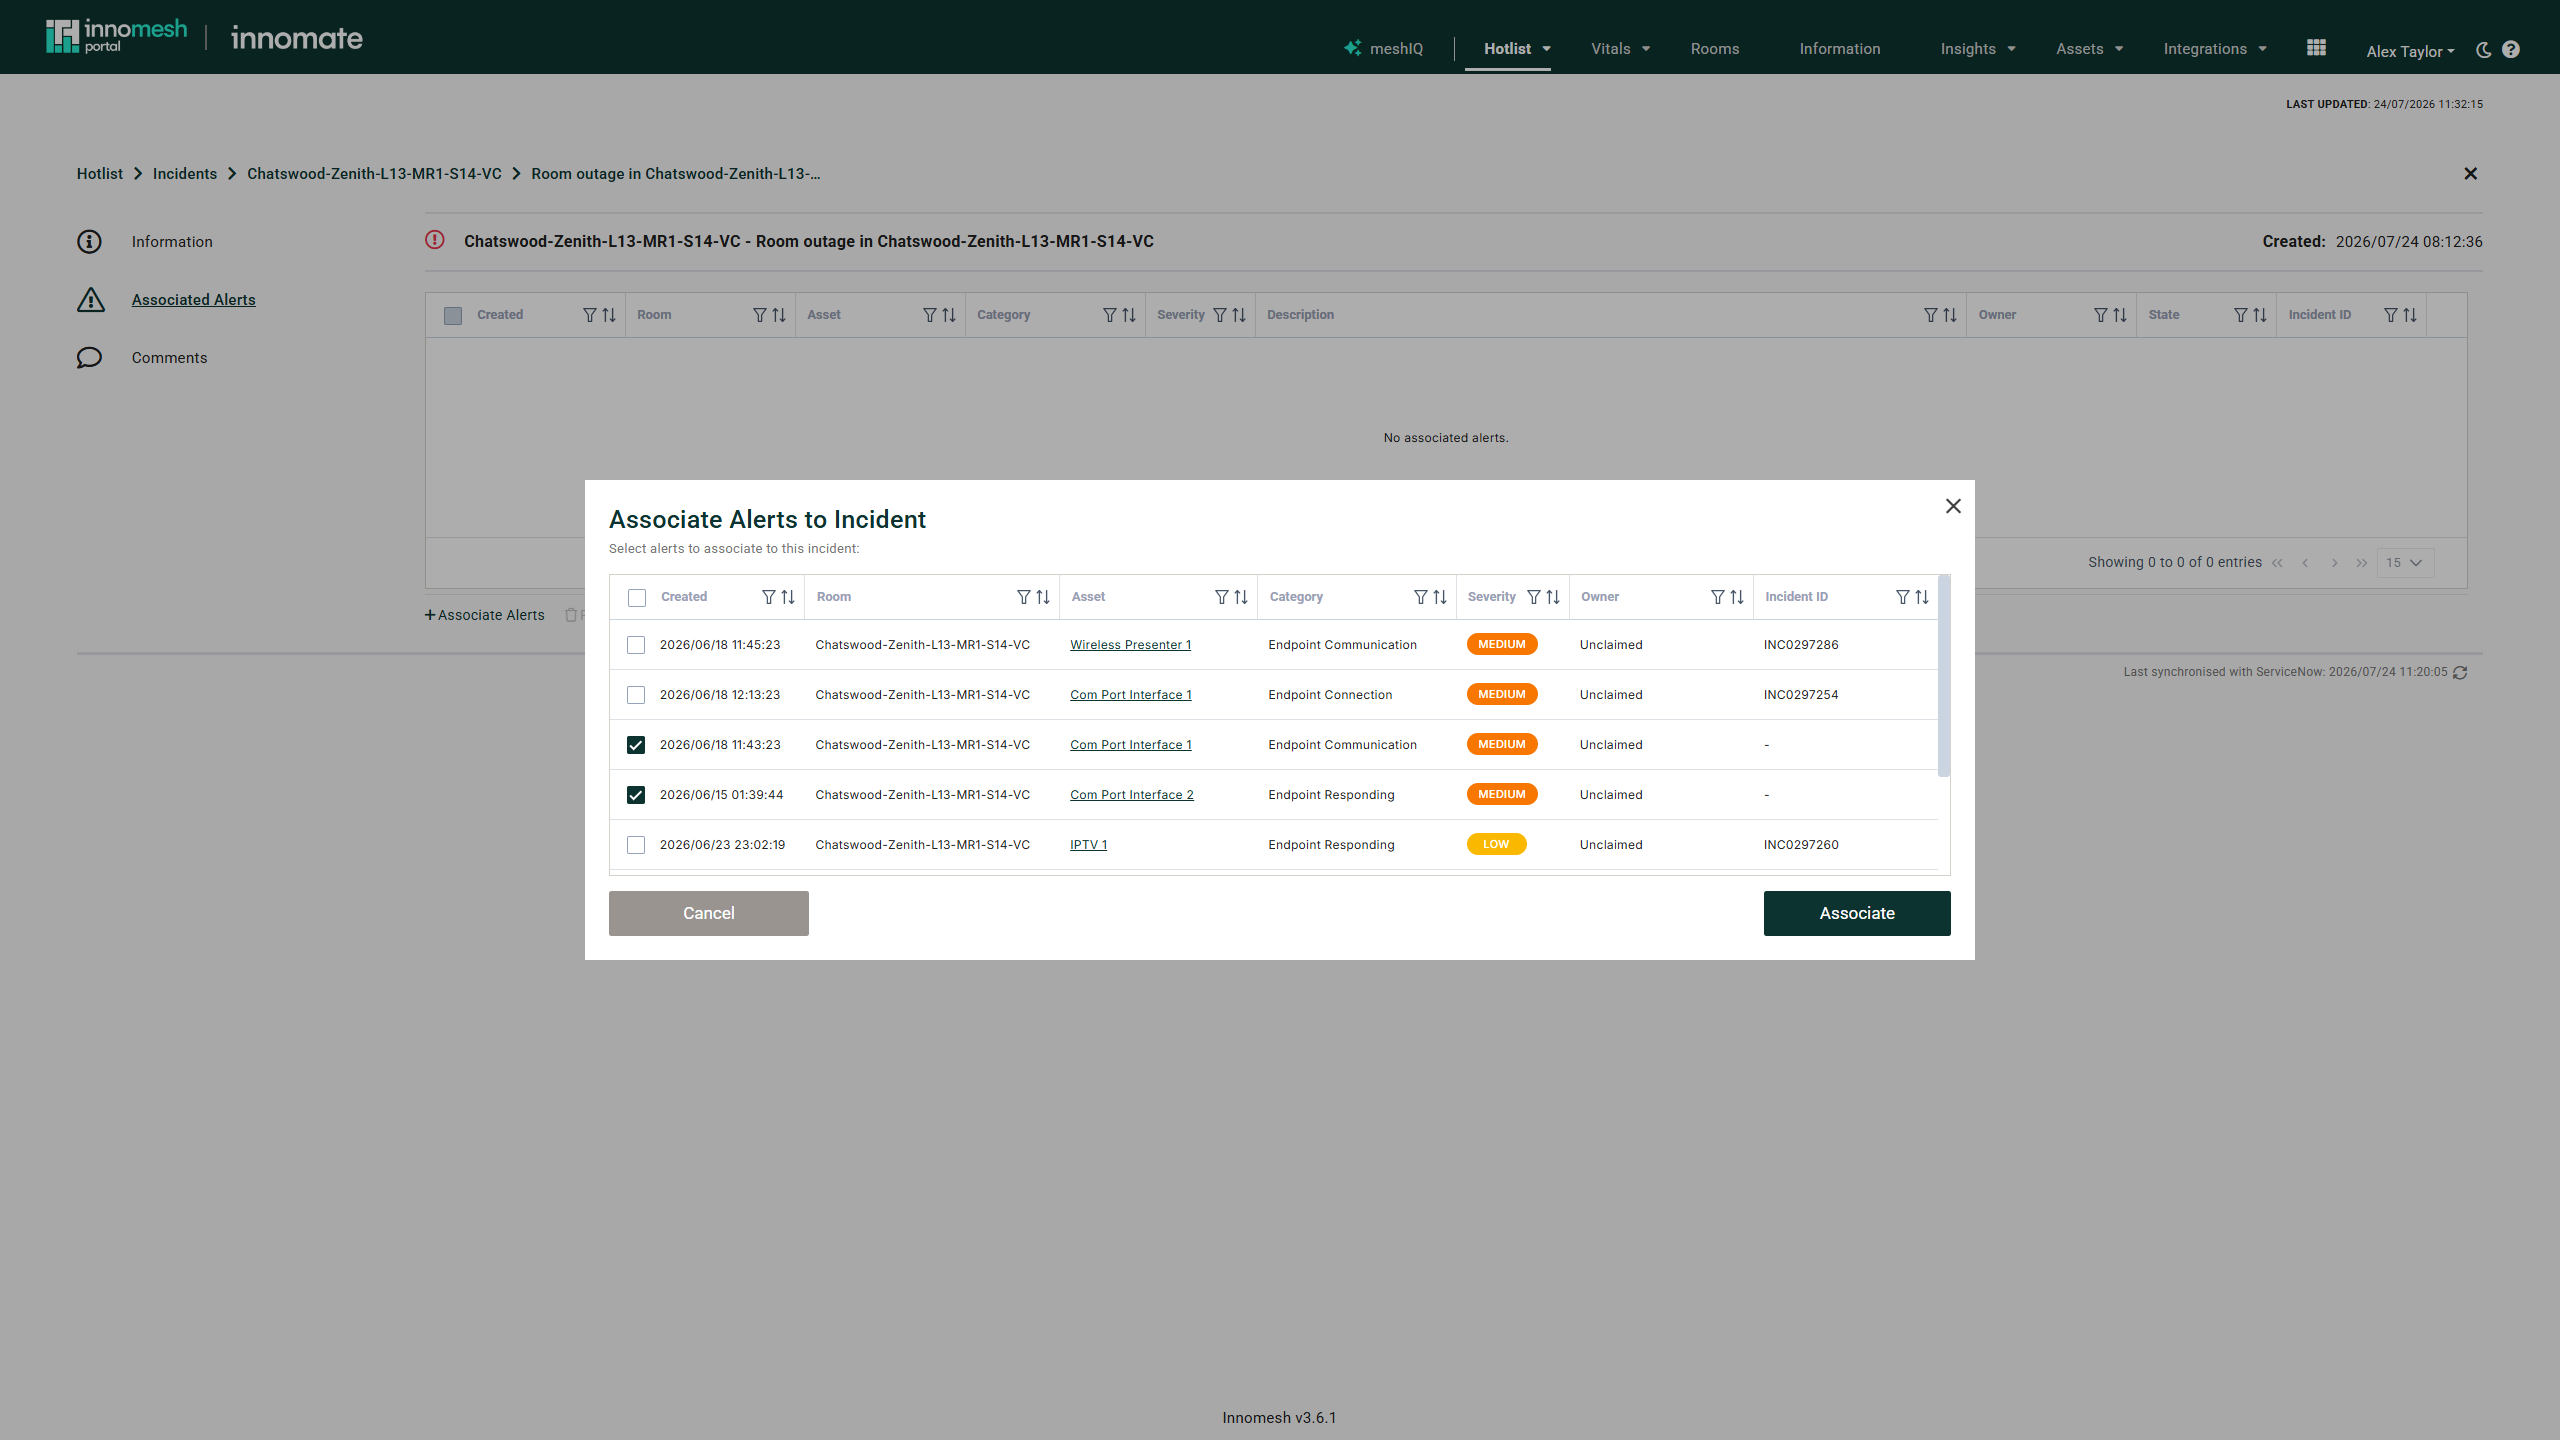
-
Remove Selected dissociates every ticked alert after confirmation. The alerts themselves are unaffected.
Comments
Comments are listed with the post timestamp, author, and body.
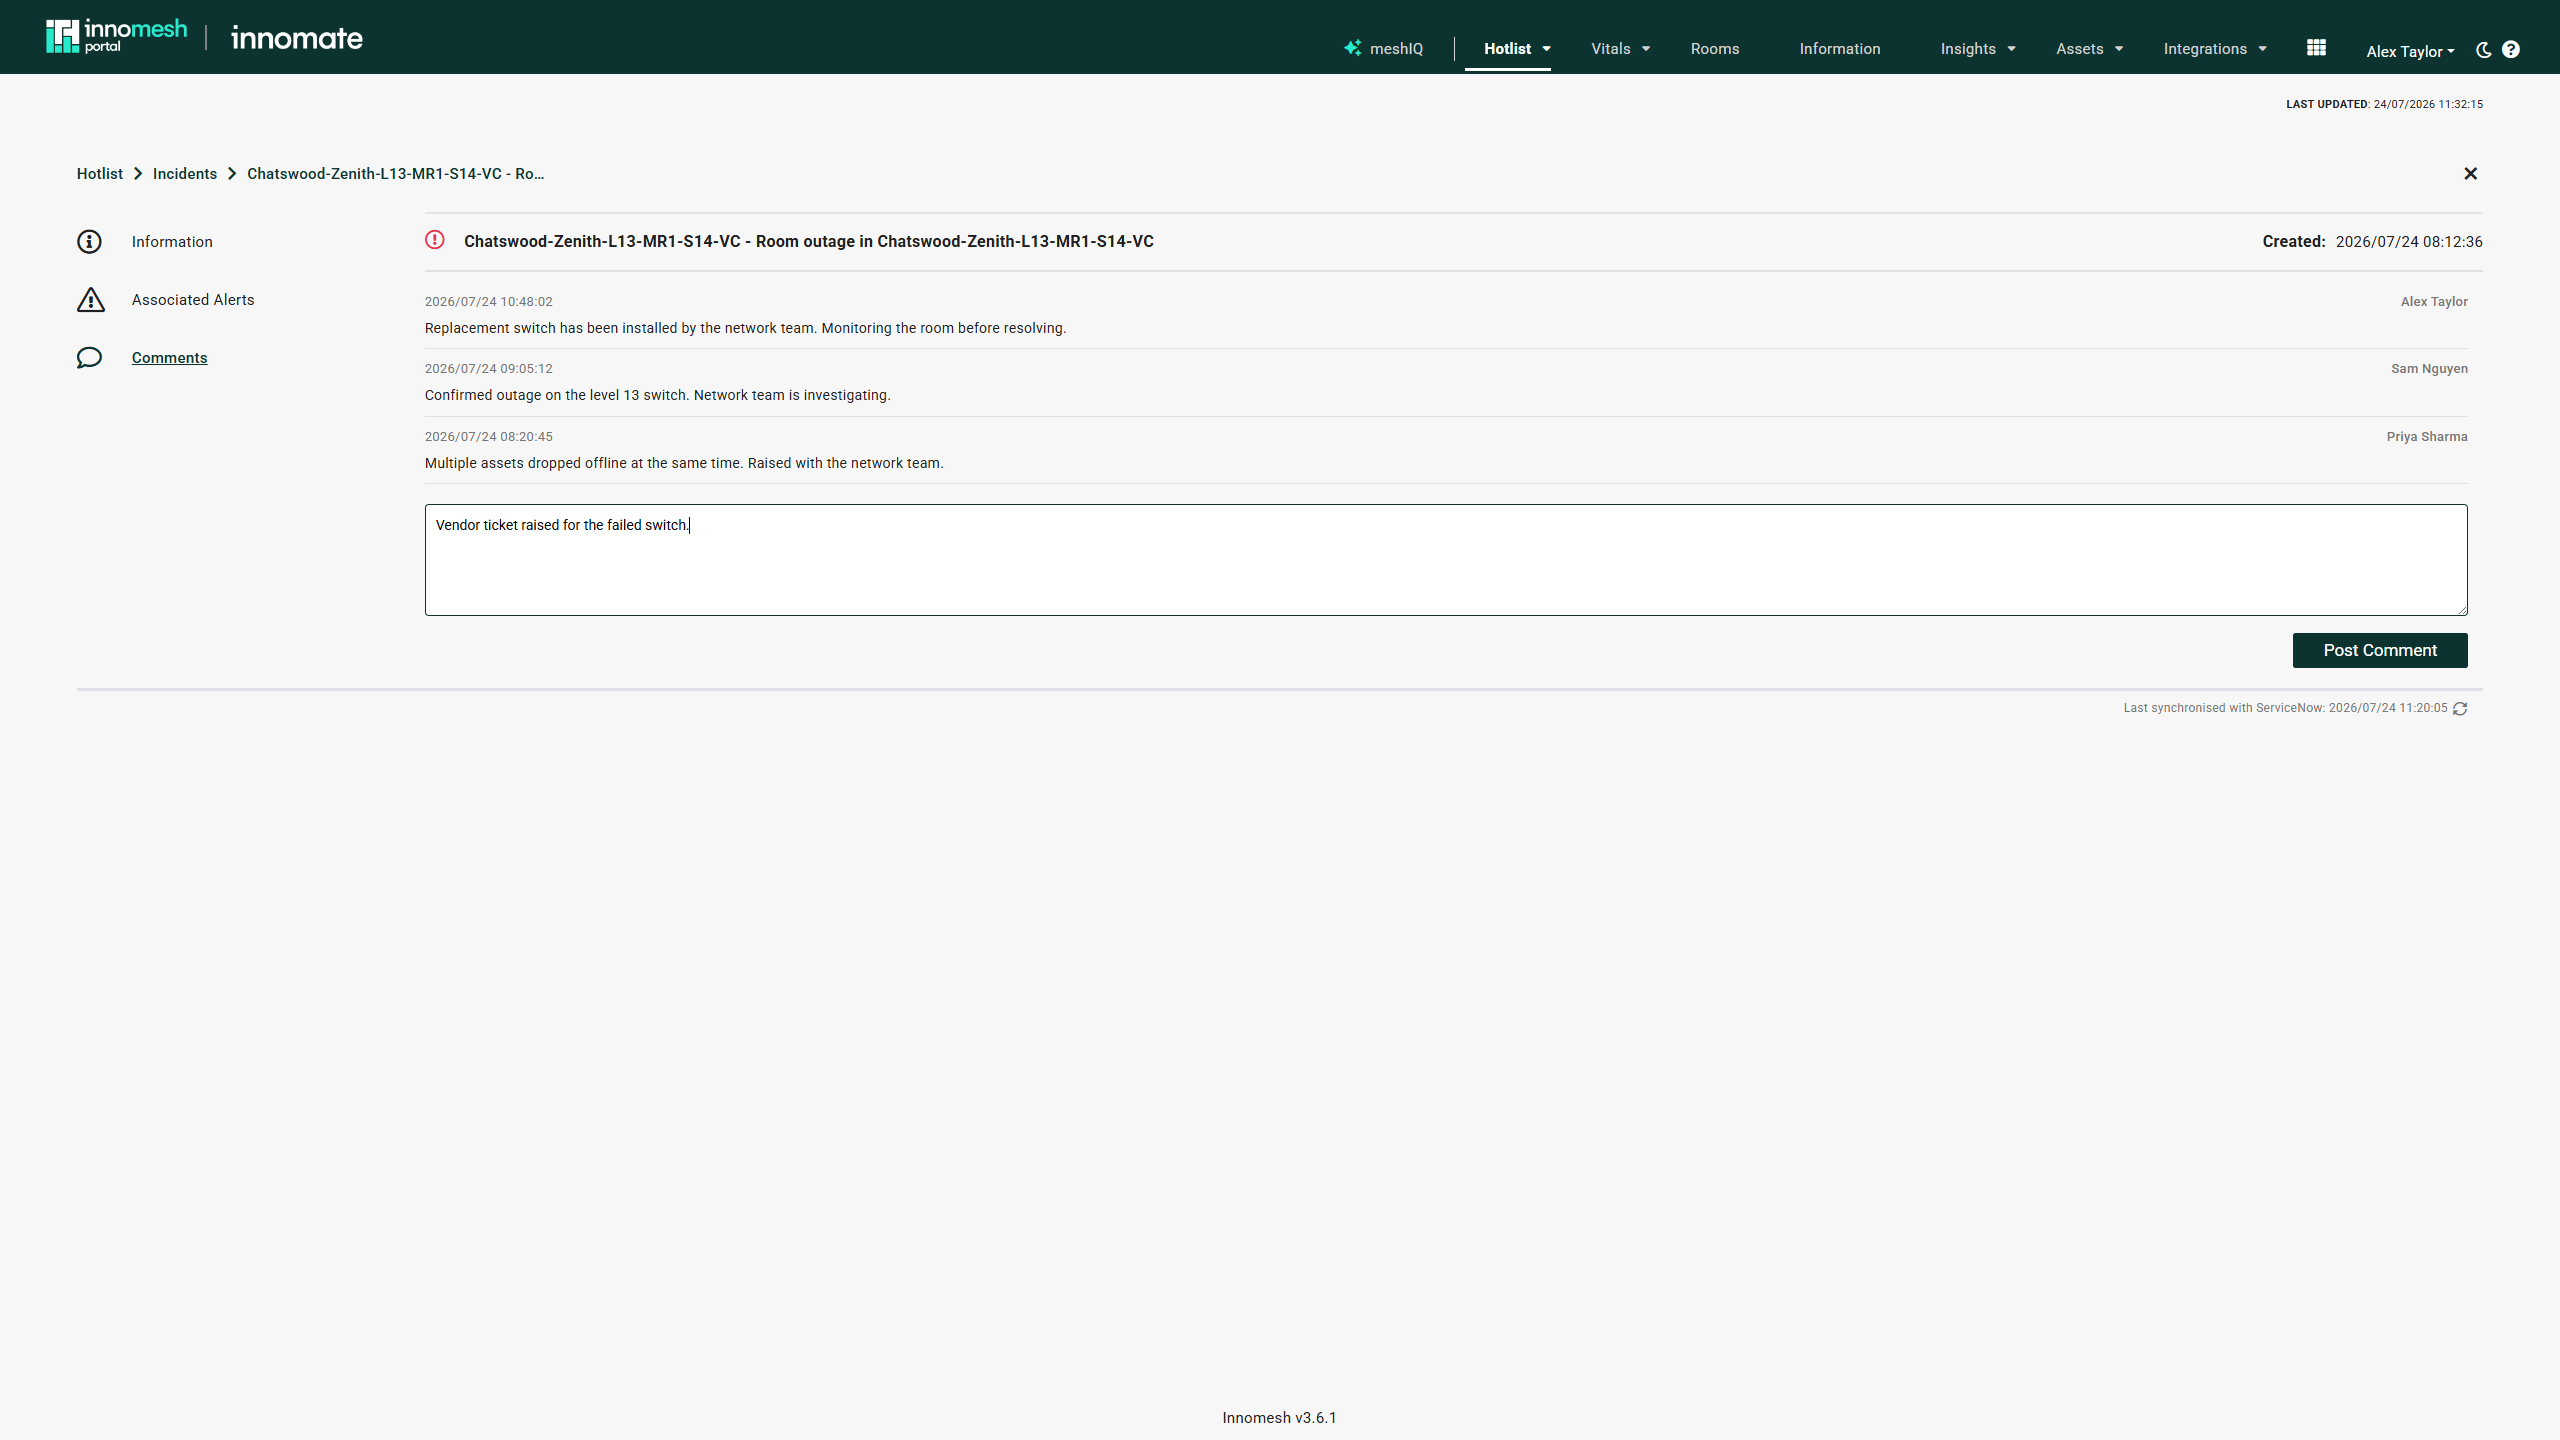 Comments | Innomesh Portal
Users with incident management permission see a New comment field. Enter text and click Post Comment; the button is enabled once the field has content.
Resolving an Incident
- In the Information panel, click Edit Information.
- Change State to Resolved.
- Click Save Changes. The Resolve dialog opens.
- Pick a Resolution Code and enter Resolution Notes.
- Click Resolve.
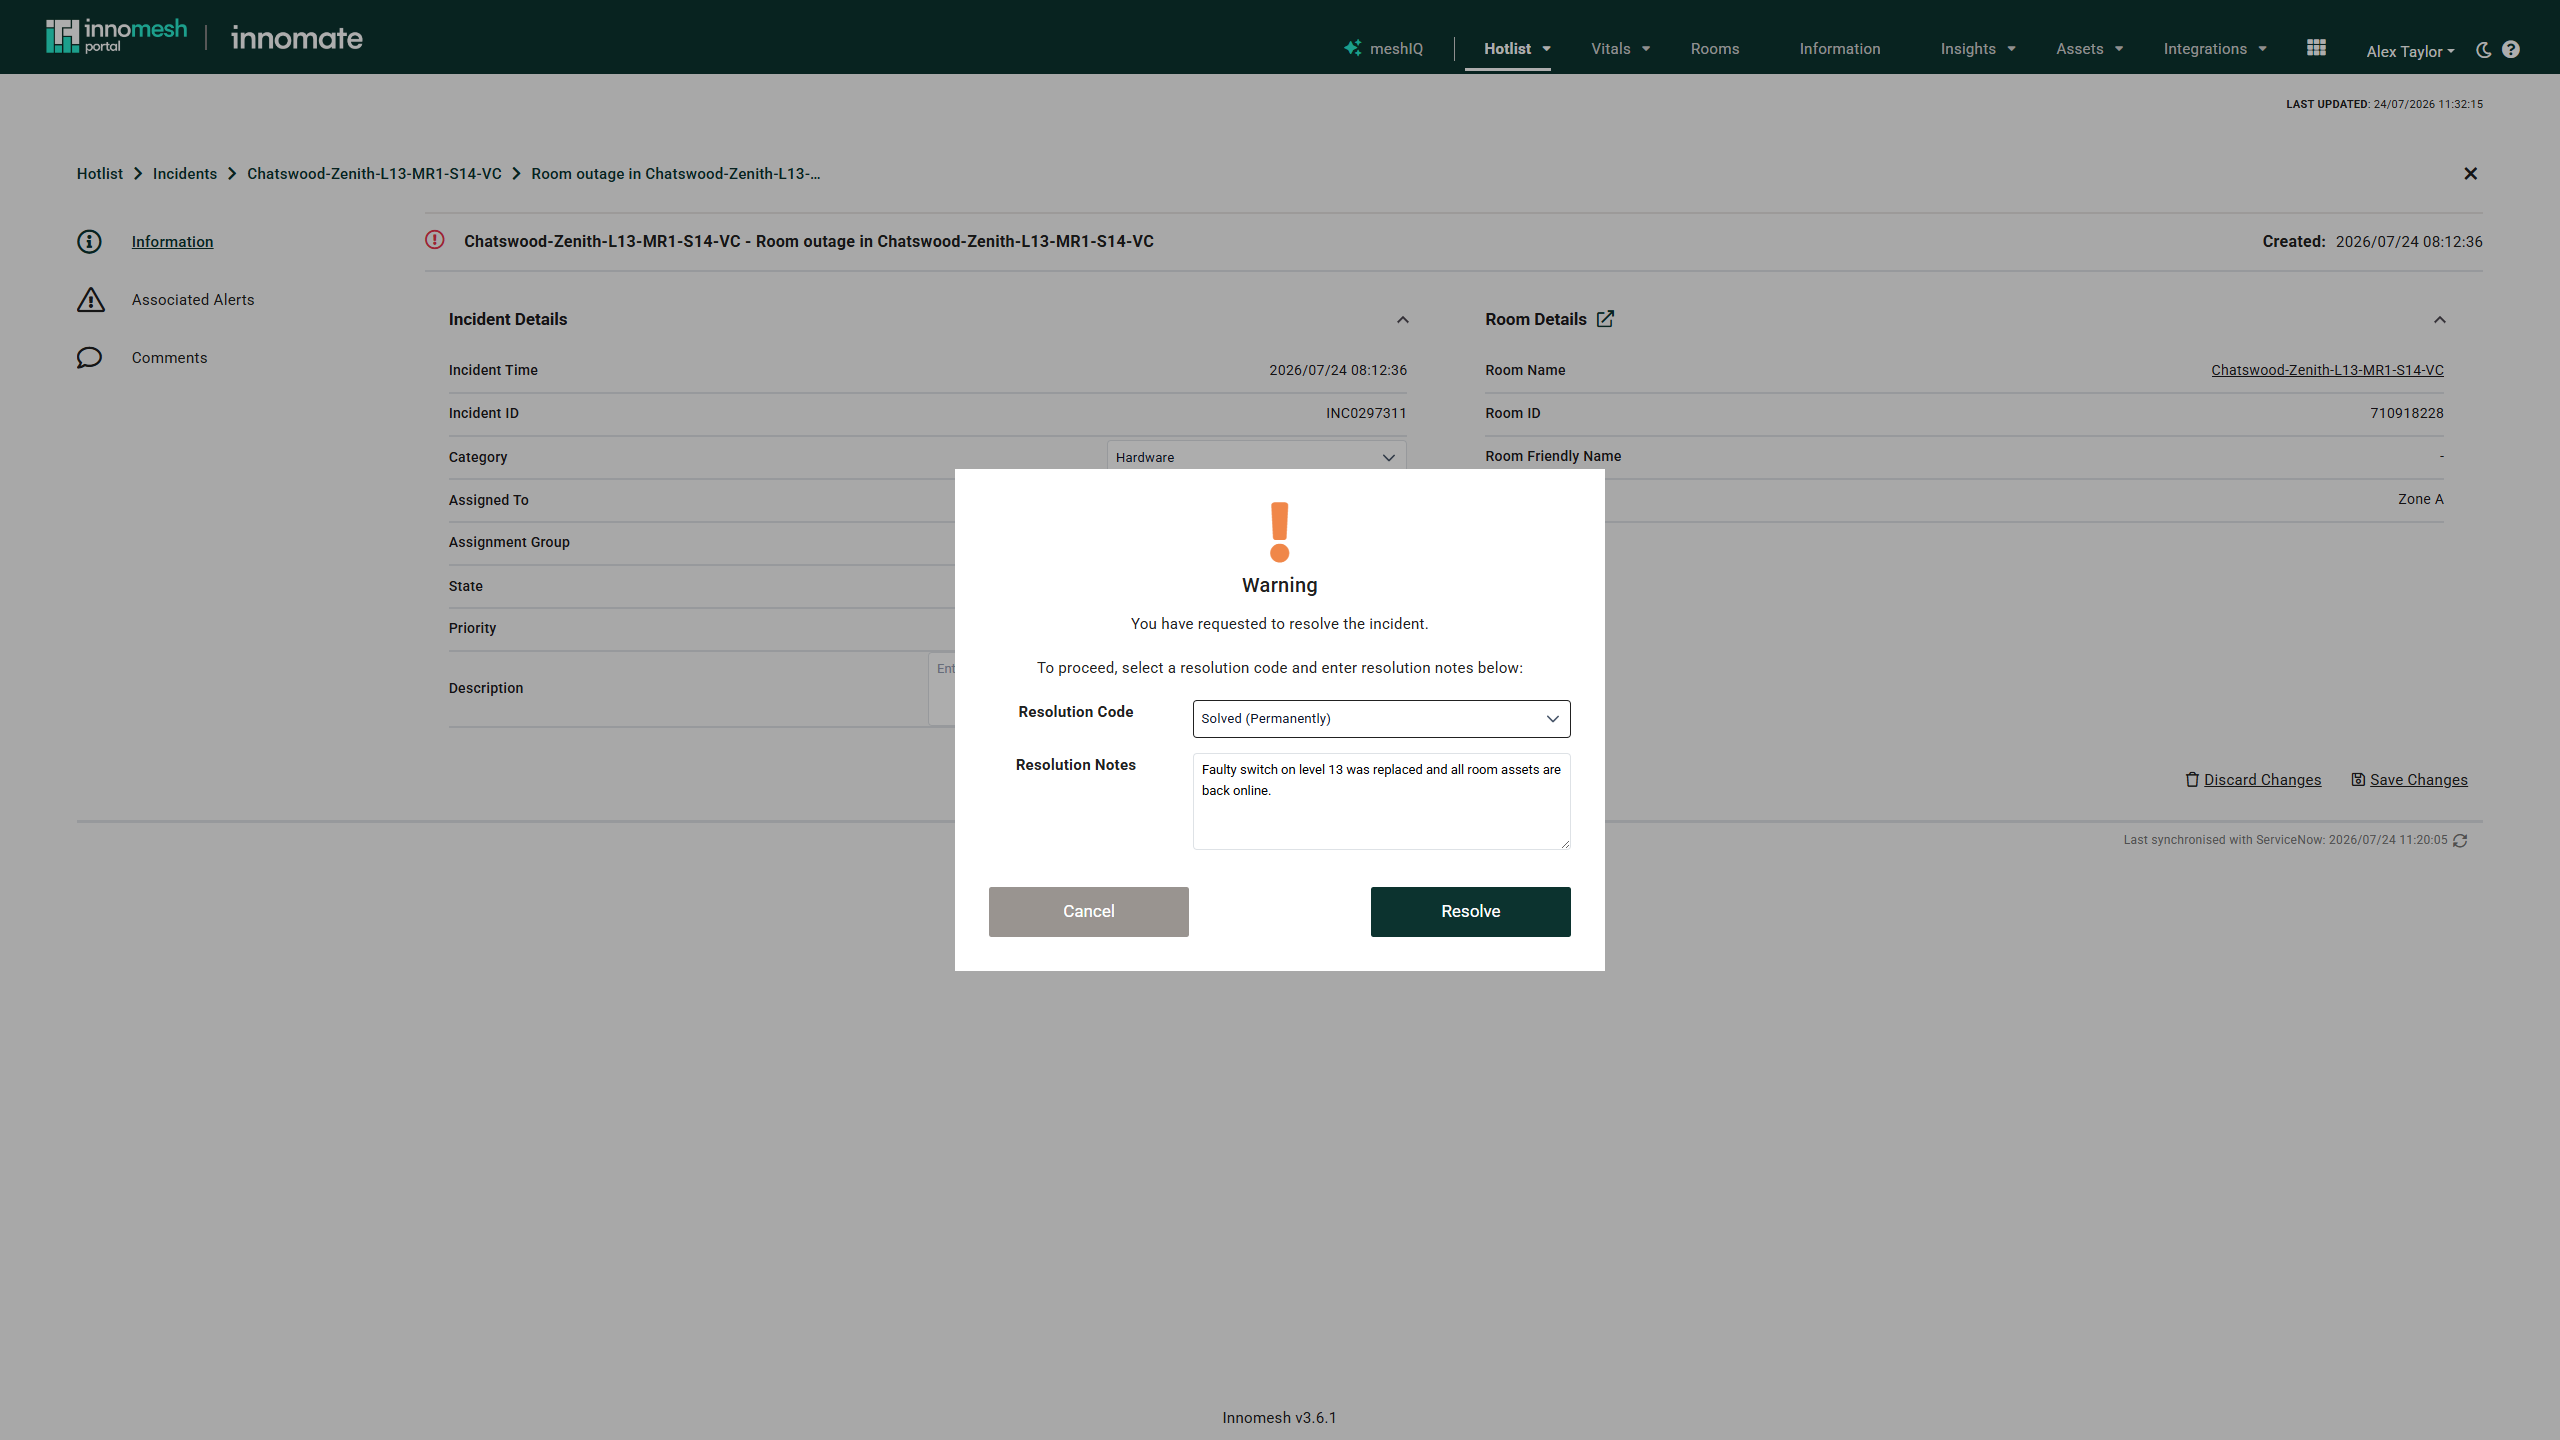
Both fields are required. The code and notes then show on the Information section alongside the resolved state.
ServiceNow Synchronisation
For tenancies with an ITSM integration, the footer of the detail view shows when the incident was last synchronised with the external system, and the Incident ID links to the matching external incident. See the ServiceNow Incident Management Integration article for how the synchronisation works.