Alert Settings is where administrators tune how Innomesh raises alerts for their tenancy. It currently hosts Severity Rules: self-service rules that override the default severity an alert would otherwise be assigned, or suppress and drop alerts that are not actionable in your environment. Previously, severity changes required a support request to Innomate; severity rules put this control in the hands of tenant administrators.
Accessing Alert Settings
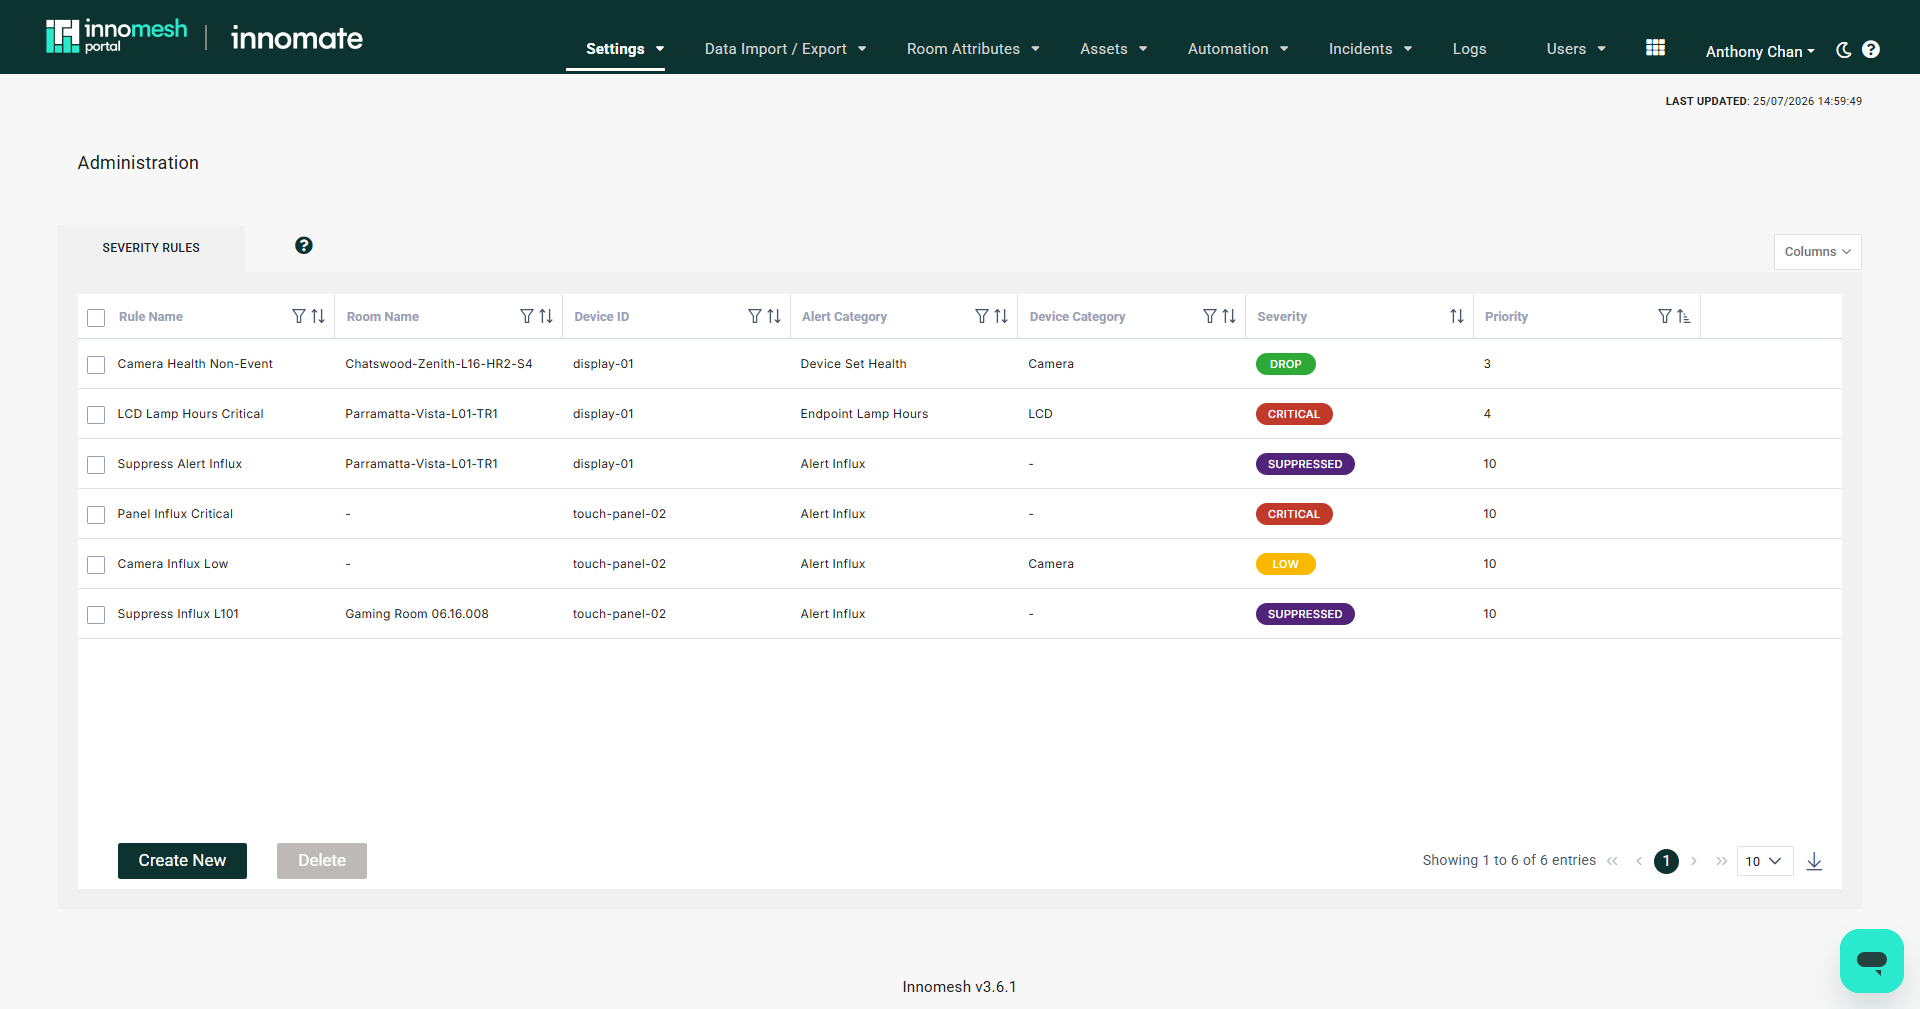
Navigate to Administration > Settings > Alert Settings in Innomesh Portal. The page opens on the Severity Rules tab, which lists every rule defined for your tenancy.
How Severity Rules Work
Every alert type carries a default severity, documented in the alert catalogue. A severity rule overrides that default for alerts matching the rule’s conditions. Common uses:
- Escalate alerts in critical spaces, for example raising display communication failures in executive rooms to Critical.
- De-escalate alert types that are routinely low-impact in your environment.
- Suppress or drop alerts that are expected and non-actionable, such as lamp-hour warnings on devices scheduled for replacement.
A rule matches an alert when all of its configured conditions apply. Alert Category is the only mandatory condition; Room Name, Device ID, Asset Category, and Alert Description narrow the match further when set.
Rules are evaluated in priority order: the lower the priority number, the earlier the rule is evaluated. When more than one rule could match the same alert, give the rule that should win the lower priority number.
Severity Options
A rule can assign any of the five standard severities, or two special values:
| Severity | Effect on matching alerts |
|---|---|
| Critical, High, Medium, Low, Notice | The alert is raised into the Hotlist with this severity instead of its default |
| Suppressed | The alert is suppressed when raised, appearing in the Suppressed tab instead of the Active tab |
| Drop | The alert is dropped entirely before it reaches the Hotlist |
Creating a Severity Rule
- Navigate to Administration > Settings > Alert Settings.
- Click Create New.
- Complete the dialog:
| Field | Required | Description |
|---|---|---|
| Rule Name | Yes | A short, descriptive label shown in the rule list |
| Room Name | No | Restricts the rule to a single room, selected from your room list |
| Device ID | No | Restricts the rule to a specific device (e.g. dev.display.1) |
| Alert Category | Yes | The alert category the rule applies to, such as Endpoint Communication or Alert Influx |
| Asset Category | No | Restricts the rule to a device type, such as Camera, LCD, or DSP |
| Alert Description | No | Restricts the rule to alerts whose description matches the entered text |
| Severity | Yes | The severity assigned to matching alerts, or Suppressed / Drop |
| Priority | No | Evaluation order; lower numbers are evaluated first. Defaults to 10 |
- Click Save Rule.
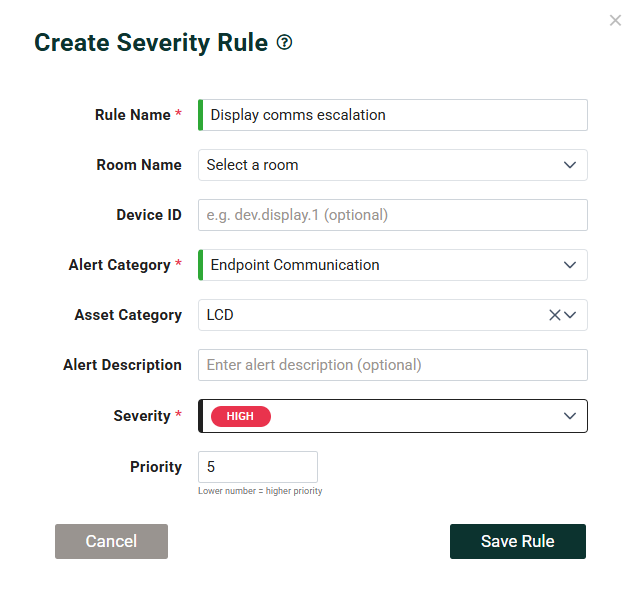
The rule applies to alerts raised after it is saved.
Managing Rules
- Edit: Click a rule in the list to open the Edit Severity Rule dialog, pre-filled with the rule’s current values.
- Delete: Select one or more rules using the row checkboxes and click Delete, then confirm. Deleted rules no longer apply to subsequent alerts.
- Customise columns: Use the Columns picker to choose which columns the list displays.
- Export: Use Download CSV to export the rule list for review or record keeping.
Severity rule changes are recorded in the audit log.