

Overview
The Innomesh Role-Based Access Control (RBAC) system allows administrators to manage user permissions across the Portal and Room Manager environments through roles and user groups. Introduced in version 3.3.0, RBAC provides granular control over which features each user can access, ensuring that team members only see and interact with the areas relevant to their responsibilities.
How Access Works
A user’s access comes from their roles. Each role sets what the user can do (its permissions) and which rooms they can do it to (its scope). The scope works through two labels on each room: its user group and its site.
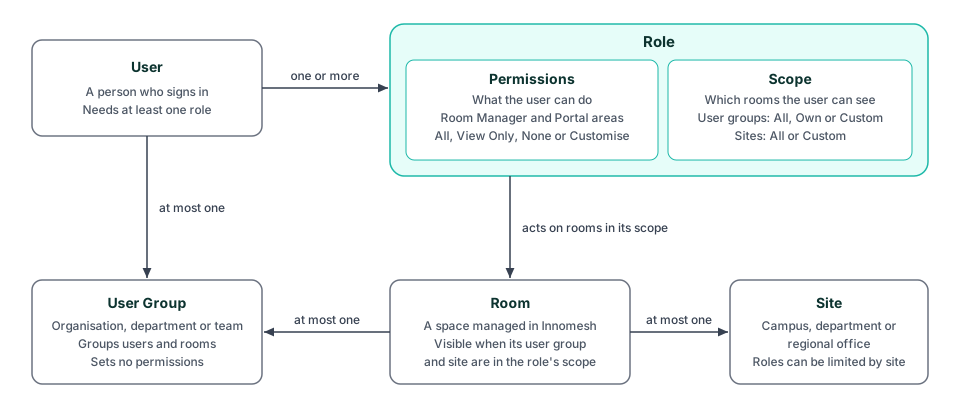
| Item | What it is | Rule |
|---|---|---|
| User | A person who signs in to Innomesh. Users are added the first time they sign in. | Needs at least one role, or has no access. Belongs to at most one user group. |
| User group | An organisation, department or team. | Groups users and rooms. Sets no permissions. |
| Role | A set of permissions plus a scope. | Sets what a user can do, and to which rooms. |
| Room | A space managed in Innomesh. | Has at most one user group and at most one site. |
| Site | A label for where a room belongs, typically a campus, department or regional office. | Lets a role be limited to certain sites. |
When a User Can See a Room
A user sees a room only when both of these are true:
- The room’s user group is within the role’s User Group Resource Access.
- The room’s site is within the role’s Site Access.
A room with no user group or no site is hidden from roles limited to specific user groups or sites.
For example, Company A builds rooms for Faculty A on a university campus:
- Site: Faculty A is set up as a site.
- User group: the rooms Company A builds are assigned to the Company A user group, and so are Company A’s staff.
- Role: Company A’s staff have a role with User Group Resource Access set to Own user group, and Site Access set to Custom with only Faculty A selected.
Company A’s staff see only the rooms in Faculty A that Company A built, not the faculty’s other rooms or any rooms at other sites.
Scope applies to rooms across most of Portal and Room Manager, but some areas always show the whole tenancy. See What Site and User Group Access Covers.
Users
The Users section displays all registered users in your Innomesh tenancy. Administrators can view and edit user roles or assign groups to users from this page. User details include their SSO provider, account request date, and assigned roles.
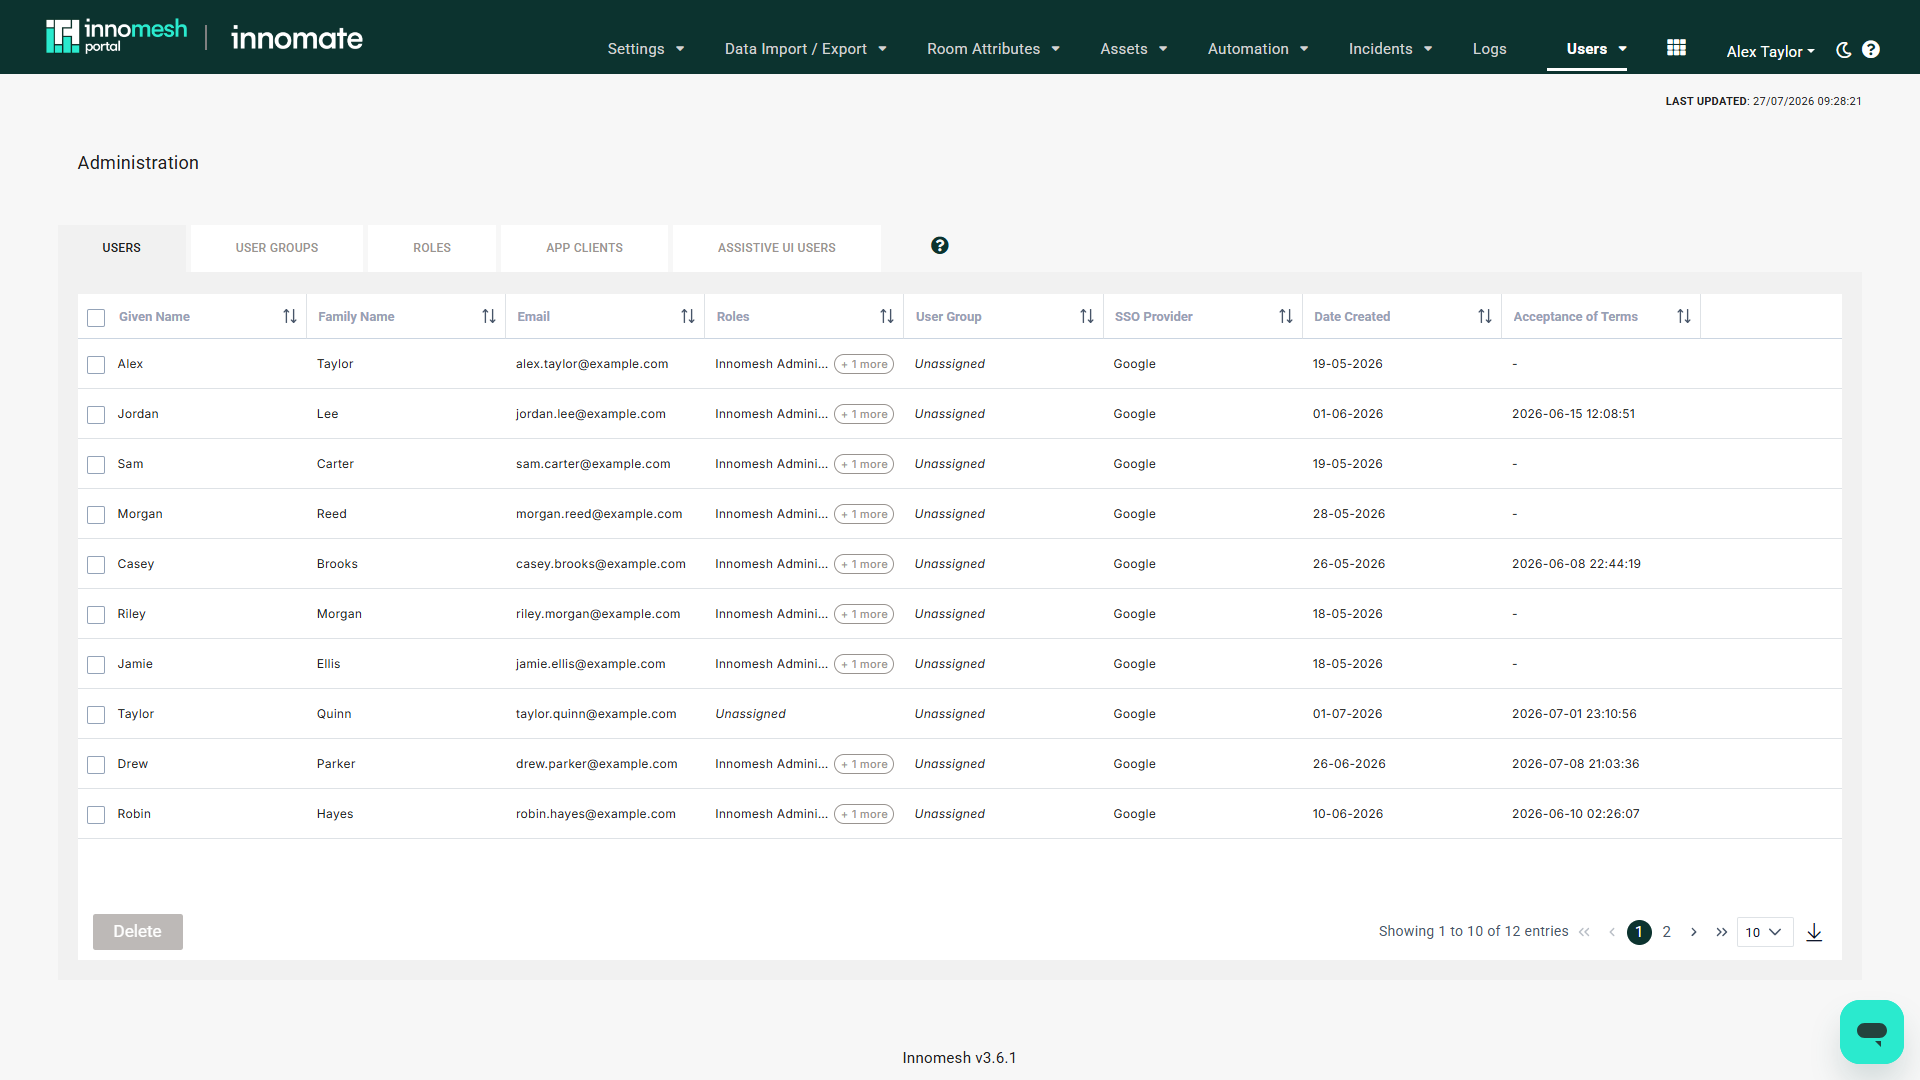
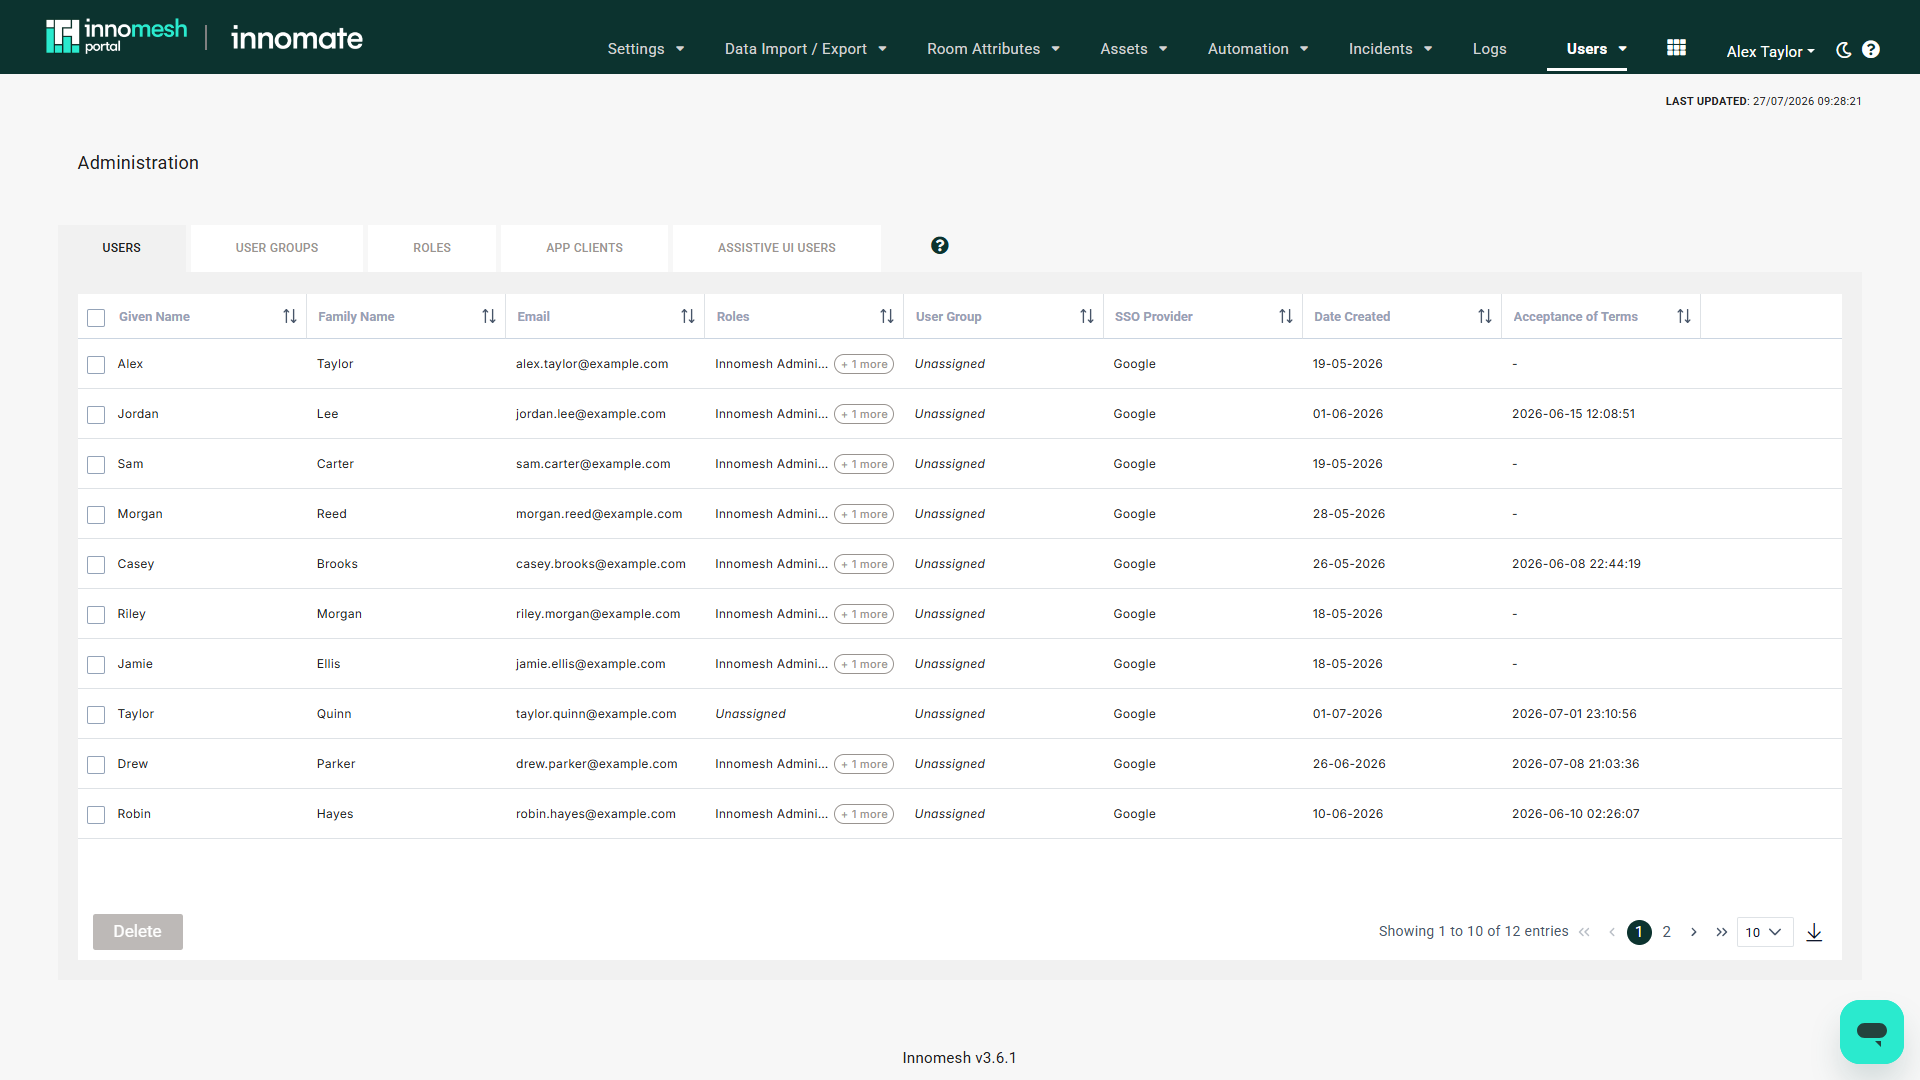
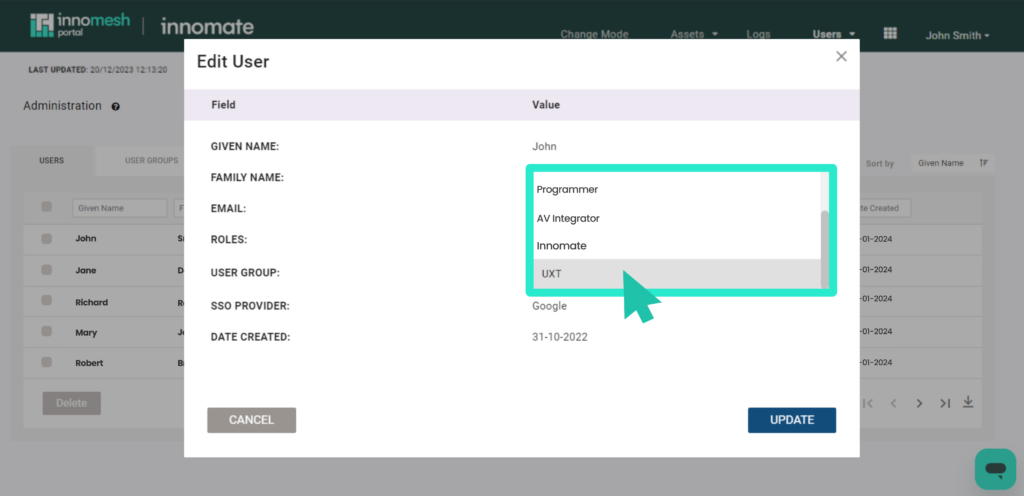
To edit a user’s role or group:
- Navigate to Administration > Users.
- Locate the user in the list.
- Click the user row to open the edit panel.
- Select one or more Roles and, optionally, a User Group.
- Save the changes.
Role changes are enforced when the user next logs in.
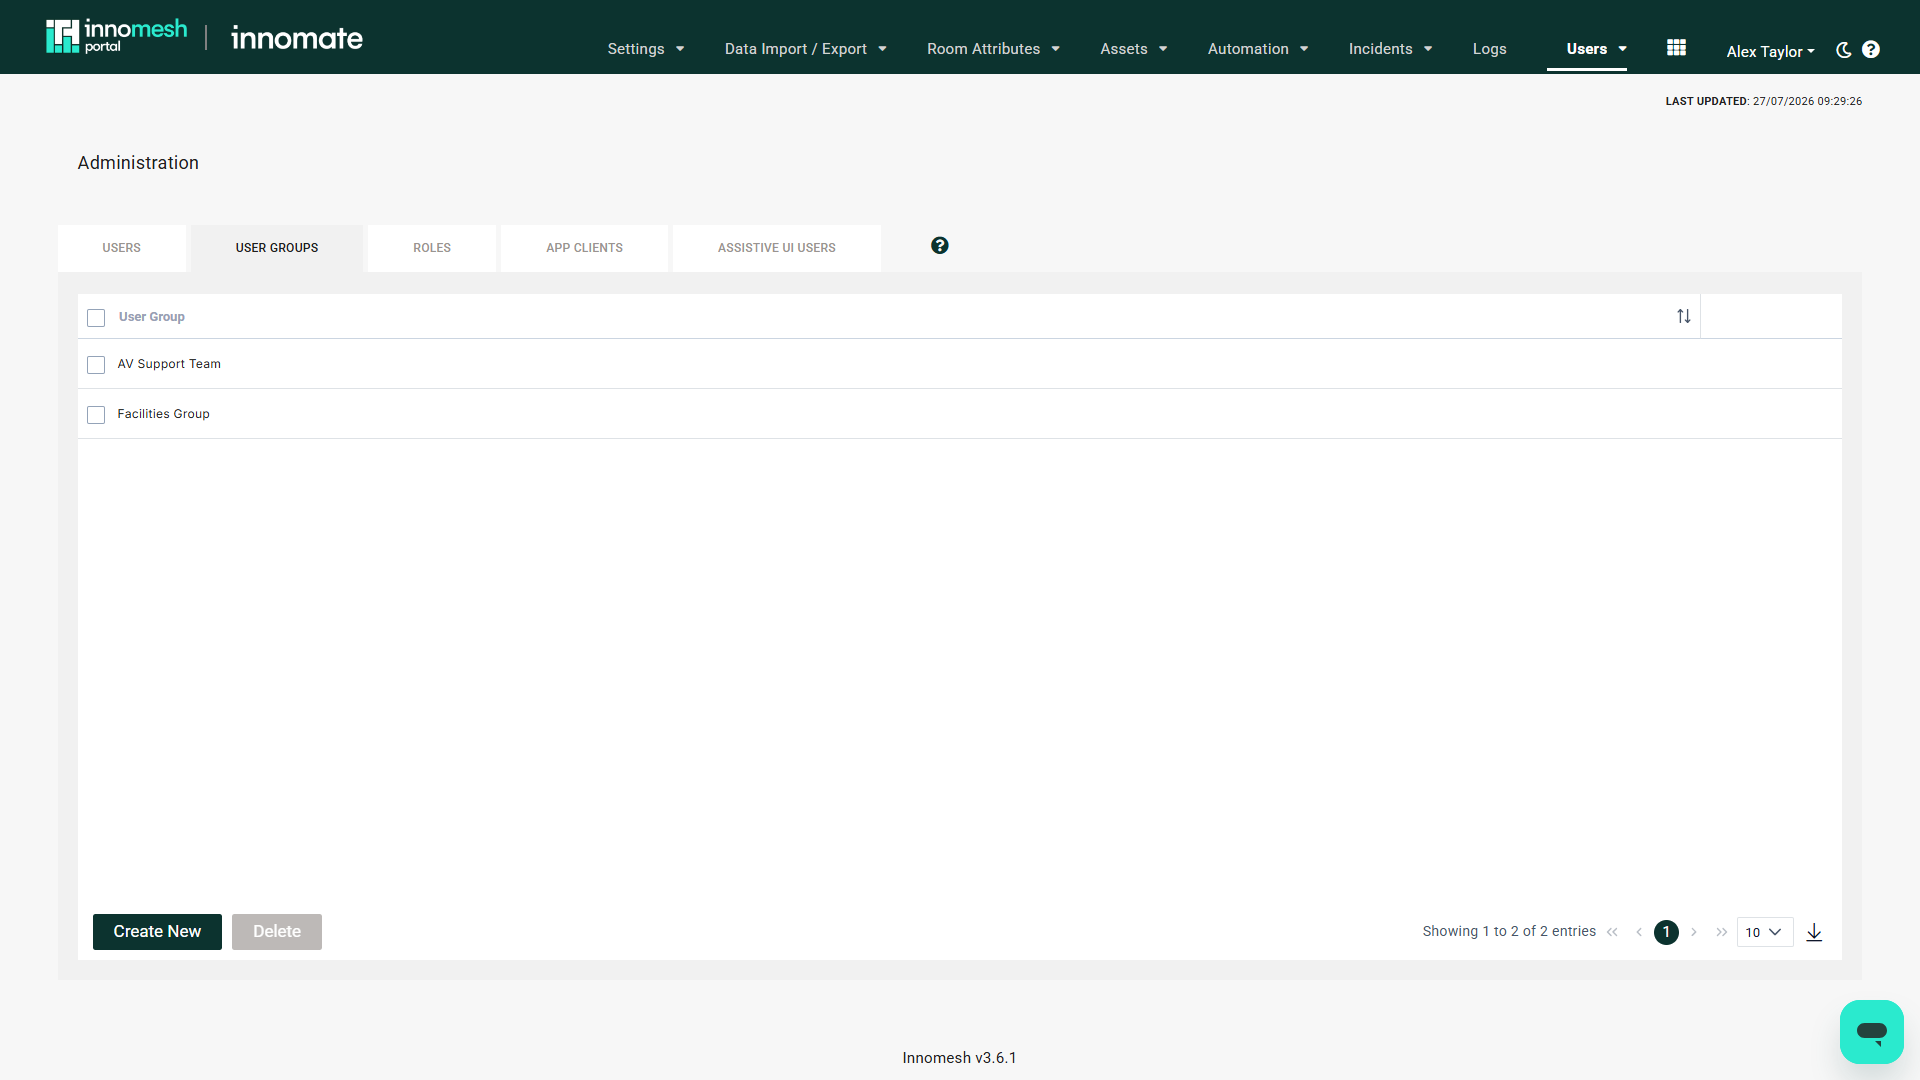
User Groups
User Groups categorise users by organisation, department, or specialisation. Groups serve an organisational purpose and are used for resource access scoping (see the General Tab section below), but they do not directly set permissions.
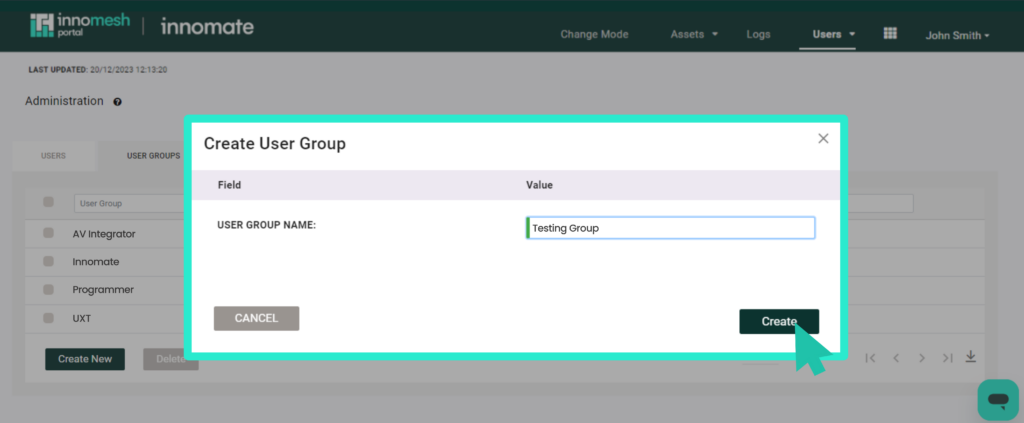
To create a user group:
- Navigate to Administration > Users > User Groups.
- Click Add Group.
- Enter the group name and description.
- Save the group.
Roles
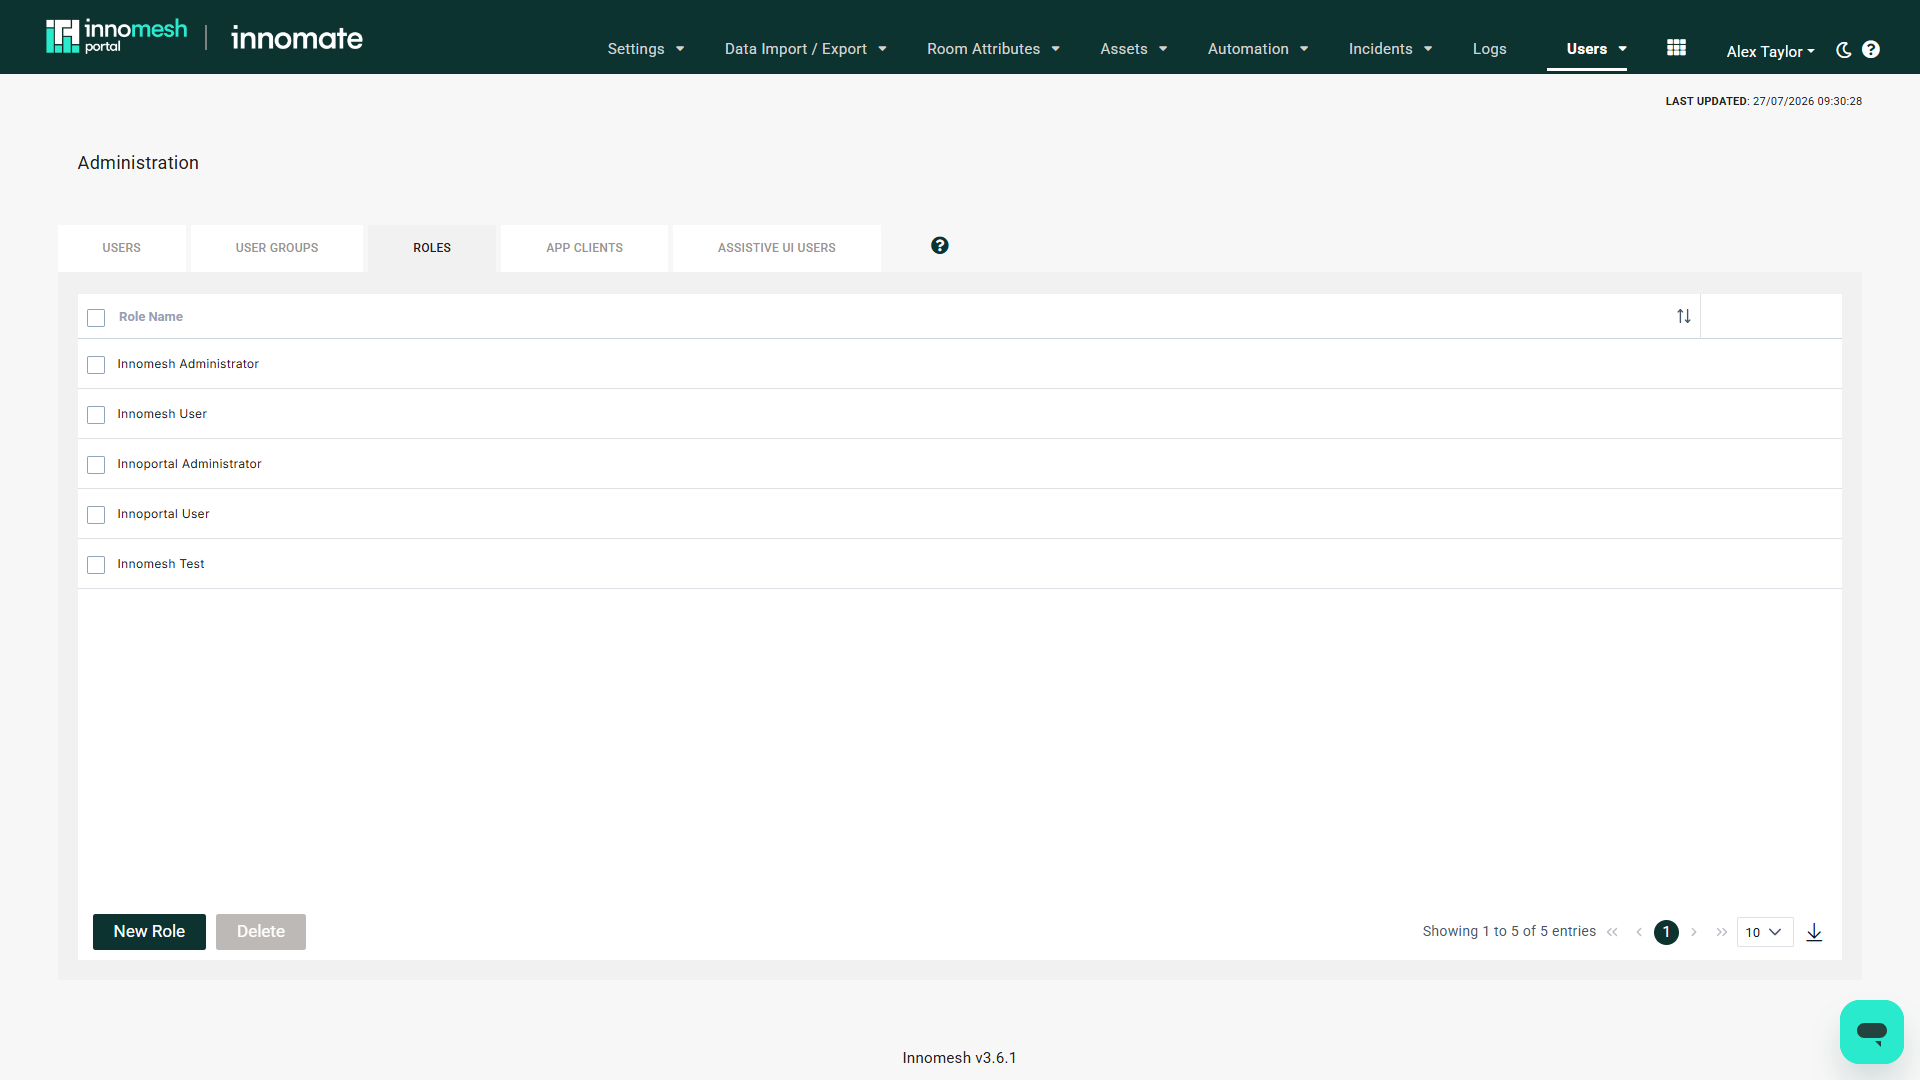
Roles define the specific access levels a user has across both Room Manager and Portal. Each role is configured through a set of tabs that control different aspects of the platform.
General Tab
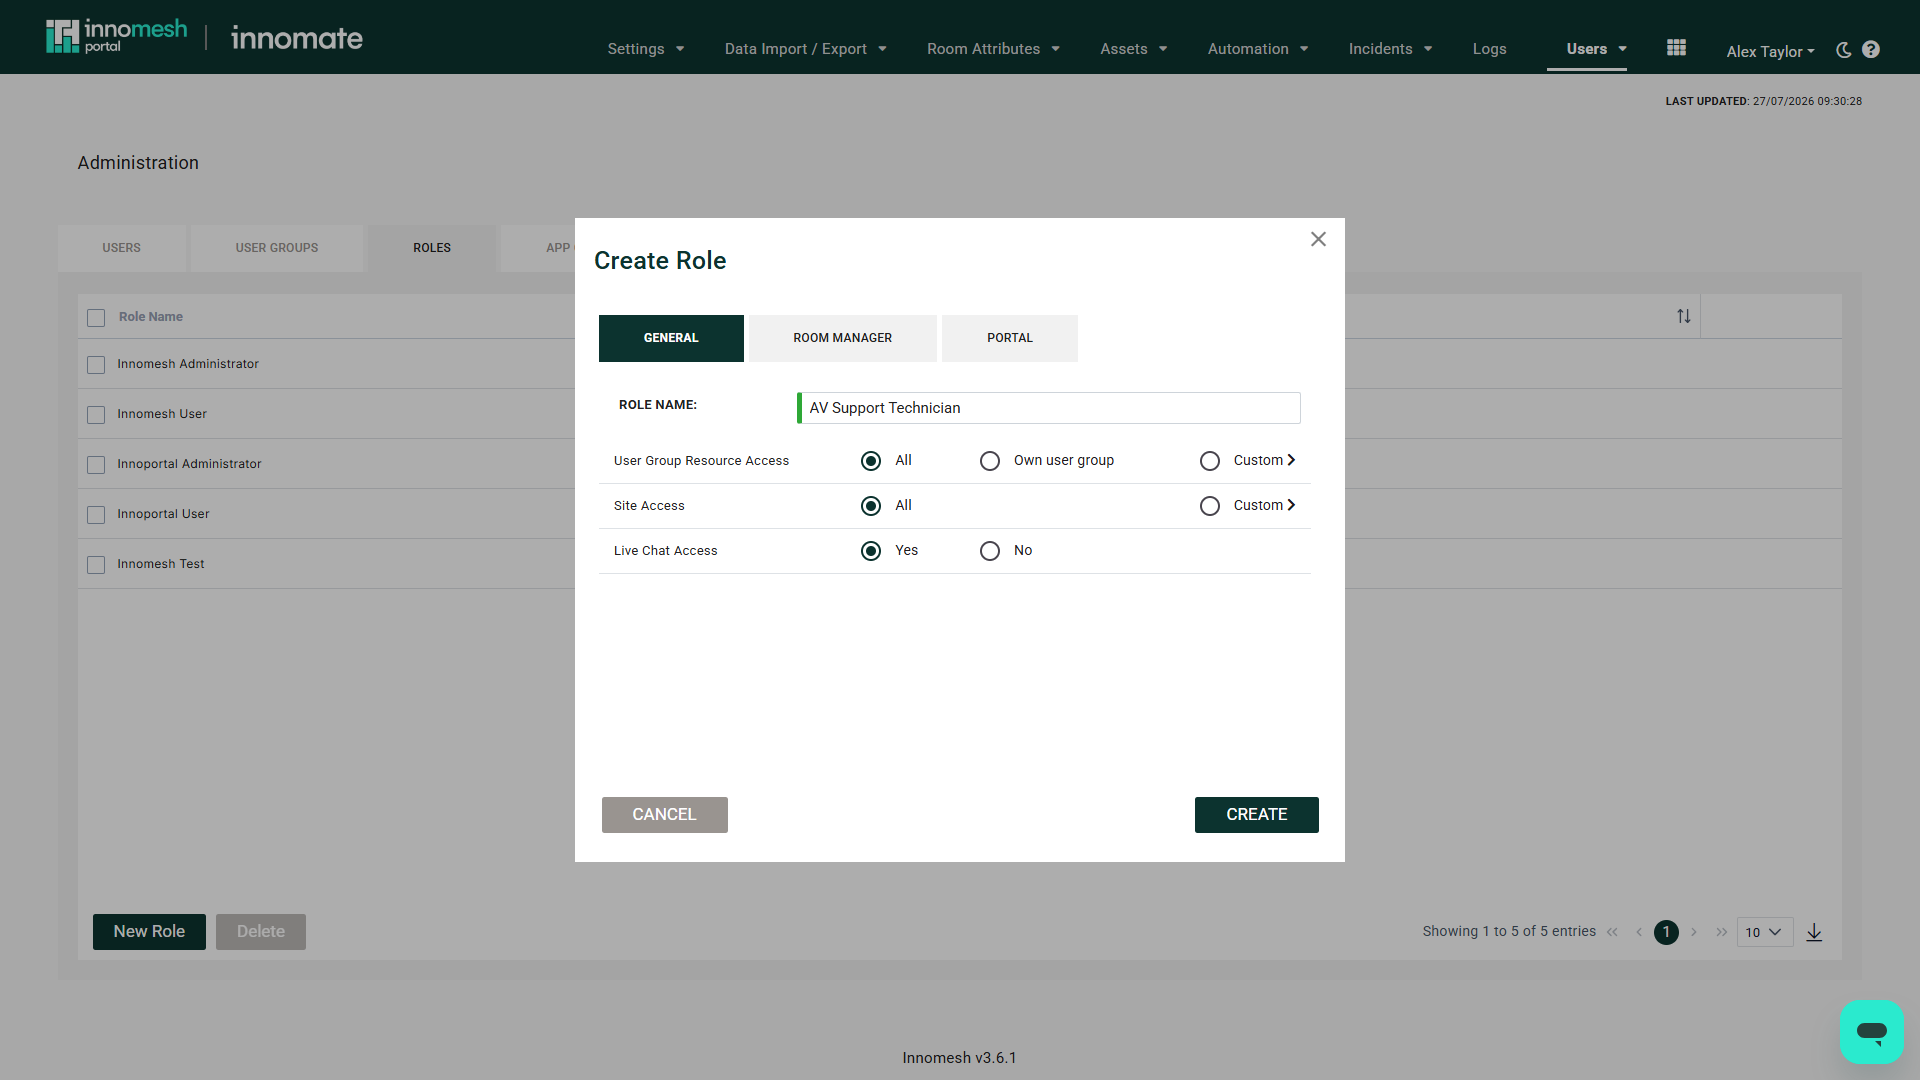
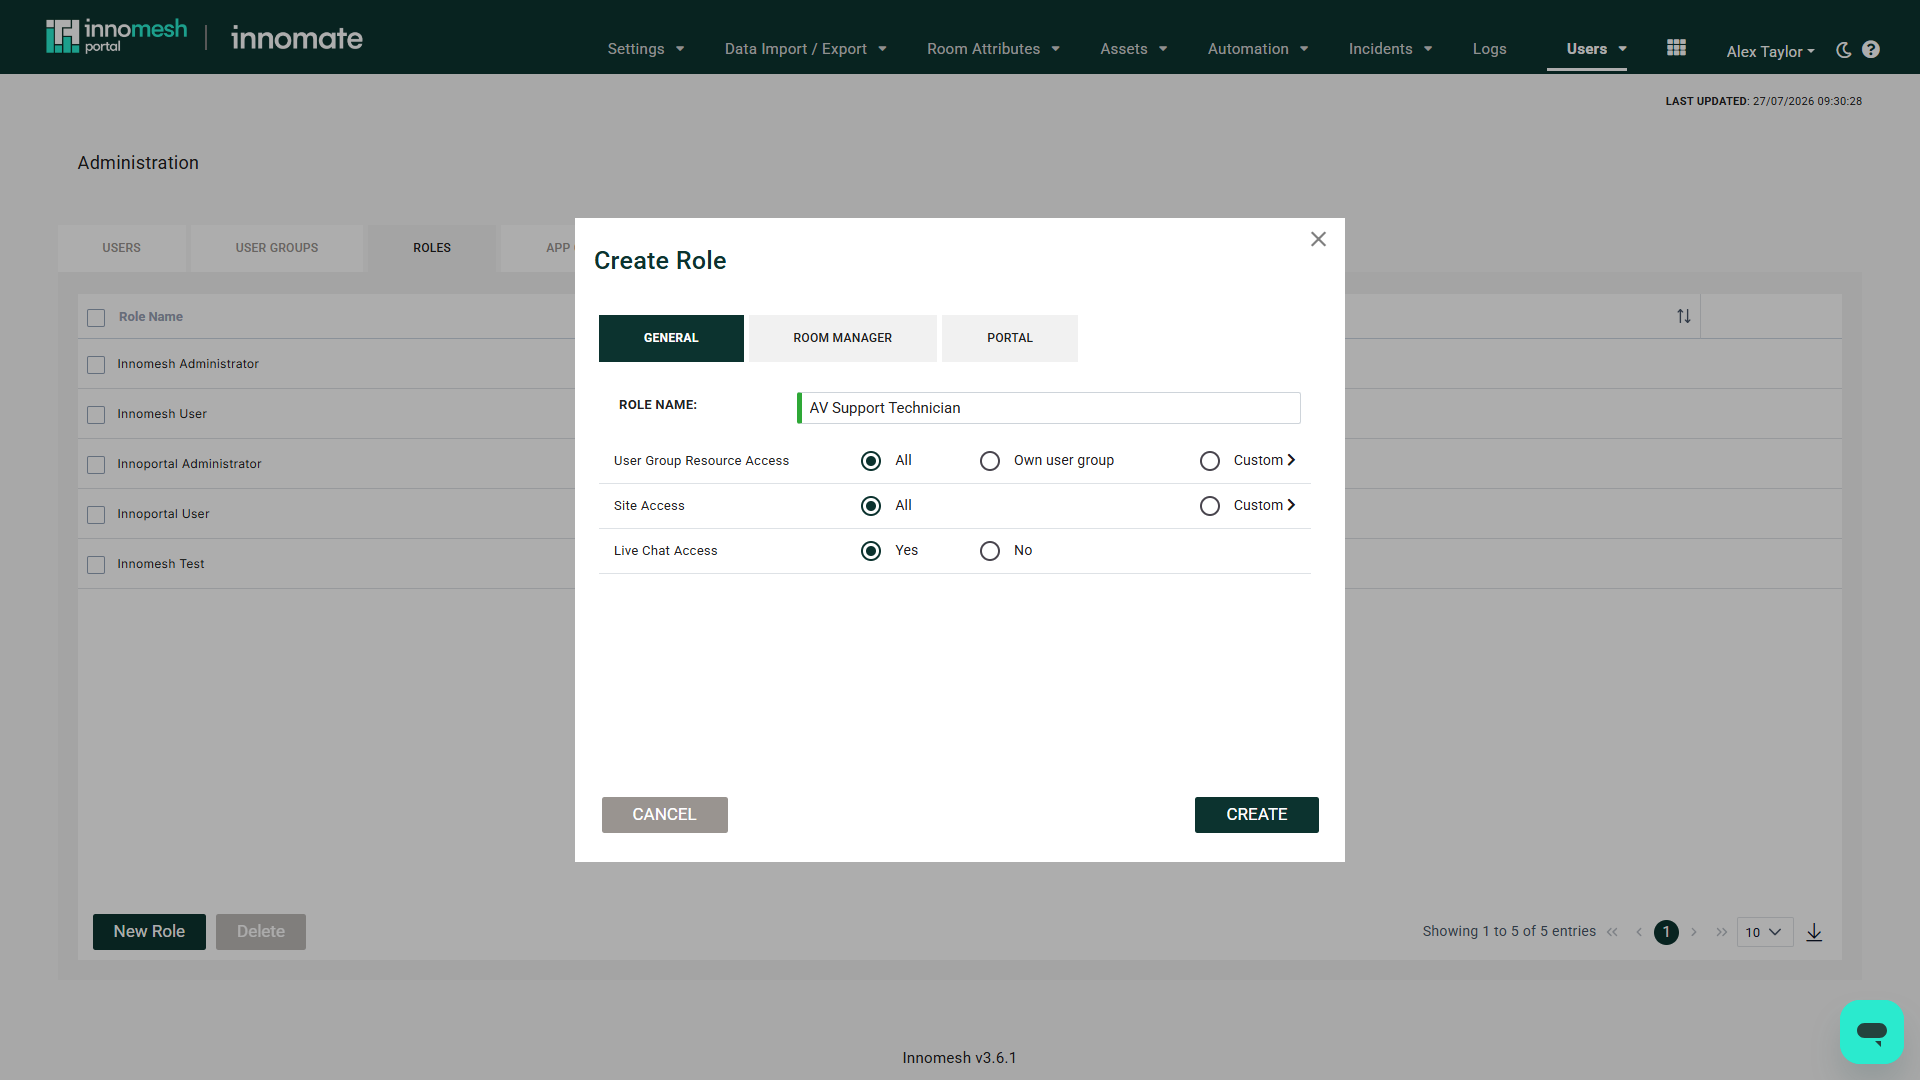
The General tab configures broad access parameters for the role:
| Setting | Options | Description |
|---|---|---|
| User Group Resource Access | All, Own User Group, Custom | Controls which user groups’ resources the role can access. “Own User Group” restricts visibility to resources belonging to the user’s group. “Custom” allows selecting specific groups. |
| Site Access | All, Custom | Restricts the role to rooms at specific sites. Useful for teams who should only manage rooms on their campus or in their region. |
| Live Chat Access | Yes, No | Controls whether users with this role can access the live chat support feature. |
What Site and User Group Access Covers
Site Access and User Group Resource Access limit what a user sees in these areas:
- The Hotlist, Rooms, Information and Assets pages in Innomesh Portal
- Rooms in Innomesh Room Manager
- meshIQ chat
- Global Alert History, Q-SYS global views and the Microsoft Teams Rooms device list
These areas show the whole tenancy to anyone whose role grants access to them:
- Vitals and Insights dashboards
- The asset actions history (Assets > Actions)
- The list of users an alert can be assigned to
- Audit logs
- Sight password management
- Administration, including users, roles, user groups and App Clients
- Data returned through the Platform API, the meshIQ MCP server and scheduled data exports, where App Client scopes limit the type of data rather than the site
A role with the Manage Roles permission can change any role or user group, so grant it only to administrators trusted with the whole tenancy.
Room Manager Tab
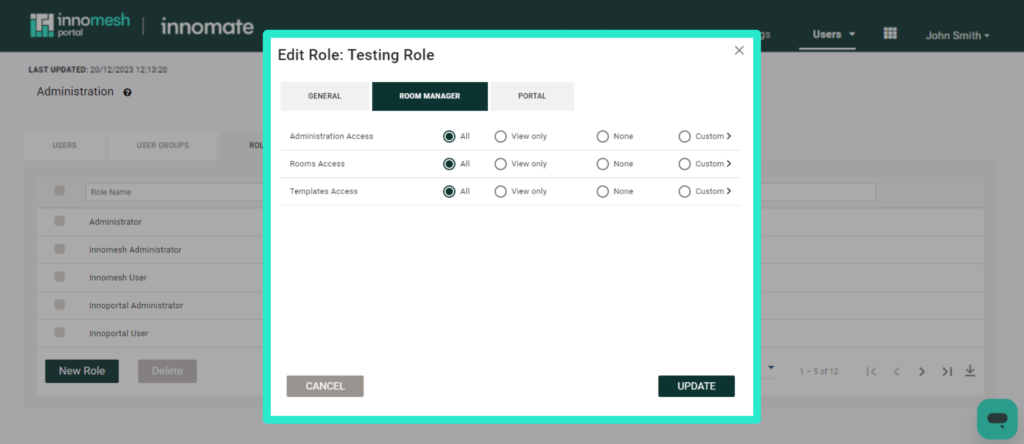
The Room Manager tab defines access to Room Manager features. Each access area supports the four permission levels described below.
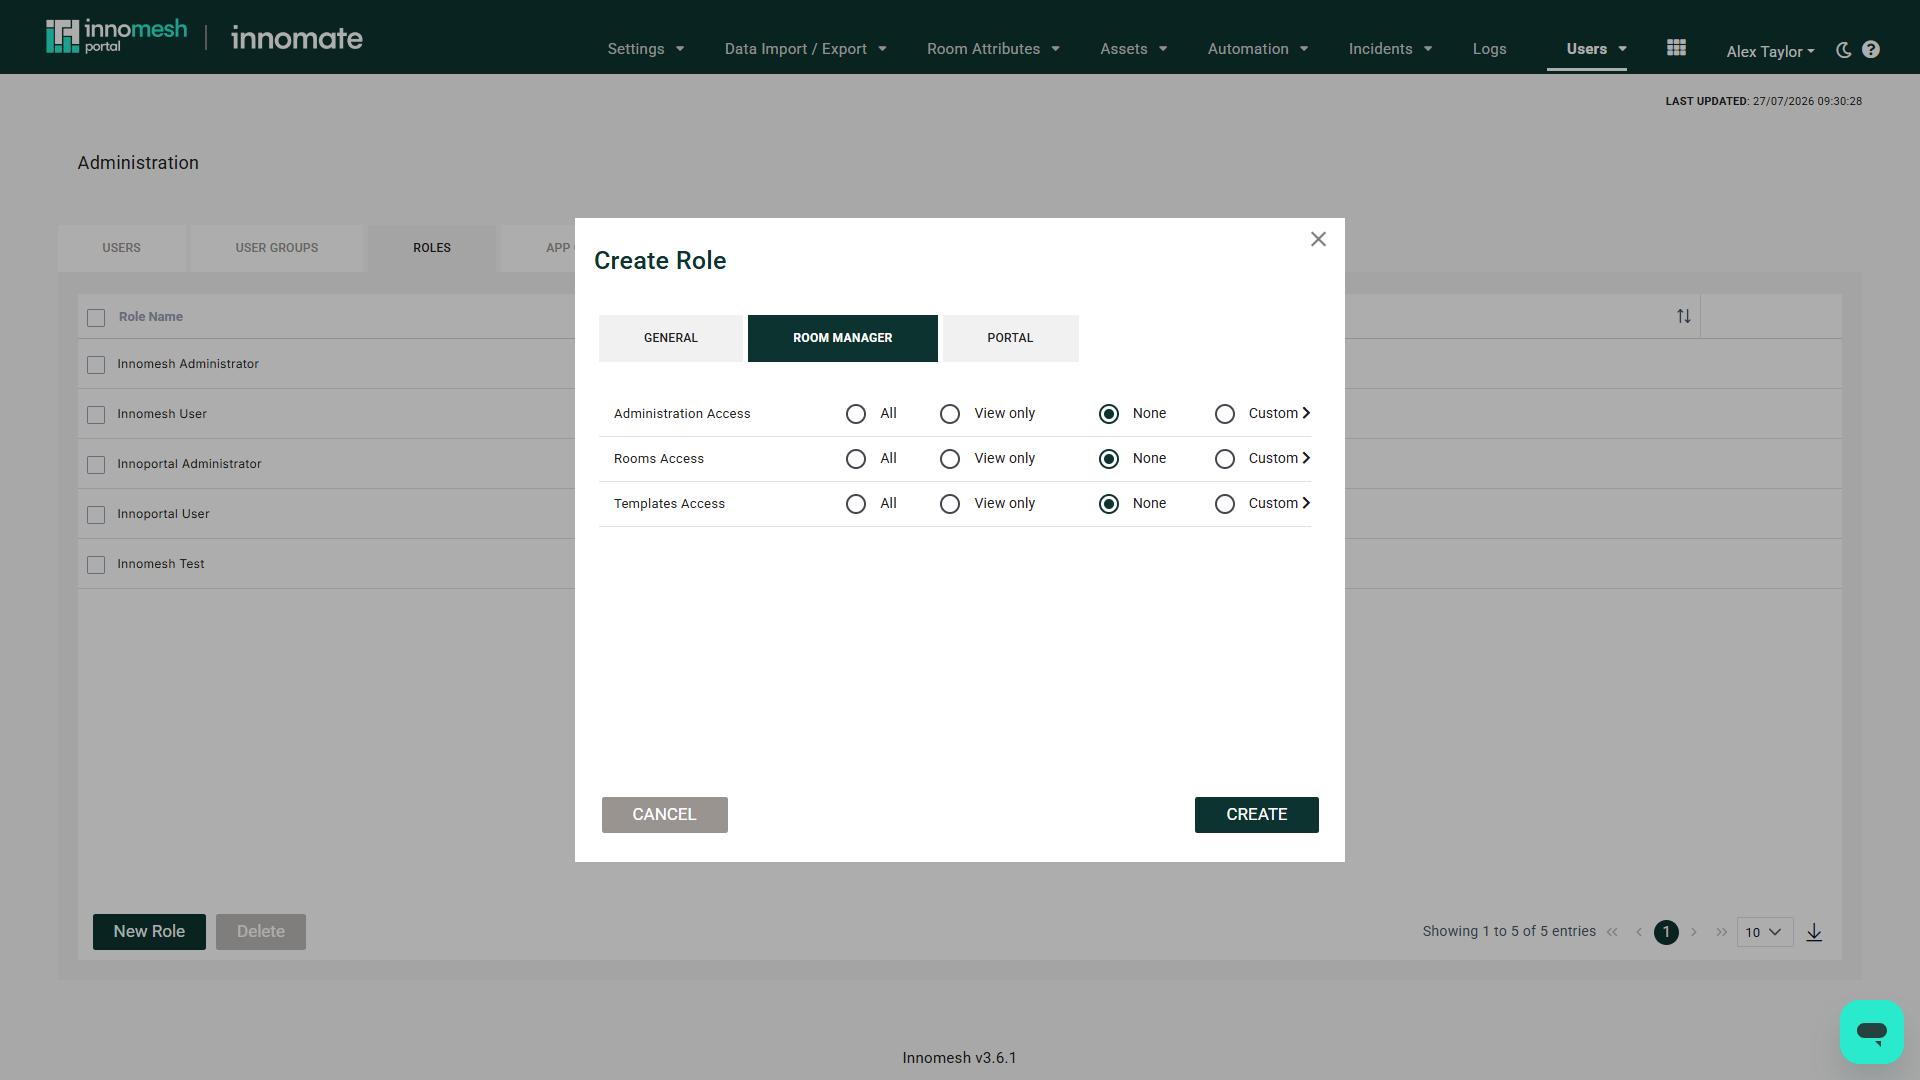
Administration Access
| Permission | Included in “View Only” | Description |
|---|---|---|
| Access Administration | Yes | Administration menu |
| Zones: view zones | Yes | View zones; download zones CSV |
| Zones: rotate hosts | No | Rotate hosts |
| Hosts: view hosts | Yes | View hosts; download hosts CSV; launch host website |
| Hosts: manage hosts | No | Enable Space VC host; disable Space VC host; drain Space CE host (future) |
| View logs | Yes | View room manager logs only; view all logs (if ip-admin-logs also enabled) |
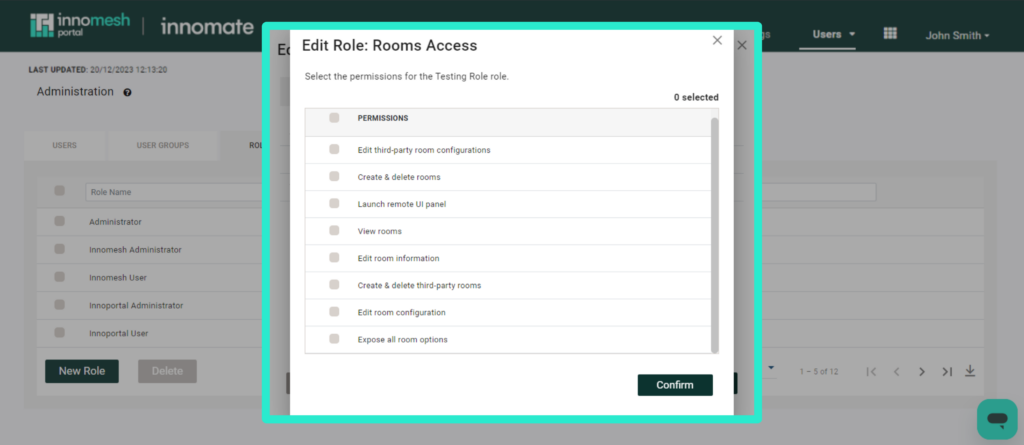
Rooms Access
| Permission | Included in “View Only” | Description |
|---|---|---|
| View rooms | Yes | View rooms (main Rooms tab); search, download rooms as CSV; view “Rooms Deployed” against template |
| Create & delete rooms | No | Create new Space/Sight/Pulse rooms; delete, duplicate, mass create, mass delete rooms |
| Edit room configuration | No | Edit existing room; move rooms between zones; update room software; upgrade Pulse to Sight; load room from file; update XPanel, VNC, web panel; pull/push template updates |
| Edit room information | No | Edit room information |
| Expose all room options | No | Expose all room options (for Space CE rooms) |
| Launch remote UI panel | Yes | Launch XPanel, VNC, Web Panel |
| Create & delete third-party rooms | No | Create or delete third-party room |
| Edit third-party room configurations | No | Edit third-party room; move between zones; update XPanel |
| Mass onboard UC rooms | No | Mass create Sight rooms for UC management (Microsoft Teams) |
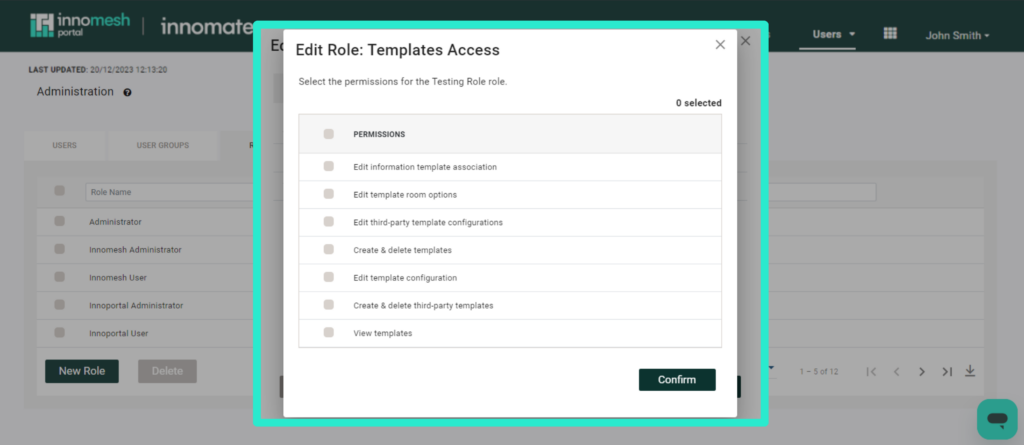
Templates Access
| Permission | Included in “View Only” | Description |
|---|---|---|
| View templates | Yes | View templates; download as CSV; view template via “Template Name” link |
| Create & delete templates | No | Create, delete, duplicate, or mass delete templates |
| Edit template configuration | No | Edit existing template; update software, XPanel, VNC, web panel; load from file; room state mapping (Sight templates) |
| Edit information template association | No | Update information template |
| Edit template room options | No | Update room options |
| Create & delete third-party Template | No | Create or delete third-party template |
| Edit third-party template configurations | No | Edit third-party template; move between zones; update XPanel |
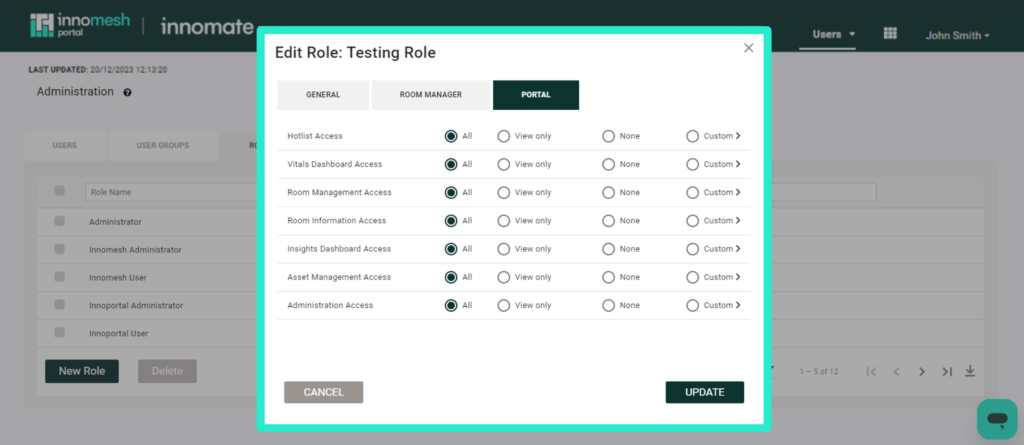
Portal Tab
The Portal tab defines access to Portal features. Each access area supports the same four permission levels described in Permission Levels. The most commonly configured areas are detailed below; the tab also includes Filtered Views and Integrations Management access areas, which follow the same All / View Only / None / Customise model.
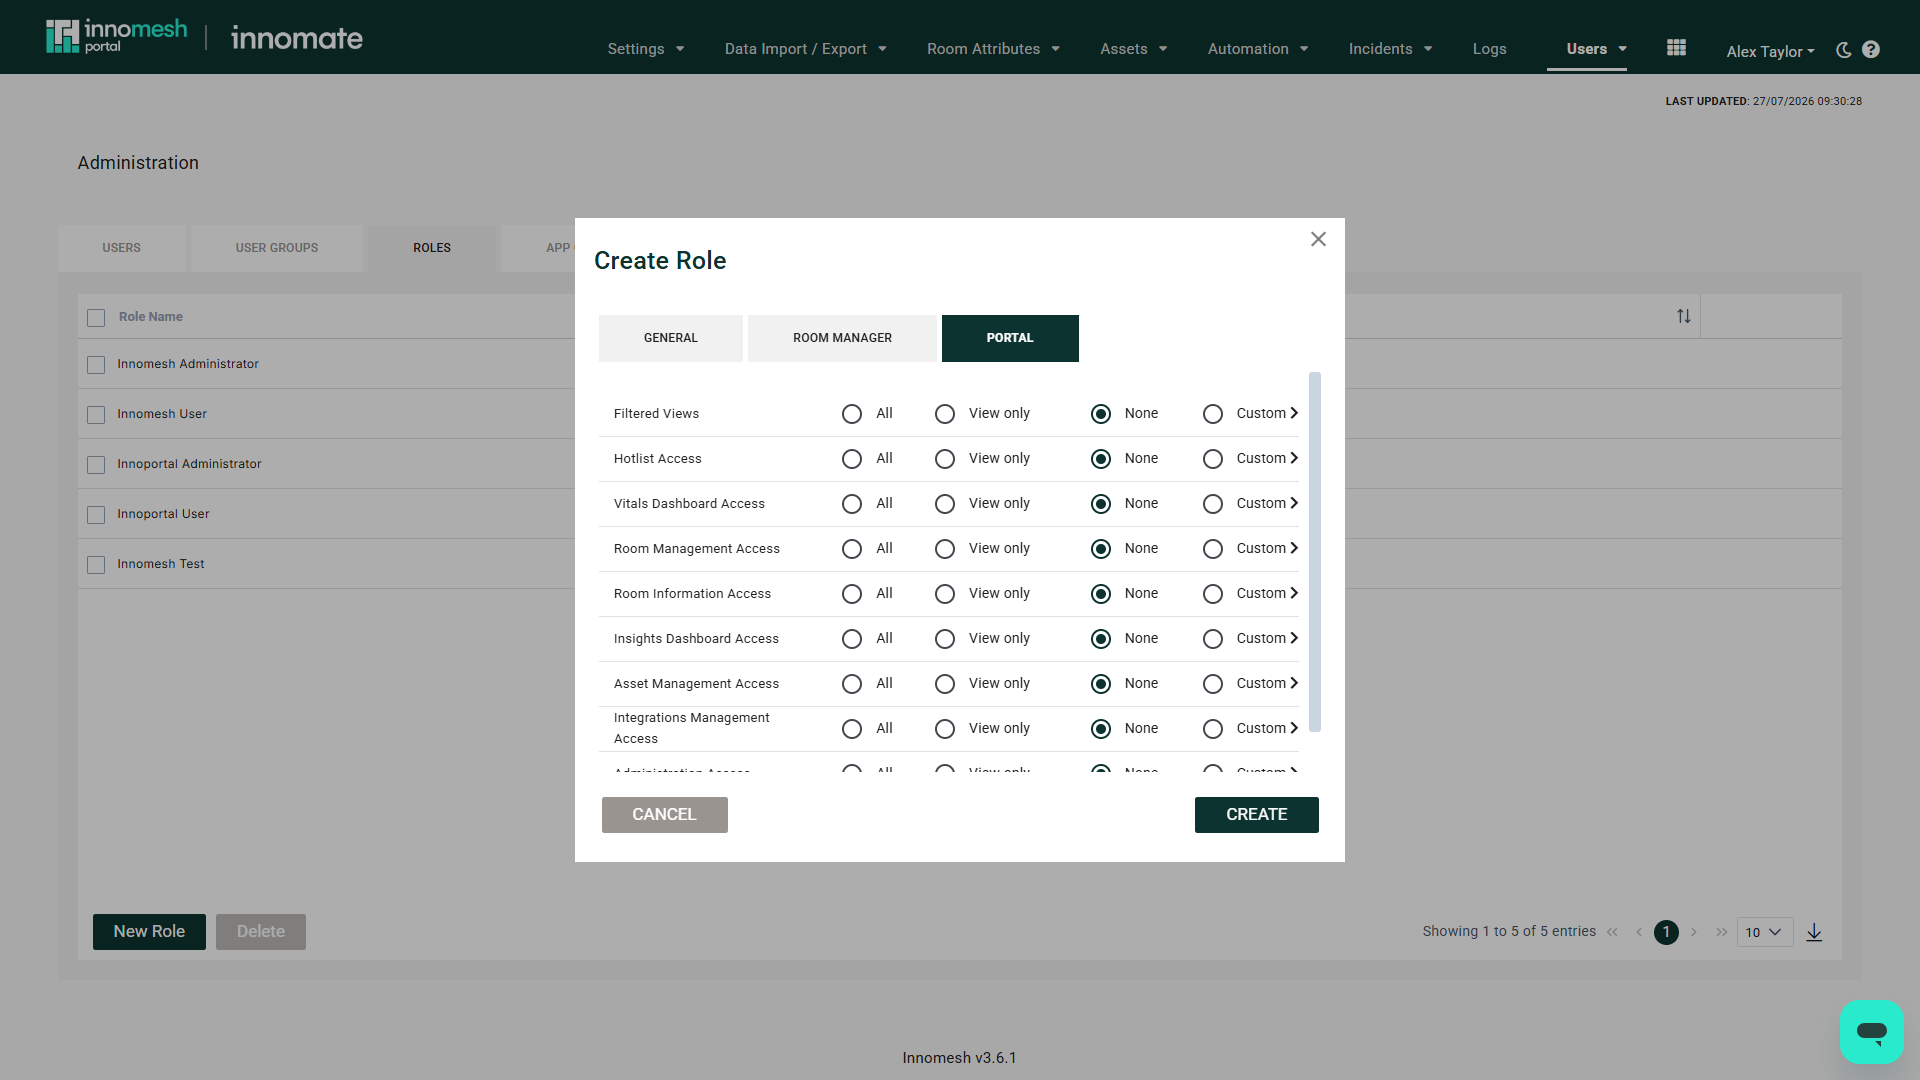
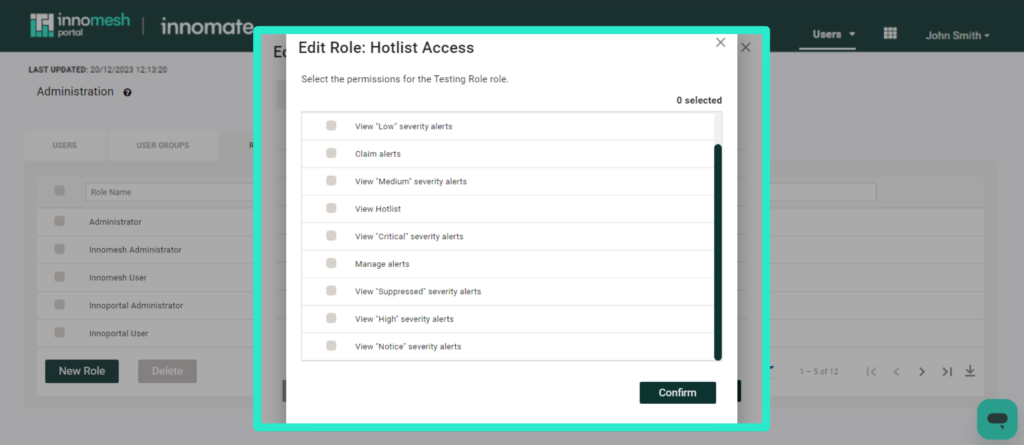
Hotlist Access
| Permission | Included in “View Only” | Description |
|---|---|---|
| View Hotlist | Yes | View, search, filter, sort Hotlist; group by room |
| View “Critical” severity alerts | Yes | Critical alerts in the unified alert list |
| View “High” severity alerts | Yes | High alerts in the unified alert list |
| View “Medium” severity alerts | Yes | Medium alerts in the unified alert list |
| View “Low” severity alerts | Yes | Low alerts in the unified alert list |
| View “Notice” severity alerts | Yes | Notice alerts in the unified alert list |
| View “Suppressed” severity alerts | Yes | Suppressed alerts tab |
| Claim alerts | No | Claim, mass claim, update alerts; add alert notes (including mass) |
| Manage alerts | No | Assign, mass assign, create ticket, resolve, mass resolve (future), set non-SLA, suppress; manage suppression rules; view alert history |
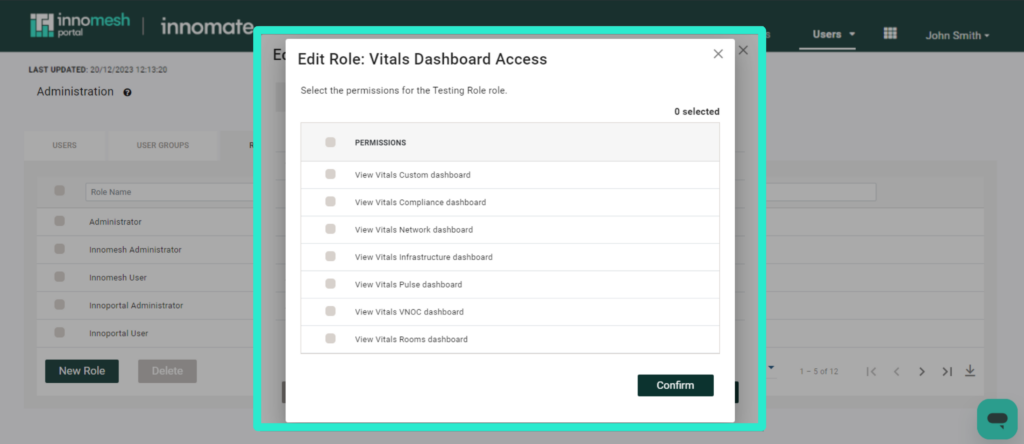
Vitals Dashboard Access
| Permission | Included in “View Only” | Description |
|---|---|---|
| View Vitals Infrastructure dashboard | Yes | Infrastructure dashboard |
| View Vitals Rooms dashboard | Yes | Rooms dashboard |
| View Vitals Network dashboard | Yes | Network dashboard |
| View Vitals Pulse dashboard | Yes | Pulse dashboard |
| View Vitals Sight dashboard | Yes | Sight dashboard |
| View Vitals Compliance dashboard | Yes | Compliance dashboard |
| View Vitals VNOC dashboard | Yes | VNOC dashboard |
| View Vitals Custom dashboard | Yes | Custom dashboard |
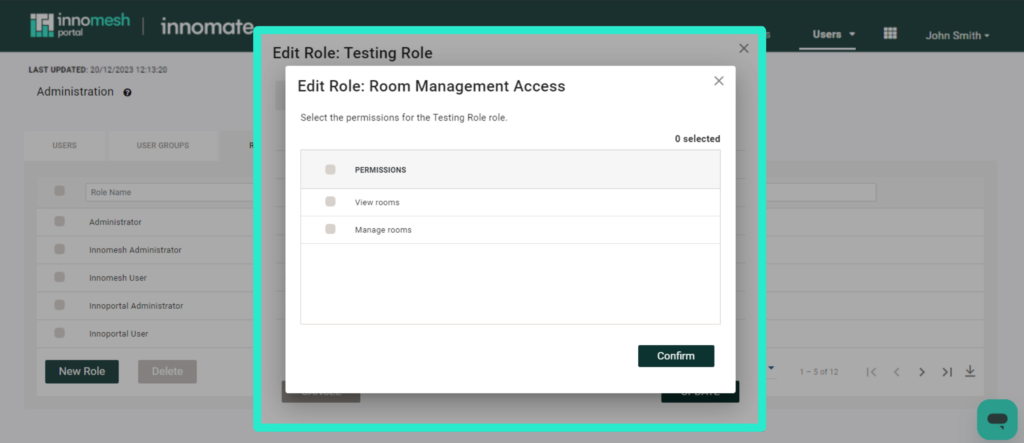
Room Management Access
| Permission | Included in “View Only” | Description |
|---|---|---|
| View rooms | Yes | View Rooms page, Live Info, Insights; sort, filter; “Show Room” link from Assets |
| Manage rooms | No | Set Maintenance; trigger room operations |
| Launch remote UI panel | No | Launch XPanel, VNC, Web Panel |
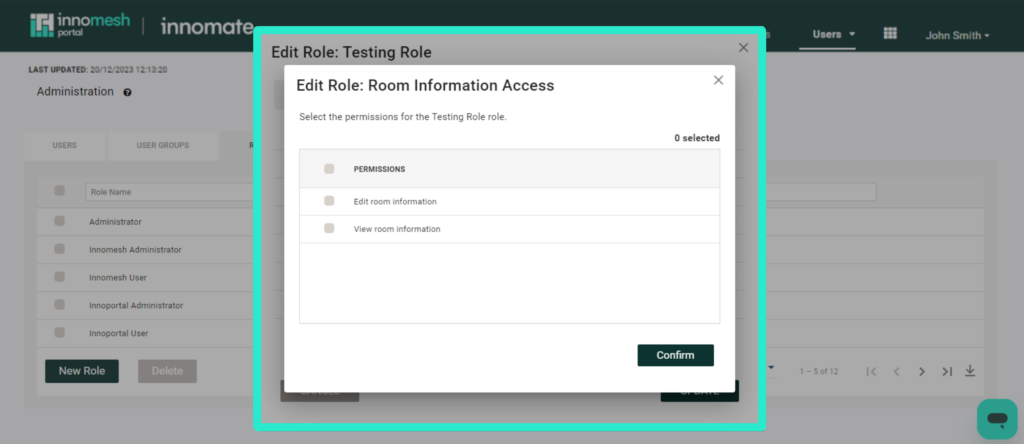
Room Information Access
| Permission | Included in “View Only” | Description |
|---|---|---|
| View room information | Yes | View, search, sort Room Information; download CSV |
| Edit room information | No | Toggle edit mode and mass edit mode; save or discard edits |
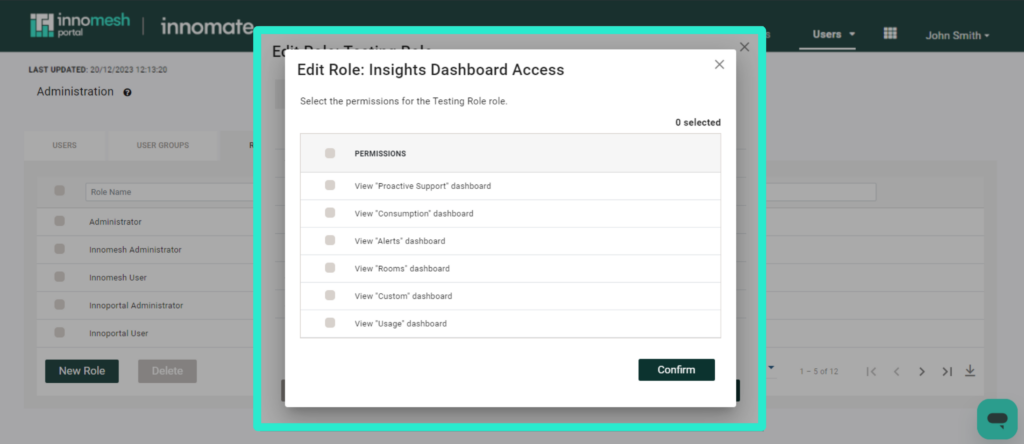
Insights Dashboard Access
| Permission | Included in “View Only” | Description |
|---|---|---|
| View “Rooms” dashboard | Yes | Rooms dashboard |
| View “Usage” dashboard | Yes | Usage dashboard |
| View “Alerts” dashboard | Yes | Alerts dashboard |
| View “Proactive Support” dashboard | Yes | Proactive Support dashboard |
| View “Consumption” dashboard | Yes | Consumption dashboard |
| View “Sight” dashboard | Yes | Sight dashboard |
| View “Ops” dashboard | Yes | Ops dashboard |
| View “Custom” dashboard | Yes | Custom dashboard |
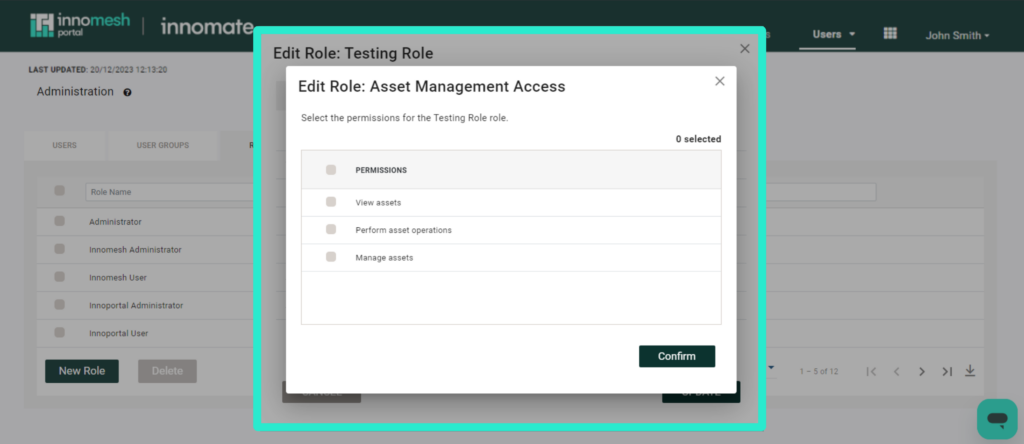
Asset Management Access
| Permission | Included in “View Only” | Description |
|---|---|---|
| View assets | Yes | View Assets page, asset details, live info; sort, filter, customise view; download CSV; view room assets and Hotlist alert asset |
| Manage assets | No | Edit asset details |
| Perform asset operations | No | Trigger asset operations (including mass); filter by operations |
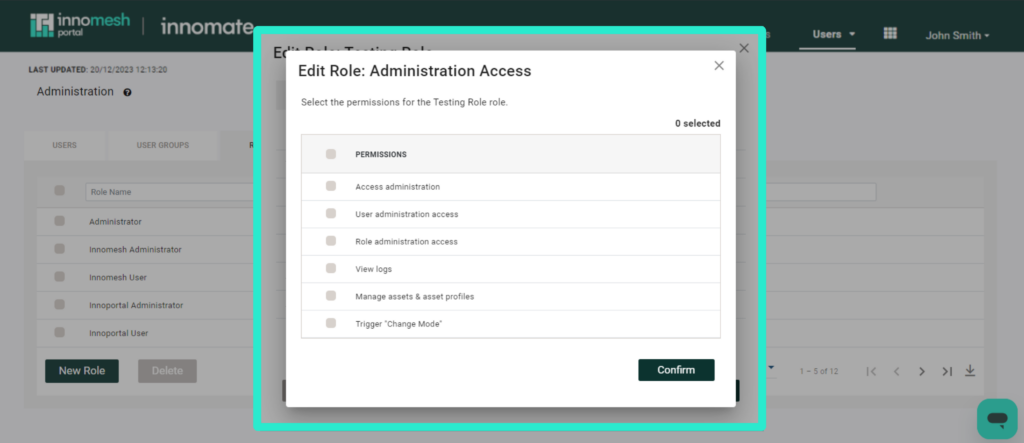
Administration Access
| Permission | Included in “View Only” | Description |
|---|---|---|
| Access administration | Yes | Administration menu |
| Trigger “Change Mode” | No | Change Mode page access and trigger |
| Manage assets & asset profiles | No | Asset profiles; driver, compliance, and custom fields management; asset operations update and file management; operations schedule (future); campaigns (future) |
| View logs | Yes | View room manager logs only; view all logs (if ip-admin-logs also enabled) |
| Manage Users | No | Update or delete user |
| Manage Roles | No | Create, update, or delete role, user group, or SAML role |
| Manage Smart Room Attributes | No | Manage Smart Room Attributes |
| View data import / export configurations | Yes | View data import and export configurations |
| Edit data import / export configurations | No | Create, edit, duplicate, or delete data import and export configurations |
| Manage Summary Views | No | Create, edit, duplicate, or delete Summary Views |
Permission Levels
Each access area within a role offers four permission levels:
| Level | Description |
|---|---|
| All | Full access to all functions within the area |
| View Only | Read-only access; the user can see data but cannot make changes |
| None | No access; the section is hidden from the user |
| Customise | Select specific individual permissions within the area |
When Customise is selected, a list of granular permissions appears. Toggle each permission on or off to tailor access to the exact requirements of the role.
App Clients
The App Clients tab under Administration > Users is where you manage the credentials that external systems use to authenticate to the Innomesh Platform API. Each App Client has its own permission scopes, which control the API endpoint families it can reach, independently of the user roles described above.
App Client creation, permission scopes, and management are covered in full in the Innomesh Platform API article.
Assistive UI Users
The Assistive UI Users tab under Administration > Users controls which users may use the Assistive UI application and which rooms each of them can access. See Assistive UI Users for details.
Best Practices
- Start with the default roles and create copies for customisation rather than modifying the originals.
- Use User Group Resource Access to scope data visibility. For example, a regional operations team should only see rooms belonging to their user group.
- Apply the principle of least privilege by granting only the permissions each role requires.
- Review roles periodically to ensure they still align with team responsibilities, especially after organisational changes.
- Document custom roles internally so that new administrators understand the purpose of each role and its intended audience.