

The Devices section of a Space CE room configuration lists the devices inherited from the room’s template and holds the room-specific connection details — hostnames, IP addresses, and credentials — that connect the design to the physical equipment in the room.
Main View
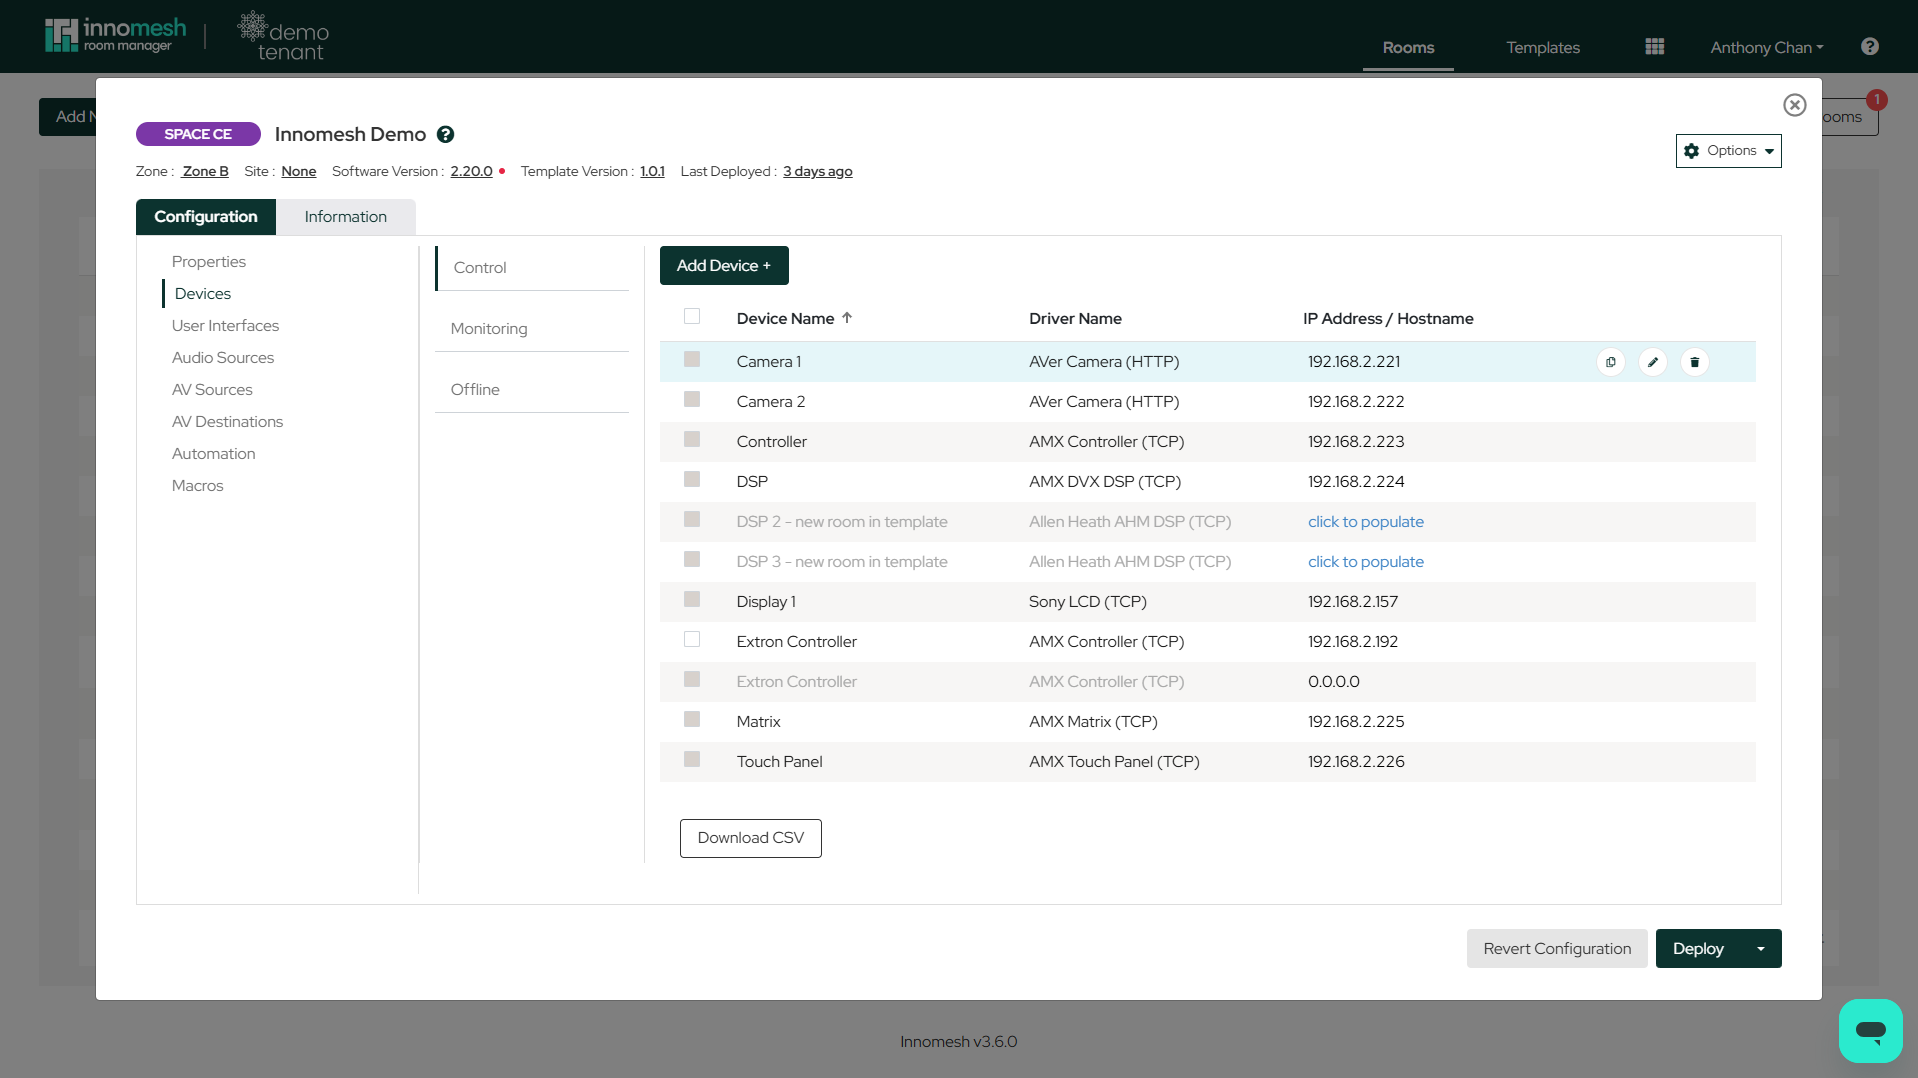
The device view presents the following elements:
- Categories: Devices are grouped into Control (actively controlled by Space CE), Monitoring (Pulse or Sight devices included for health and status visibility), and Offline (defined for reference or inventory, with no connectivity checks).
- Device Fields: Properties describing each device’s key characteristics.
- Actions: Hover over a device to reveal its information, duplication, editing, and deletion options.
- CSV Export: Download the device list in each category as a CSV file for external reference.
- Add Device: Create a new device in the room.
Adding a New Device
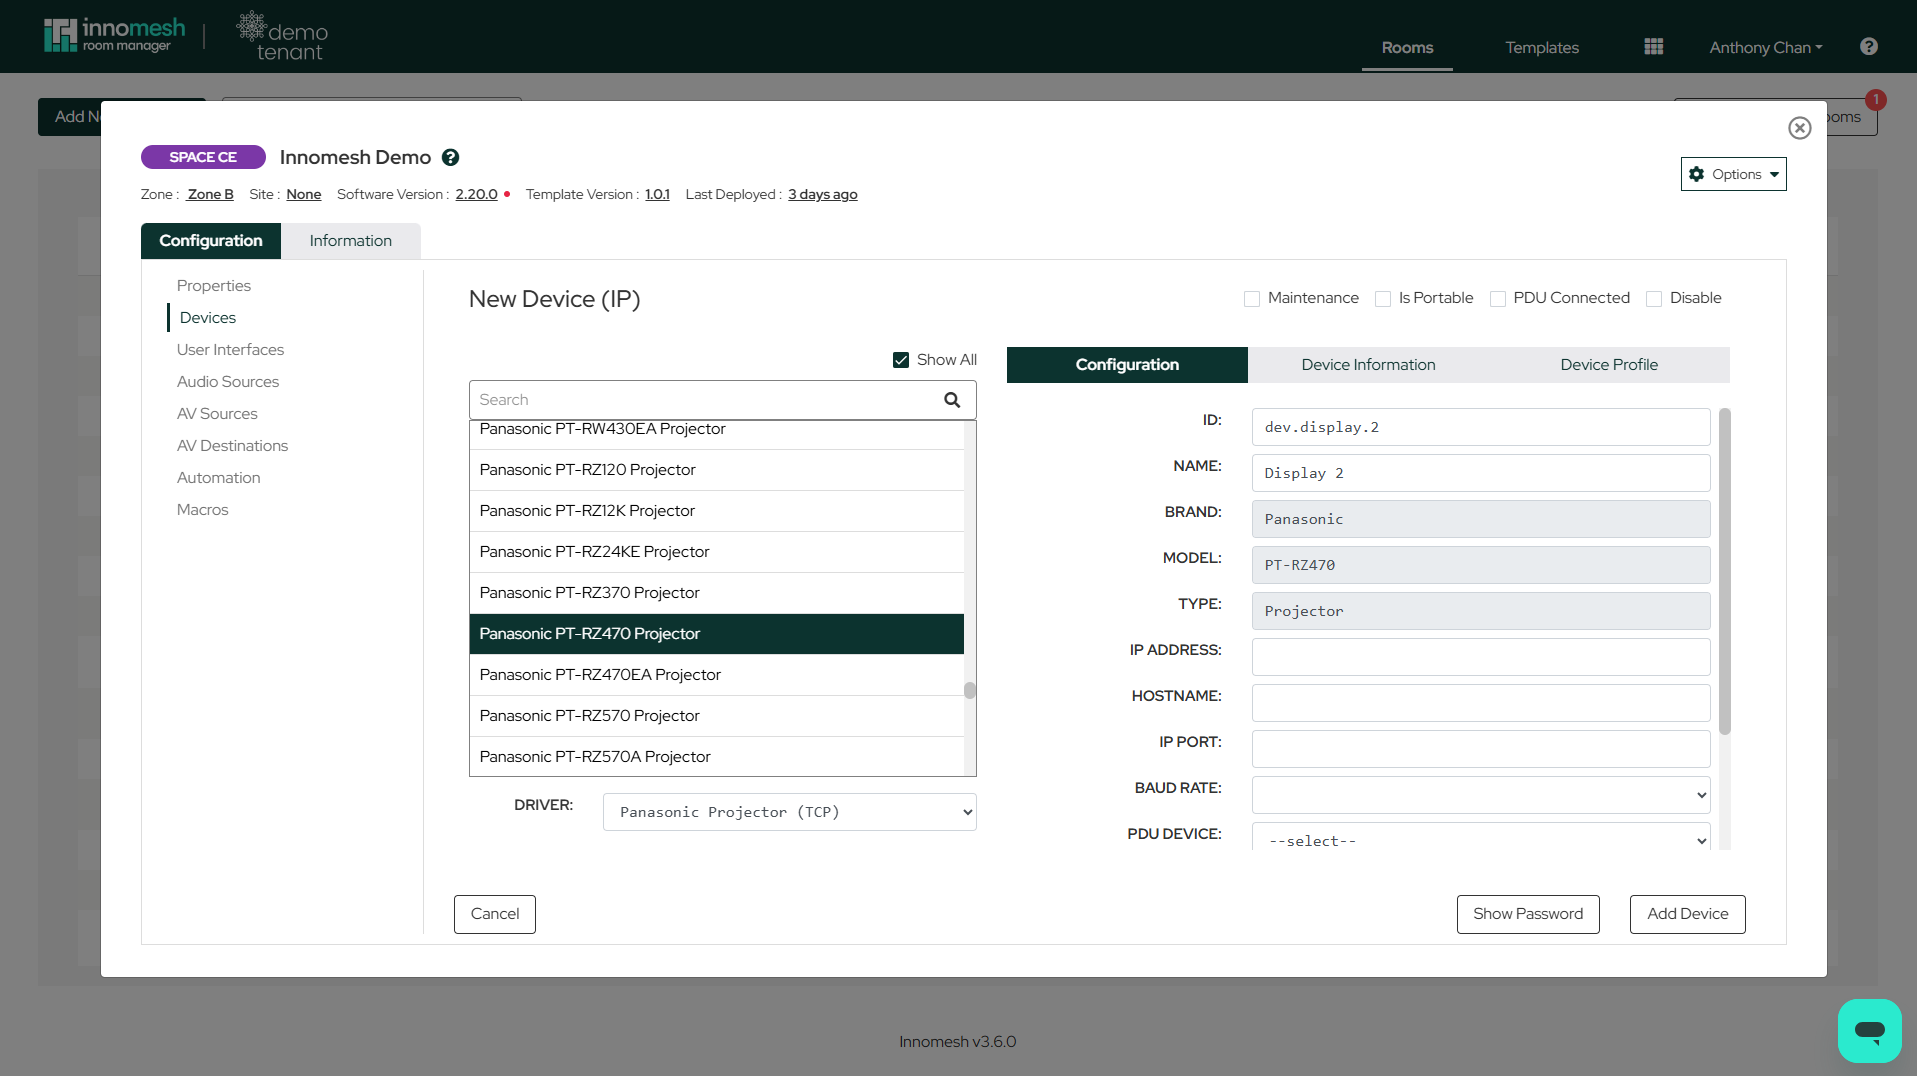
Clicking Add Device + opens the New Device view. The device models on offer depend on the category you are adding under: the Control category lists device models supported for Space CE control, while the Monitoring category lists models supported for Pulse and Sight monitoring.
Selecting a Device Model
Use the searchable list on the left to select the device model. Once a model is selected, the drivers available for it are shown in the Driver dropdown below the list.
By default, the list shows only device models on the tenant’s favourites list, or on the template’s list of restricted devices (set using the Set Available Devices option under the template — see Device Configuration Enforcement). Checking Show All reveals the full list of supported device models. This checkbox is only available to users with the right permissions.
Device Fields
The right-hand side of the view is organised into three tabs:
- Configuration: Fields that relate to controlling the device, such as IP address or hostname, baud rate (for RS-232 devices), device login credentials, and the PDU or PoE port the device is connected to. The ID and Name fields are auto-populated based on the naming convention defined for the device model, incremented to reflect the quantity of that device type already in the configuration — for example, adding a display to a configuration that already has one results in a Name of “Display 2”.
- Device Information: Fields that are informational about the device but not directly related to its control. The fields differ between tenants, but examples include serial number, MAC address, asset tag number, and warranty expiry. The fields that appear here are defined in the Innomesh Portal administration section, under Assets → Asset Fields.
- Device Profile: A read-only view of the asset profile for the selected device model.
Certain fields — such as Name, Model, IP Address, and Hostname — are shared between the Configuration and Device Information tabs; editing them in one tab is reflected in the other.
If the device requires login credentials to connect, use Show Password to view and edit the device’s username and password.
Device Flags
Four checkboxes at the top of the view control the device’s alerting and status:
- Maintenance: Suppresses the device’s alerts during maintenance periods.
- Is Portable: For devices not always connected, such as removable equipment. Alerts from the device are dropped.
- PDU Connected: Indicates a power distribution unit connection. Alerts are suppressed while the device is powered off with the room.
- Disable: Removes the device from the active configuration.
Click Add Device to complete the operation and return to the main Devices page.