

This guide walks through creating a Sight template in Innomesh Room Manager. A template is a reusable blueprint from which standardised rooms are created, so a common room type only has to be defined once. A Sight template defines the set of devices to monitor in that room type and, for each device, the driver Sight uses to pull live data from it. When you create a room from the template, you keep this device set and adjust the room-specific details, such as the room name and each device’s IP address or hostname.
Like Pulse, Sight templates and rooms are loosely associated: once a room is created, the template can be updated without affecting that room, and template changes cannot be pushed back to existing rooms. Sight also has no user-selected software version; the software is abstracted from the user and kept up to date by Innomate as part of the Innomesh SaaS platform. See Templates & Rooms for how templates and rooms relate across the subscription tiers.
Step 1: Navigate to the Templates Page
Click the Templates button in the top-right corner of the Innomesh interface to open the Templates page.
Step 2: Add a New Template
Click the Add New Template button. A popup window appears prompting you to select the system template type. Choose Sight, then click Next.
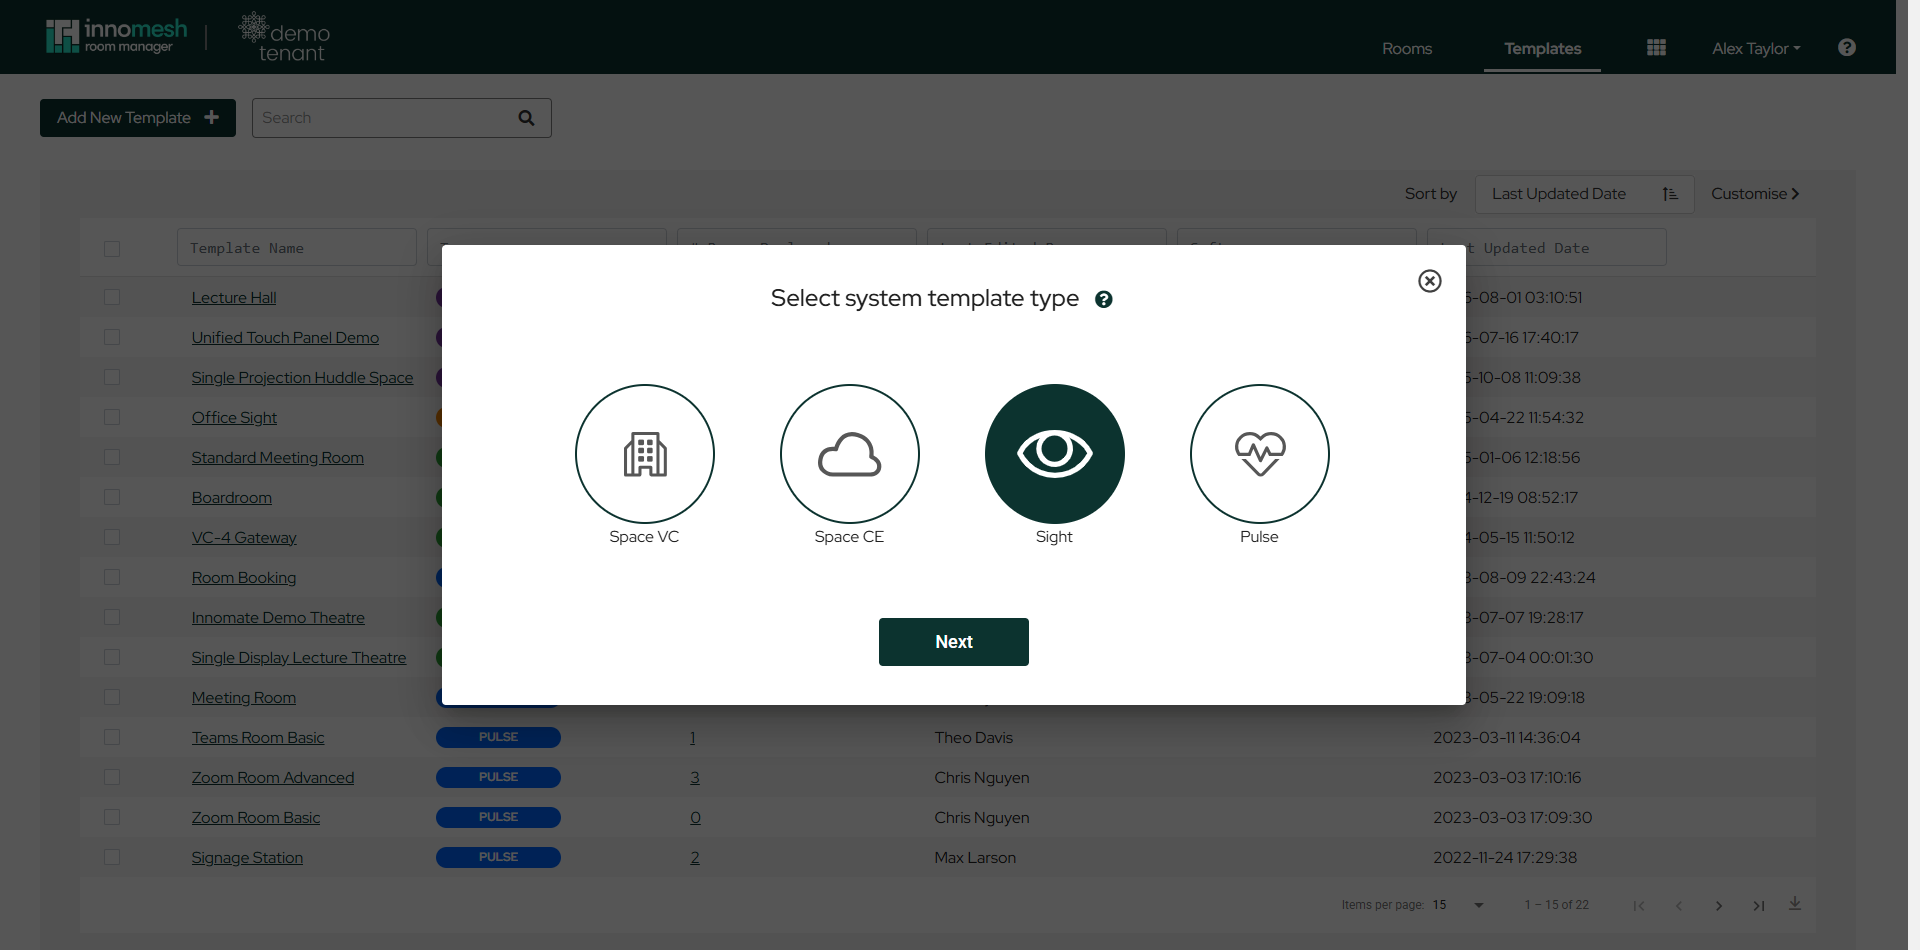 Selecting the Sight template type | Innomesh Room Manager
Step 3: Enter Template Details
The main template creation view contains the following fields:
- Template Name: A friendly name to identify the template.
- Template Description: A brief description of the template’s purpose and the type of room it represents.
- System Type: The category of the room, such as Meeting Room, Lecture Theatre, or Office.
Below the template details is the device list, where each device appears with its name, brand, model, and IP address or hostname. Devices are grouped under two tabs:
- Monitoring: devices Sight actively monitors.
- Offline: devices recorded on the template but not currently monitored.
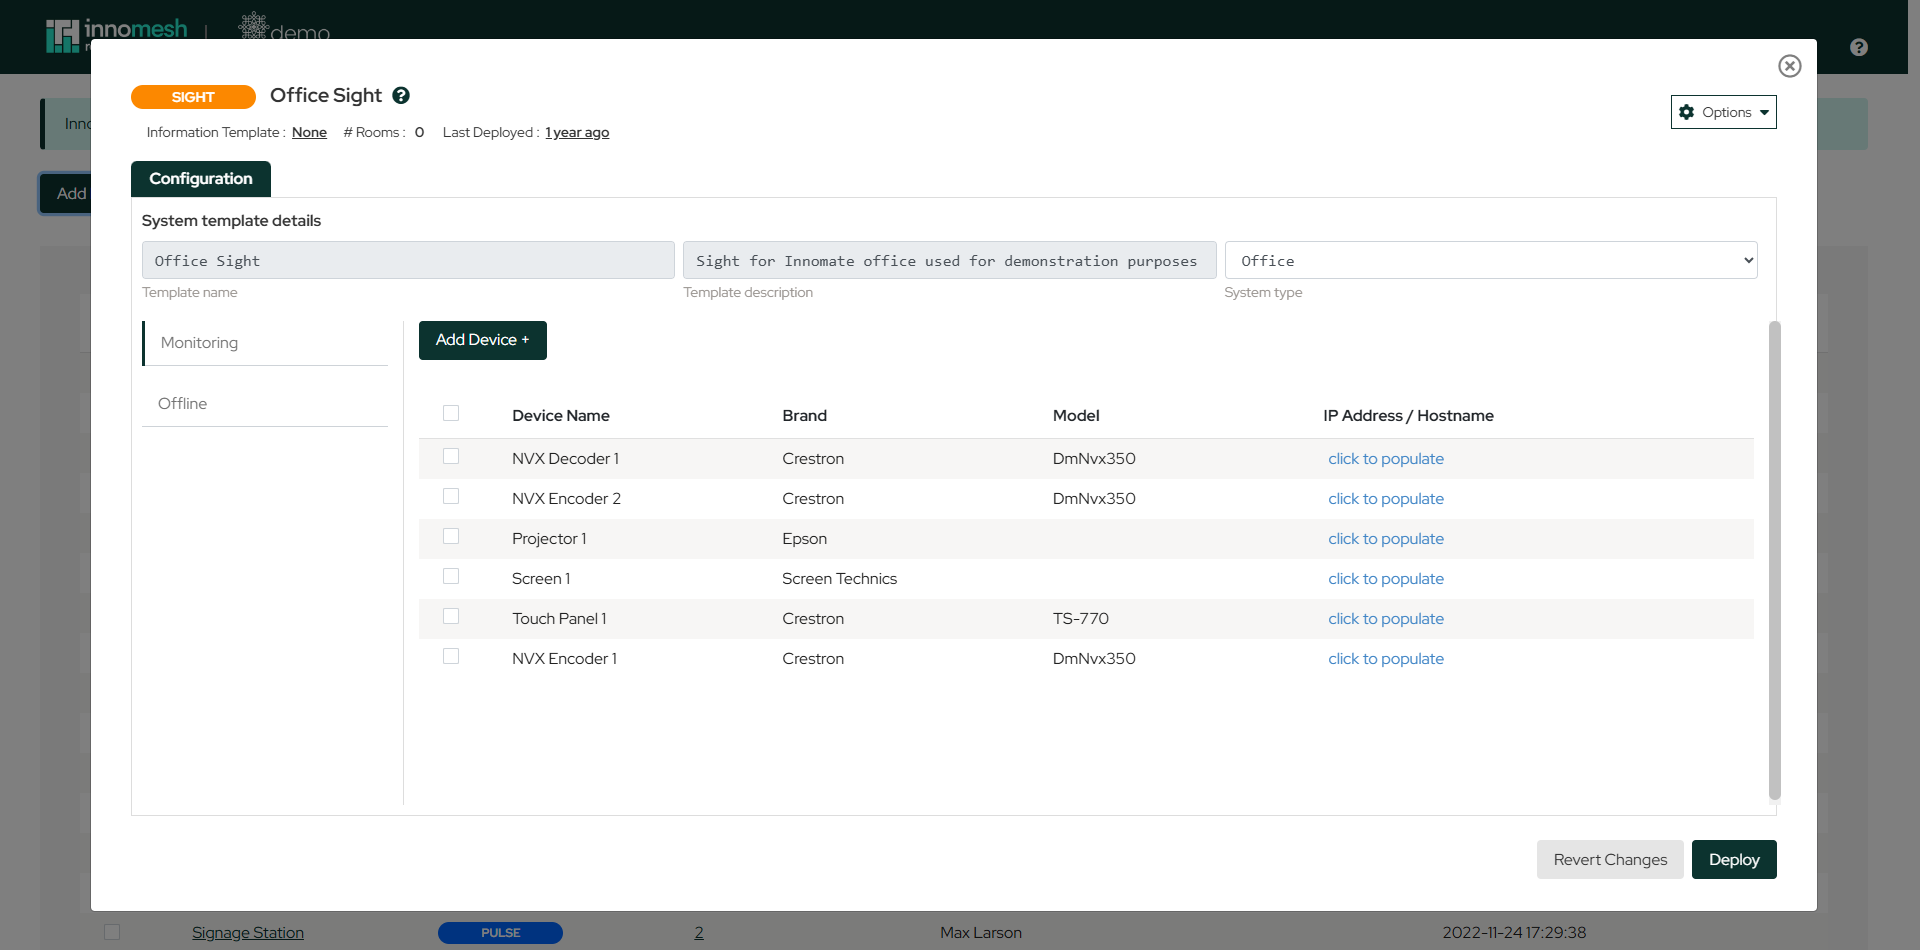 Sight template configuration | Innomesh Room Manager
Step 4: Add Devices
Click the Add Device button to open the device configuration form. Search the list on the left and select the asset profile that matches the device you are adding.
Selecting an asset profile pre-populates the device’s core details, so you don’t enter them manually:
- Device ID (a unique identifier).
- Device Name.
- Manufacturer and Model.
- The drivers available to monitor the device.
Where the device supports native Sight monitoring, the Driver dropdown offers its native driver, for example Epson Projector (TCP) for an Epson projector. Choose the native driver so Sight pulls live data from the device; Pulse (ICMP) remains available as a reachability-only fallback.
If no asset profile exists for a given product, submit a request through the form in the Innomate Support Portal to have one created, so the device is captured with complete, consistent asset data. As a temporary measure while the profile is being prepared, you can choose a Generic device profile and set the driver manually.
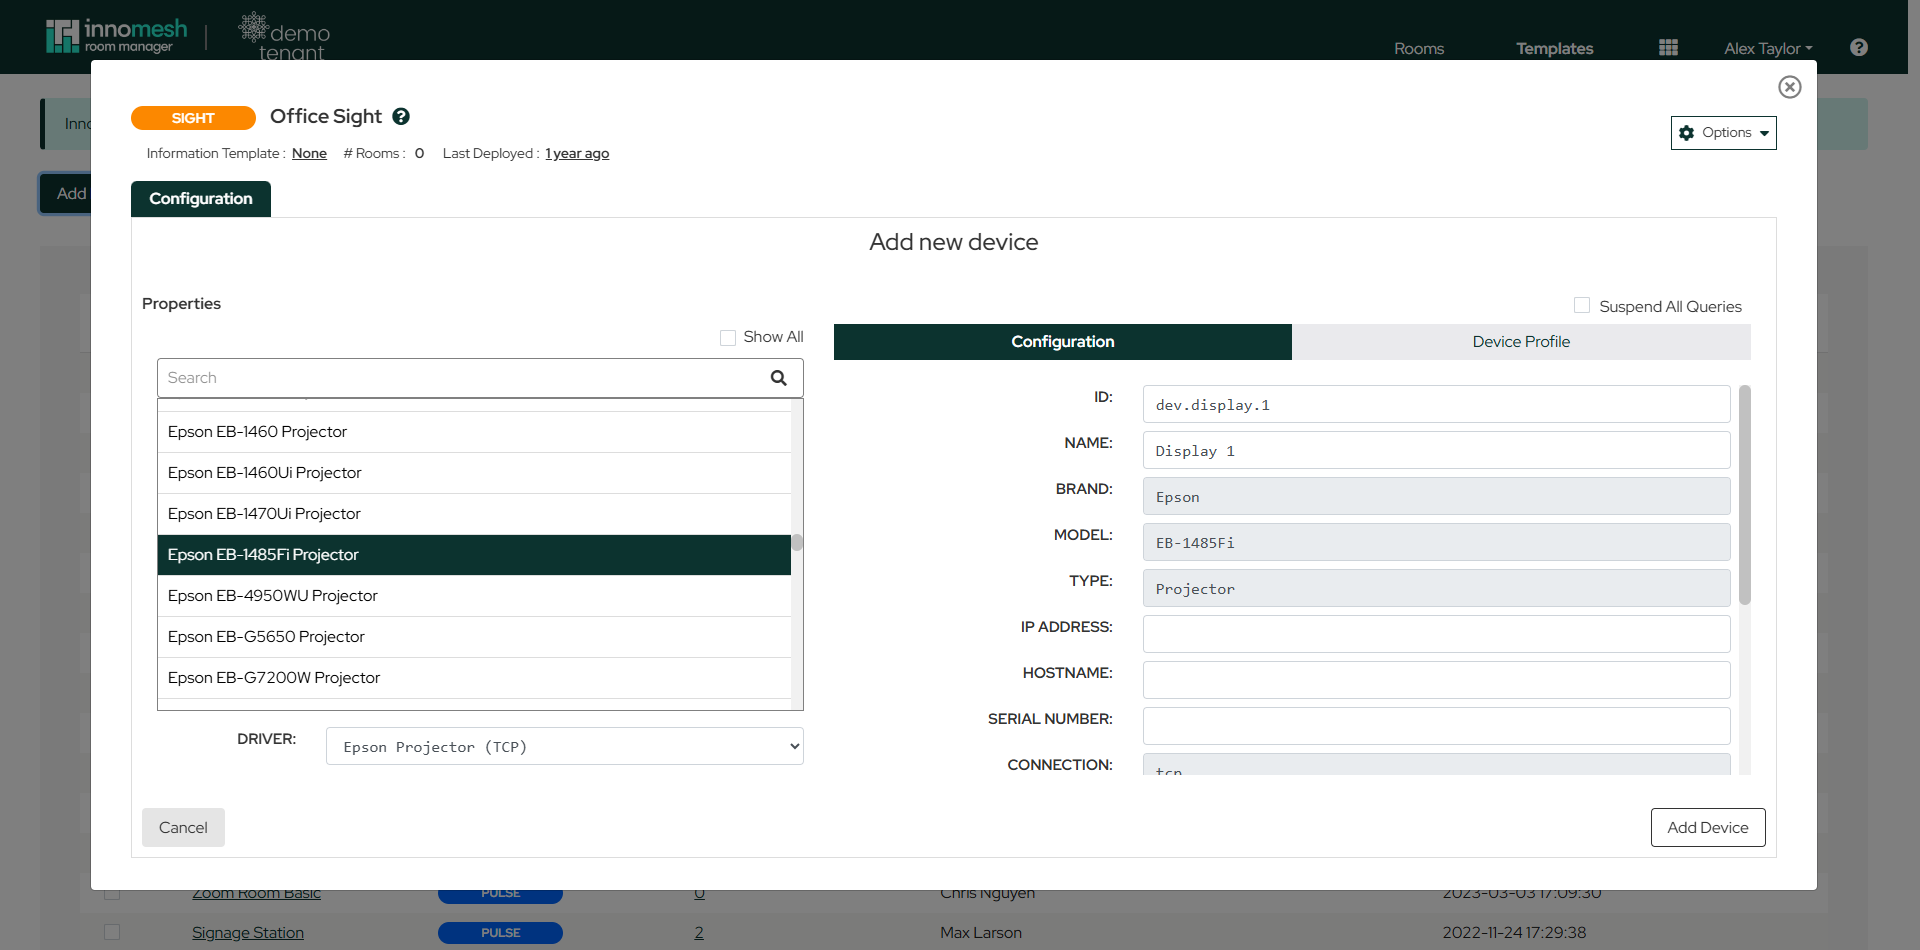 Adding a device to a Sight template | Innomesh Room Manager
The right-hand side of the panel has a Configuration tab for the device’s identity and network fields, and a Device Profile tab showing the full specifications supplied by the asset profile.
Repeat the Add Device process for each device in the template.
Step 5: Create the Template
Once all devices have been added, click the Create button to finalise and save the template.
Options Menu
The dropdown Options menu in the top-right corner provides the following utilities:
- Download as JSON: Export the template configuration as a
.jsonfile for backup or sharing. - Load Template from File: Import a template configuration from a previously exported
.jsonfile. - Duplicate Template: Create a copy of the template as a starting point for a new one.
- Set Available Devices: Manage which devices are available on the template.
- Update XPanels: See XPanel Management.
- Room Operation Mapping and Room State Mapping: See Room Operation Mapping and Room State Mapping.
The template header also shows the associated Information Template, the number of rooms deployed from the template, when it was last deployed, and a View Template History button.